Android Audio Connect APP
The Audio Connect APP is designed to provide various features for Realtek RTL87xx SOC products. After connected to an RTL87xx product, it supports functions such as TTS, OTA updates, equalizer adjustments, and allows for configurations like changing the device name.
Device Information Display: View the device name and battery level.
OTA Updates: Upgrade the device firmware to ensure it runs the latest version.
Rename: Customize the device name.
Channel Switch: Choose from three channel modes for different audio experiences.
Real Hearing Enhancement: Optimize hearing effects by switching listening modes and adjusting configurations in each mode.
Hearing Aid Adjustment: Fine-tune hearing aid settings for personalized audio.
Hearing Assessment Test: Conduct a simple hearing test to understand user's hearing condition.
Equalizer: Customize the built-in sound effects for music.
Voice EQ: Adjust EQ parameters during calls for clearer voice quality.
TTS (Text-to-Speech): Get caller information before answering calls.
Gaming Mode: Enable or disable gaming mode with five delay levels for optimal gaming audio.
Key Mapping: View and customize the mapping between key actions and their corresponding functions.
Notification: Adjust VP and Ringtone Volume.
Burn/Apply ANC LLAPT Parameters: Write ANC or LLAPT parameters to the device.
SPP Data Capture: Capture DSP logs.
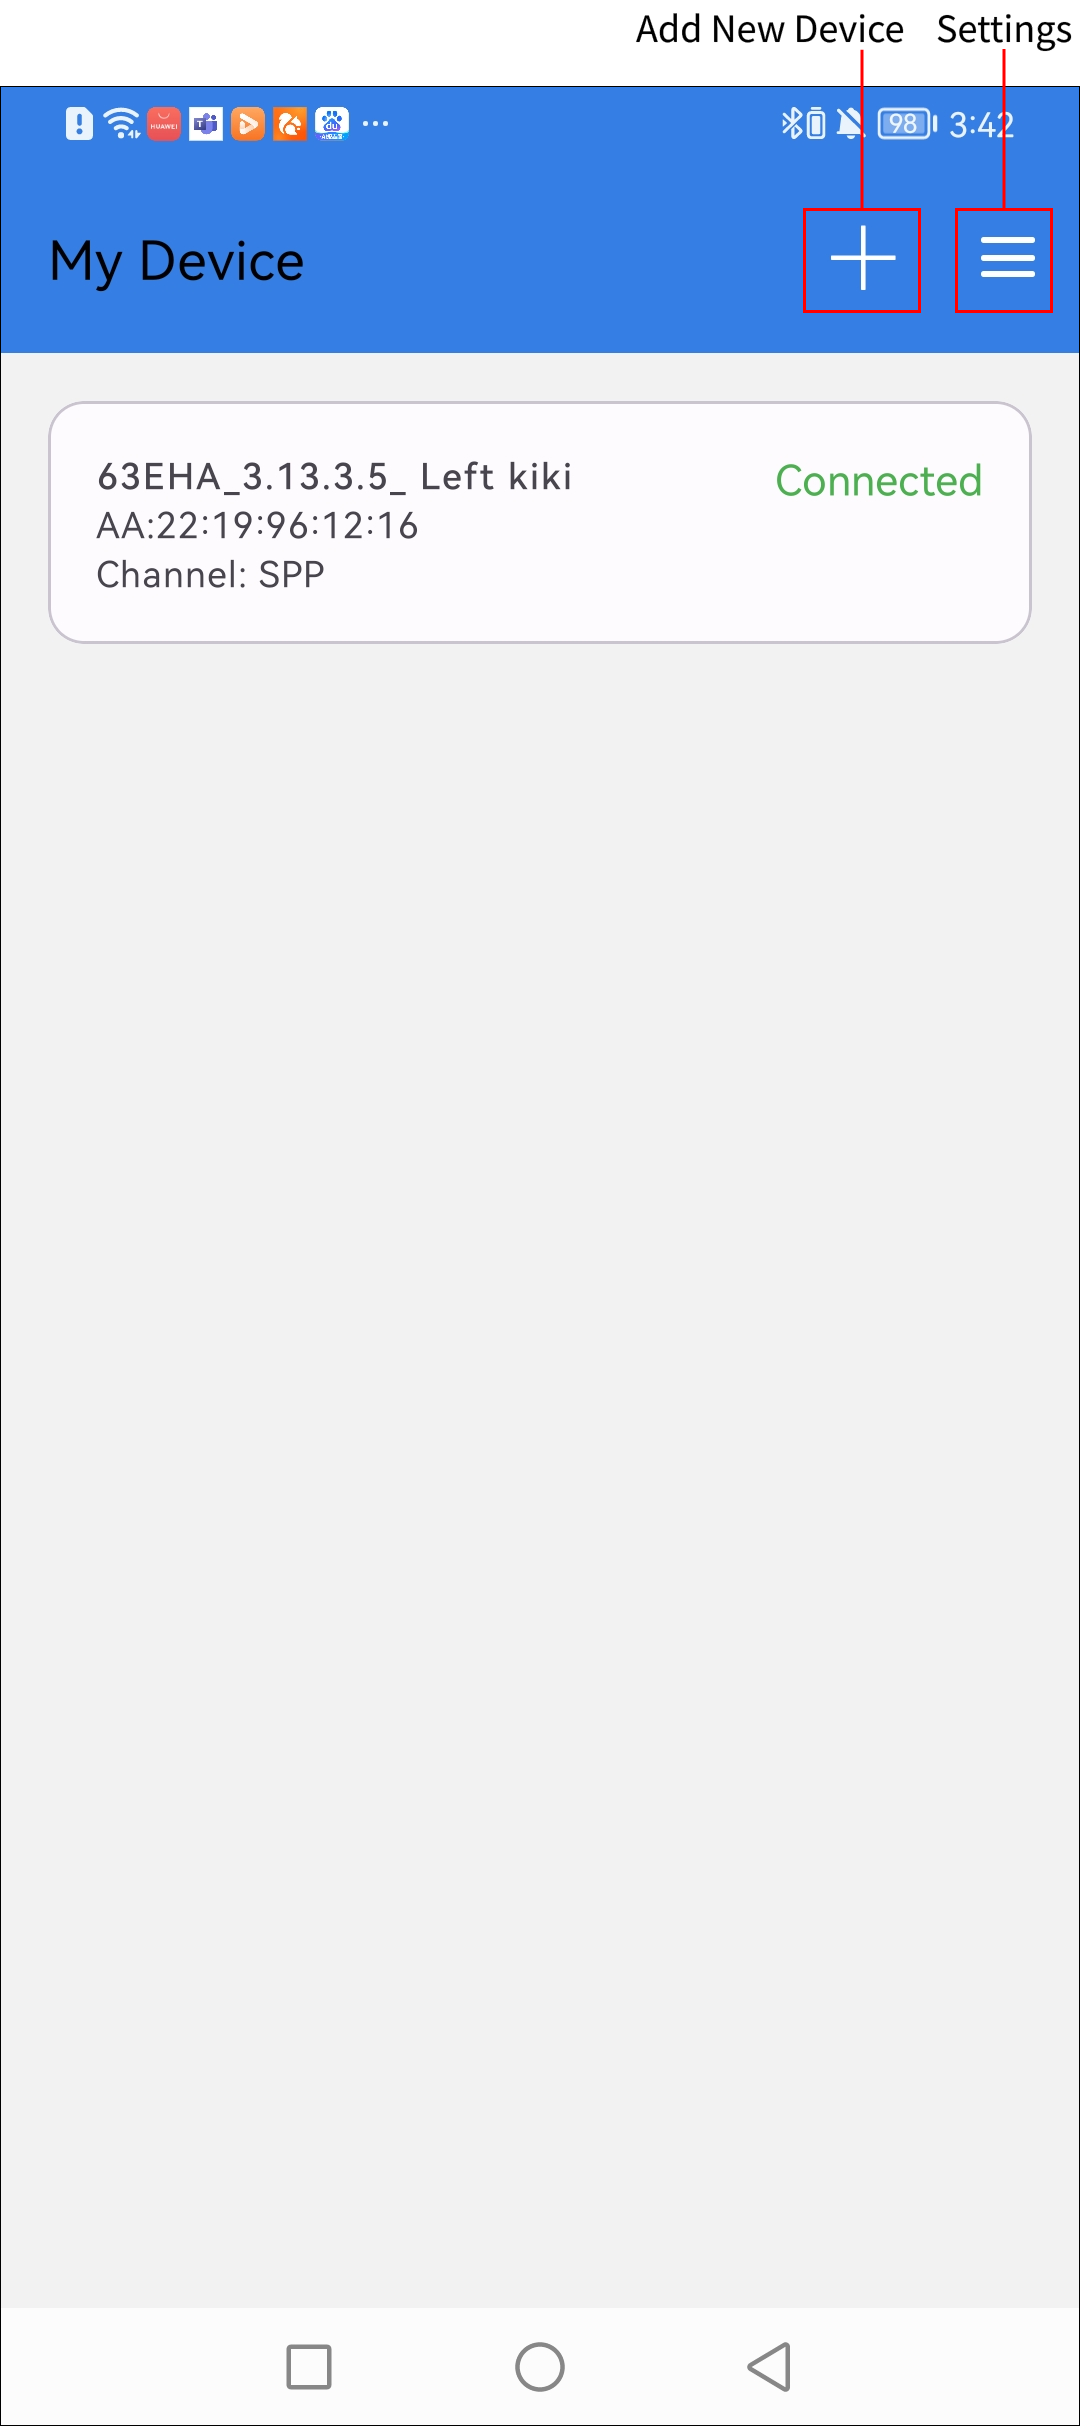
My Device
Click the Add New Device to search for nearby available devices, click it to automatically connect, and jump to the device details page.
Click the Settings to enter the settings page.
Select a device that has been used before from the device list, click it to automatically connect, and jump to the device details page.
My Device
Device Features
After jumping to the device details page, the device will be automatically connected. After the connection is successful, the device information will be automatically synchronized and the function menu will be displayed.
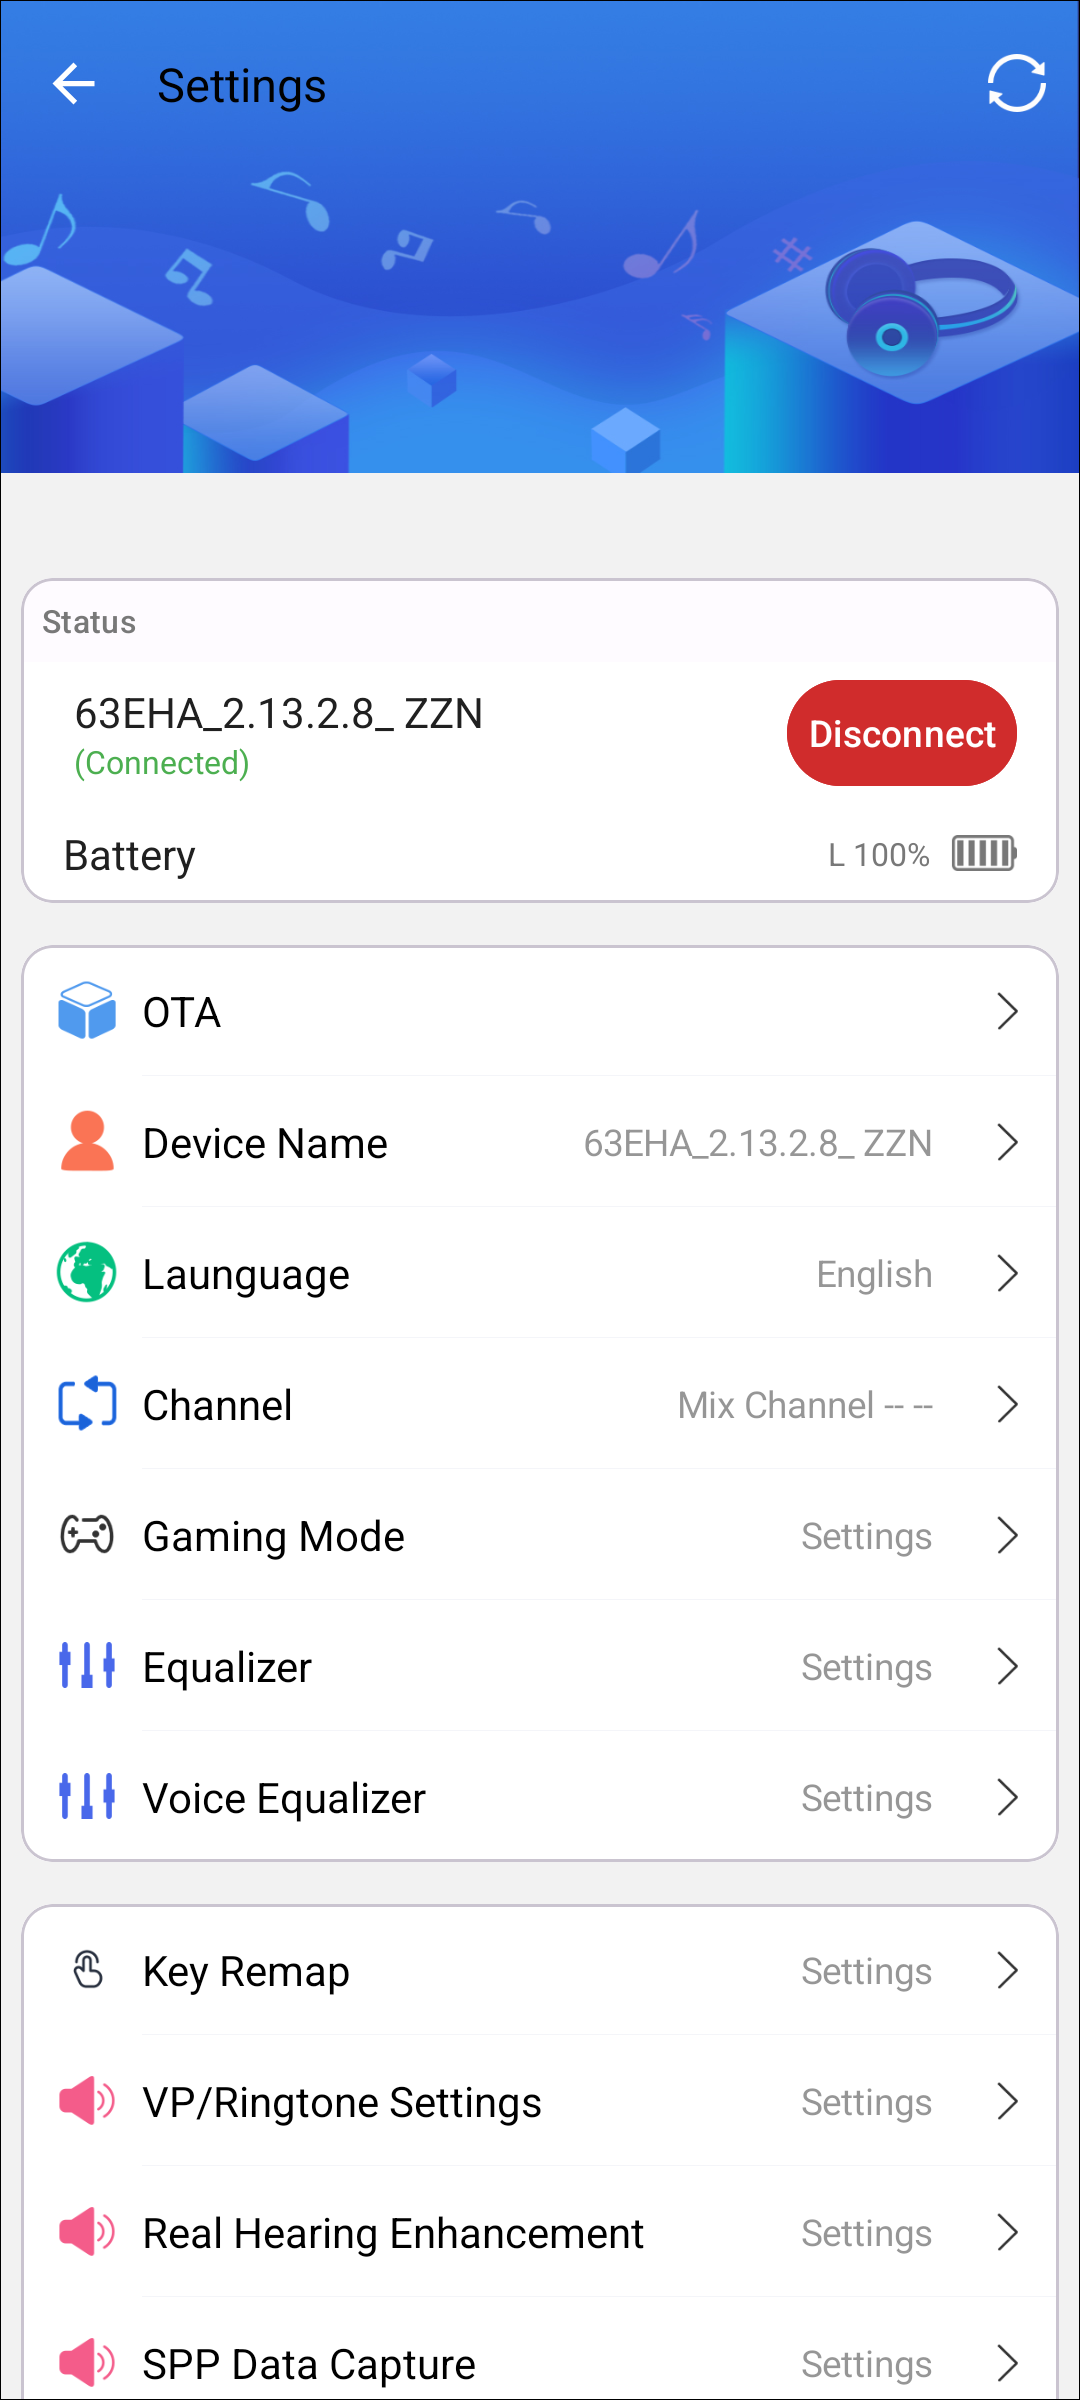
Device Function Menus
Modify Device Name
This module is designed to modify RTL87xx device's name. As shown below, input the new name and click OK to save.
Note
After changing the name, it will take effect only after the device factory reset.
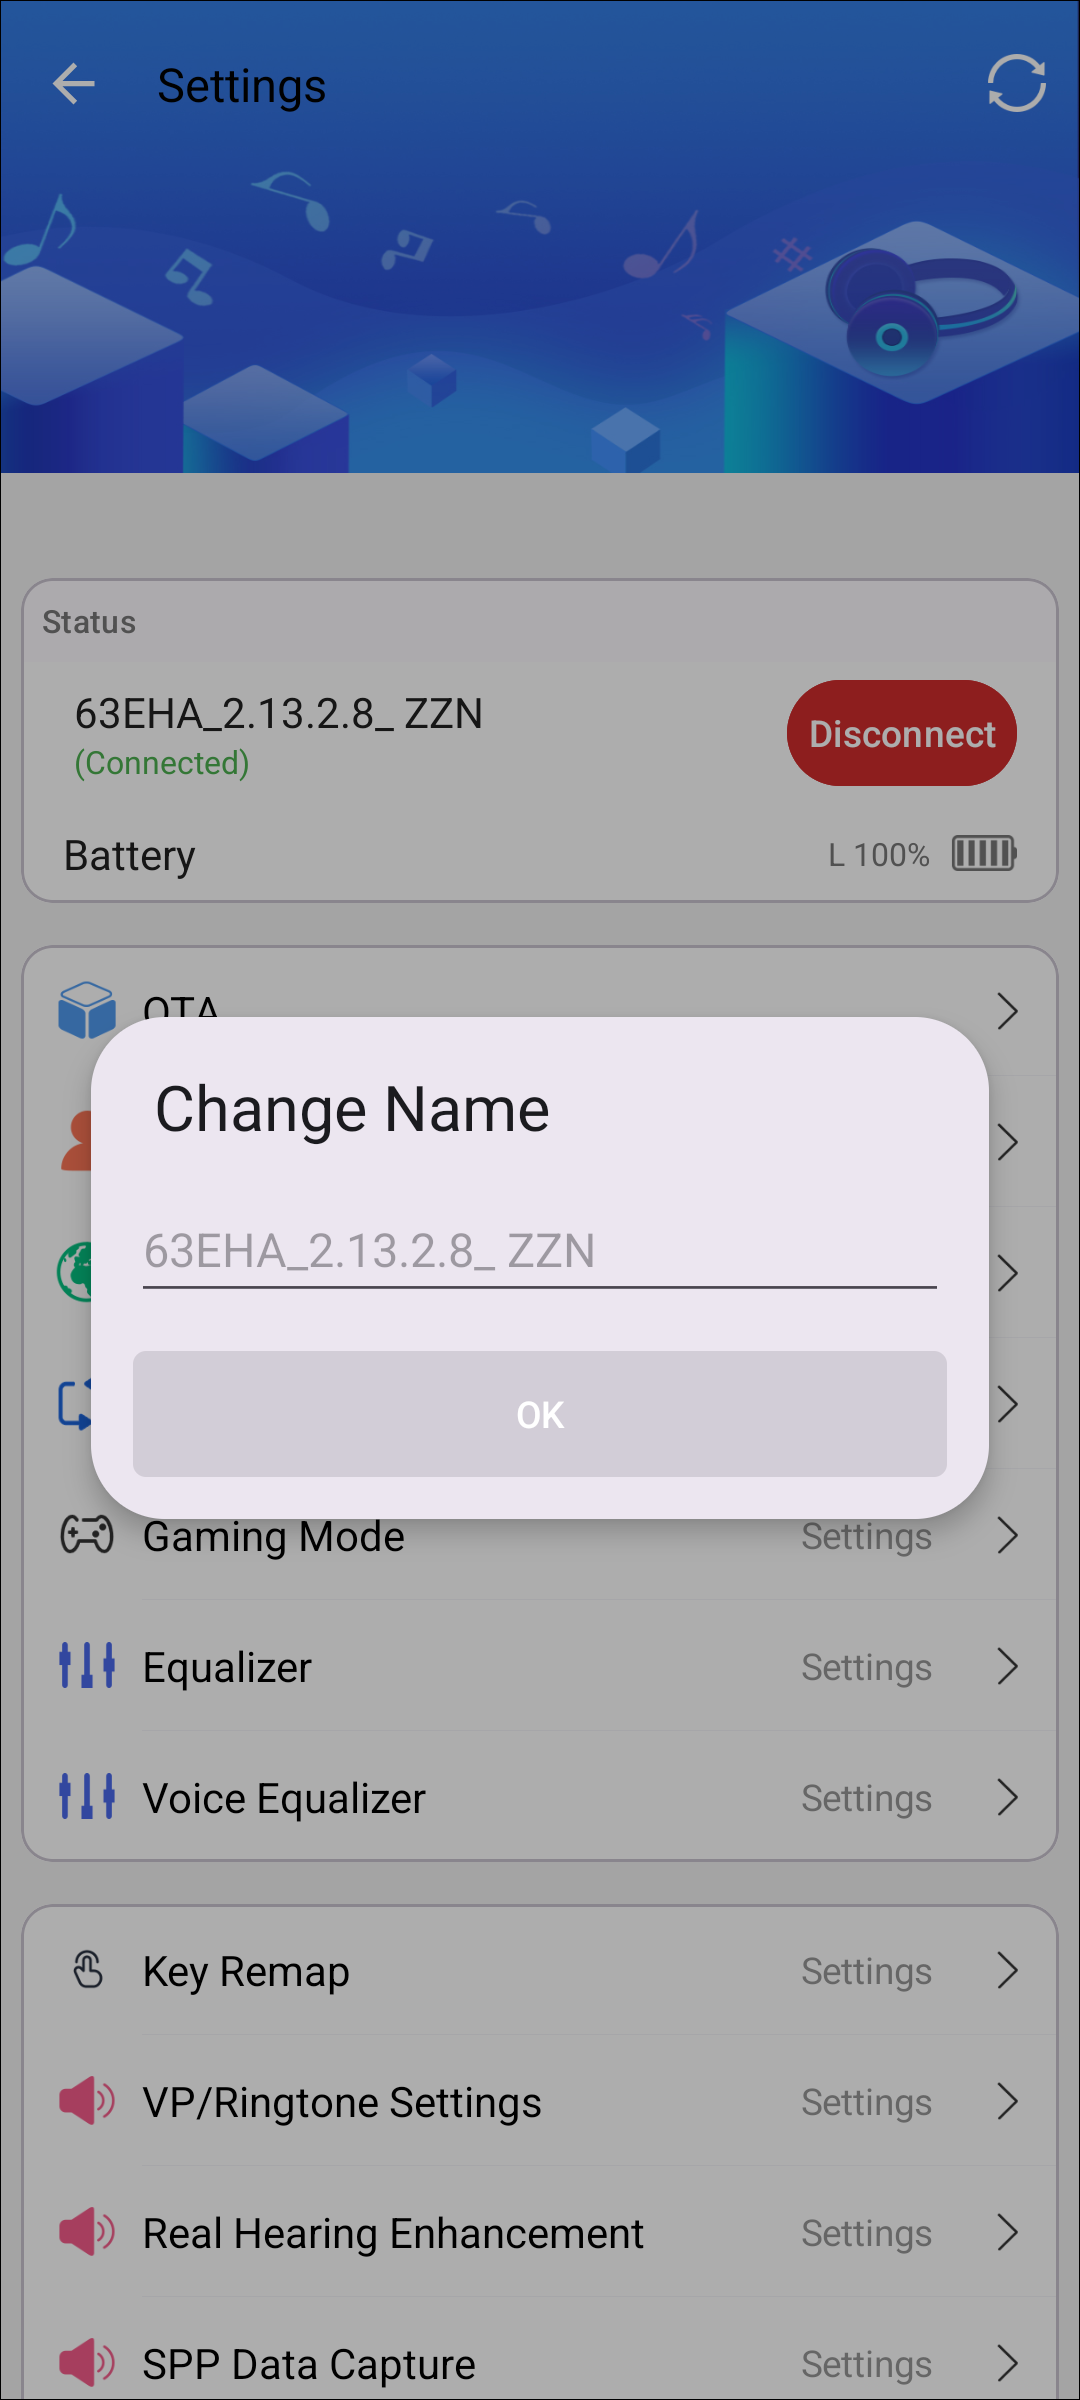
Modify Device Name
Channel
There are three modes:
Left Channel - Right Channel
Right Channel - Left Channel
Left and Right Mix - Left and Right Mix
This function is only available when both left and right earphones are connected. Otherwise, a warning message will be displayed.
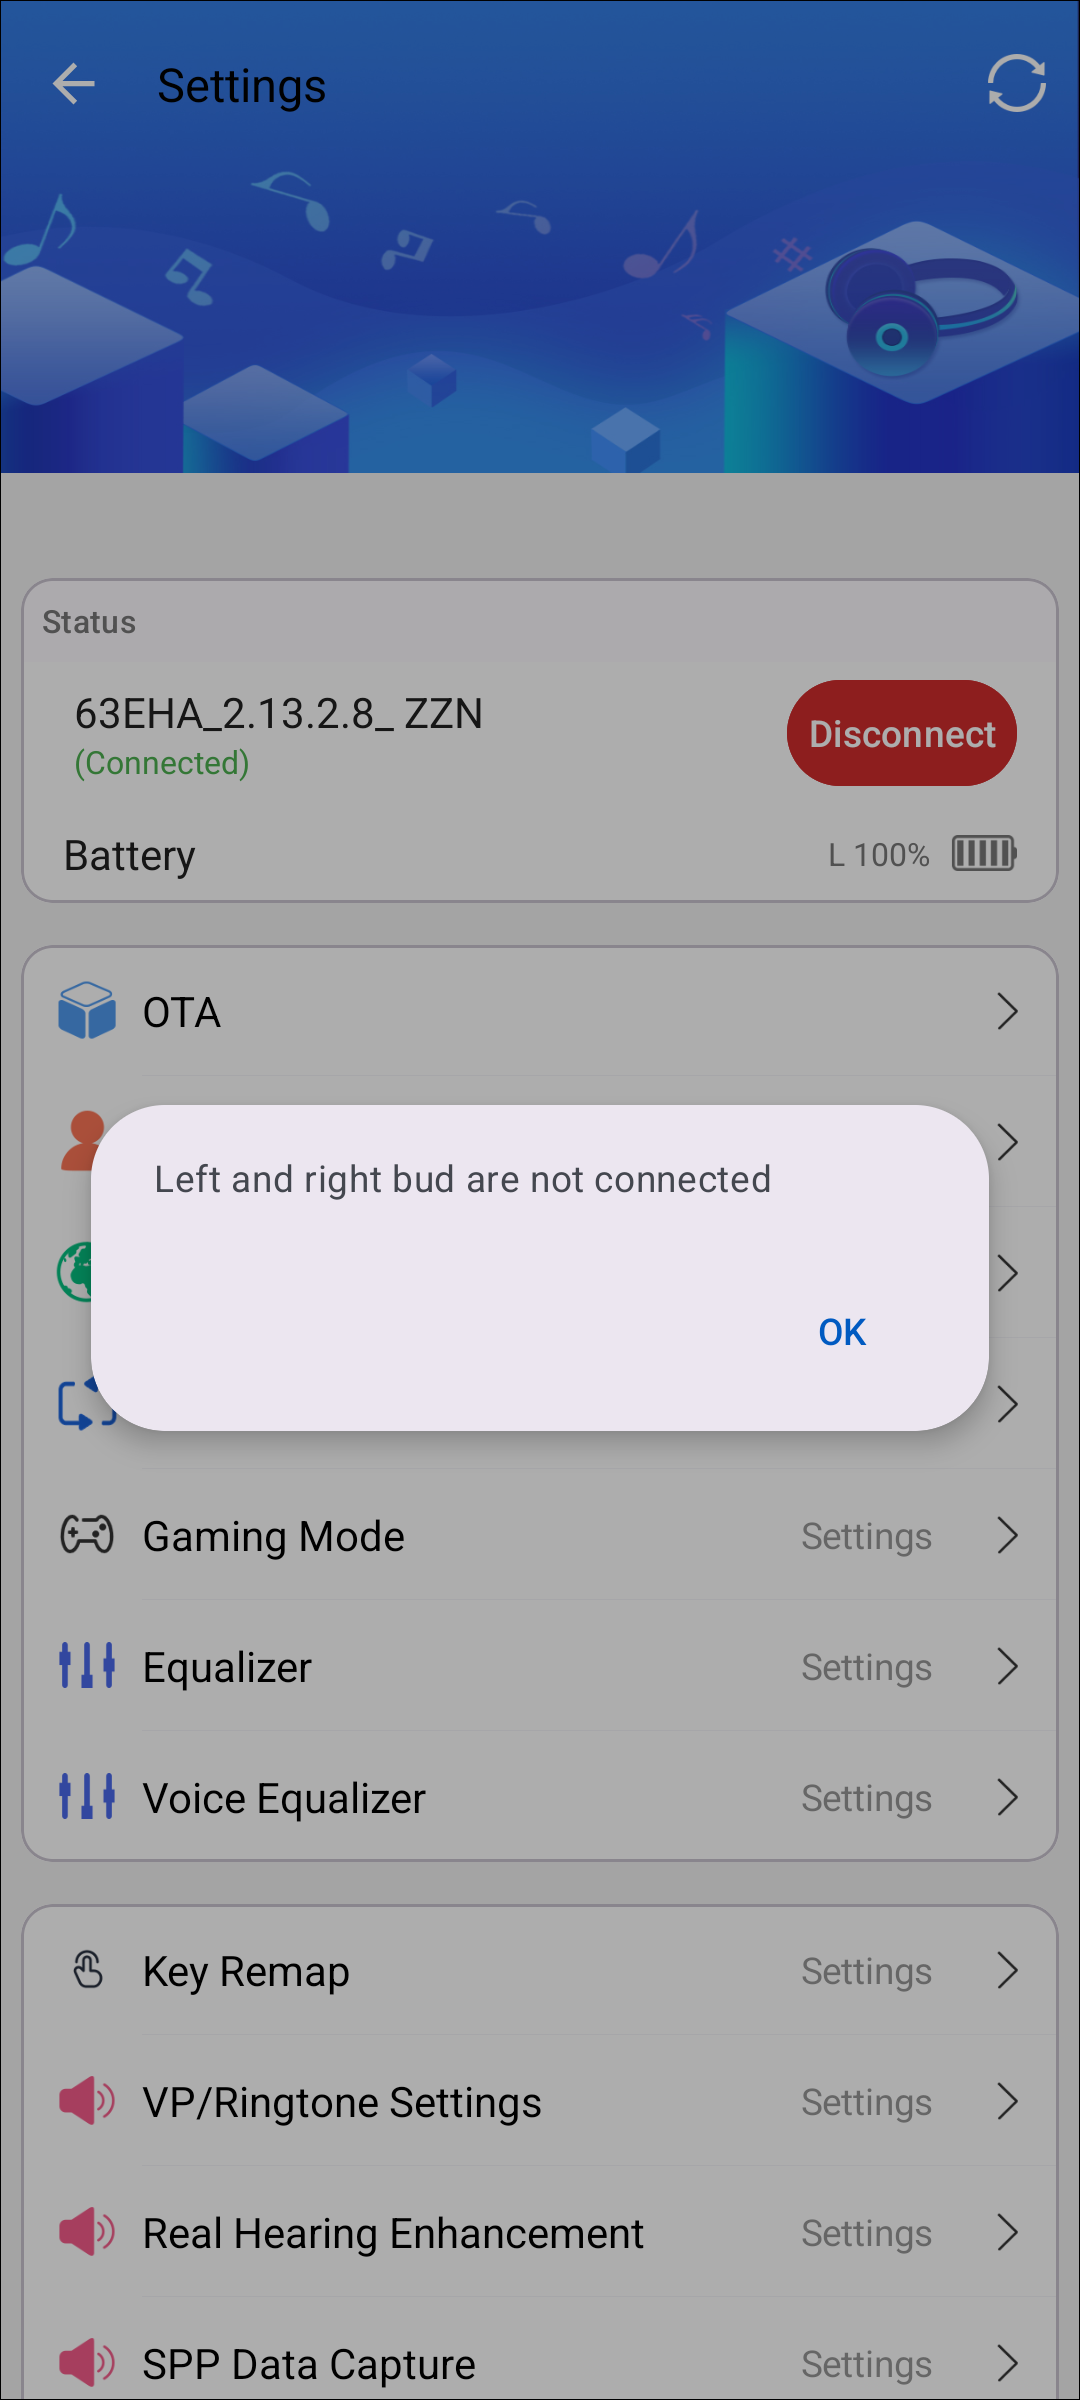
Channel Warning
OTA
OTA module is designed to upgrade RTL87xx device's firmware. Users may see the target information as shown below:
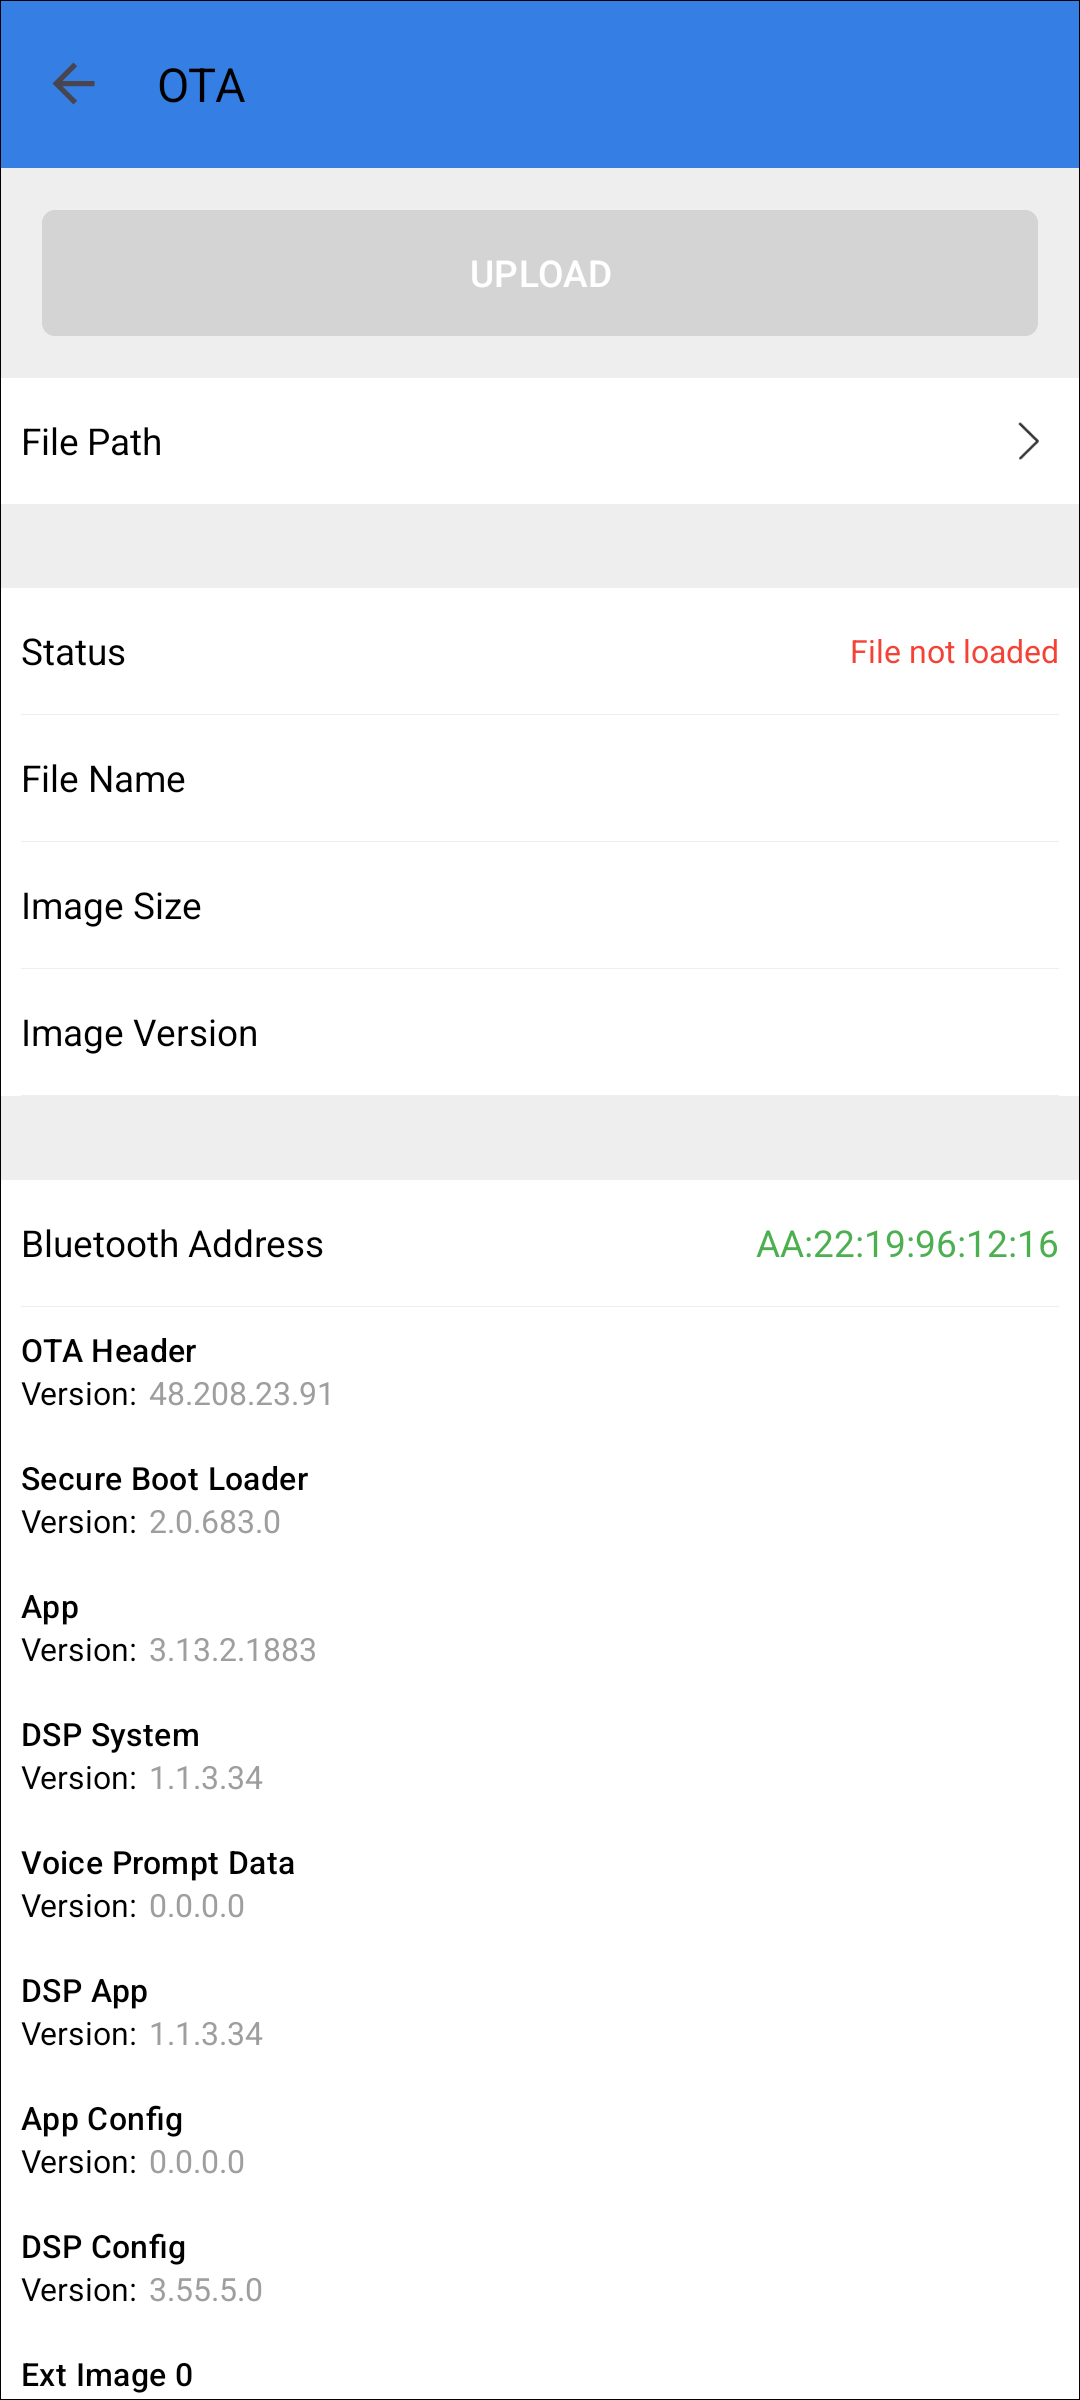
OTA
Click the File Path item to select pack bin file.
Click the UPLOAD button will start the update procedure.
Note
Before performing the OTA test, please place the bin file in the designated directory:sdcard\Android\data\com.realtek.apps.audioconnect\files\ota.
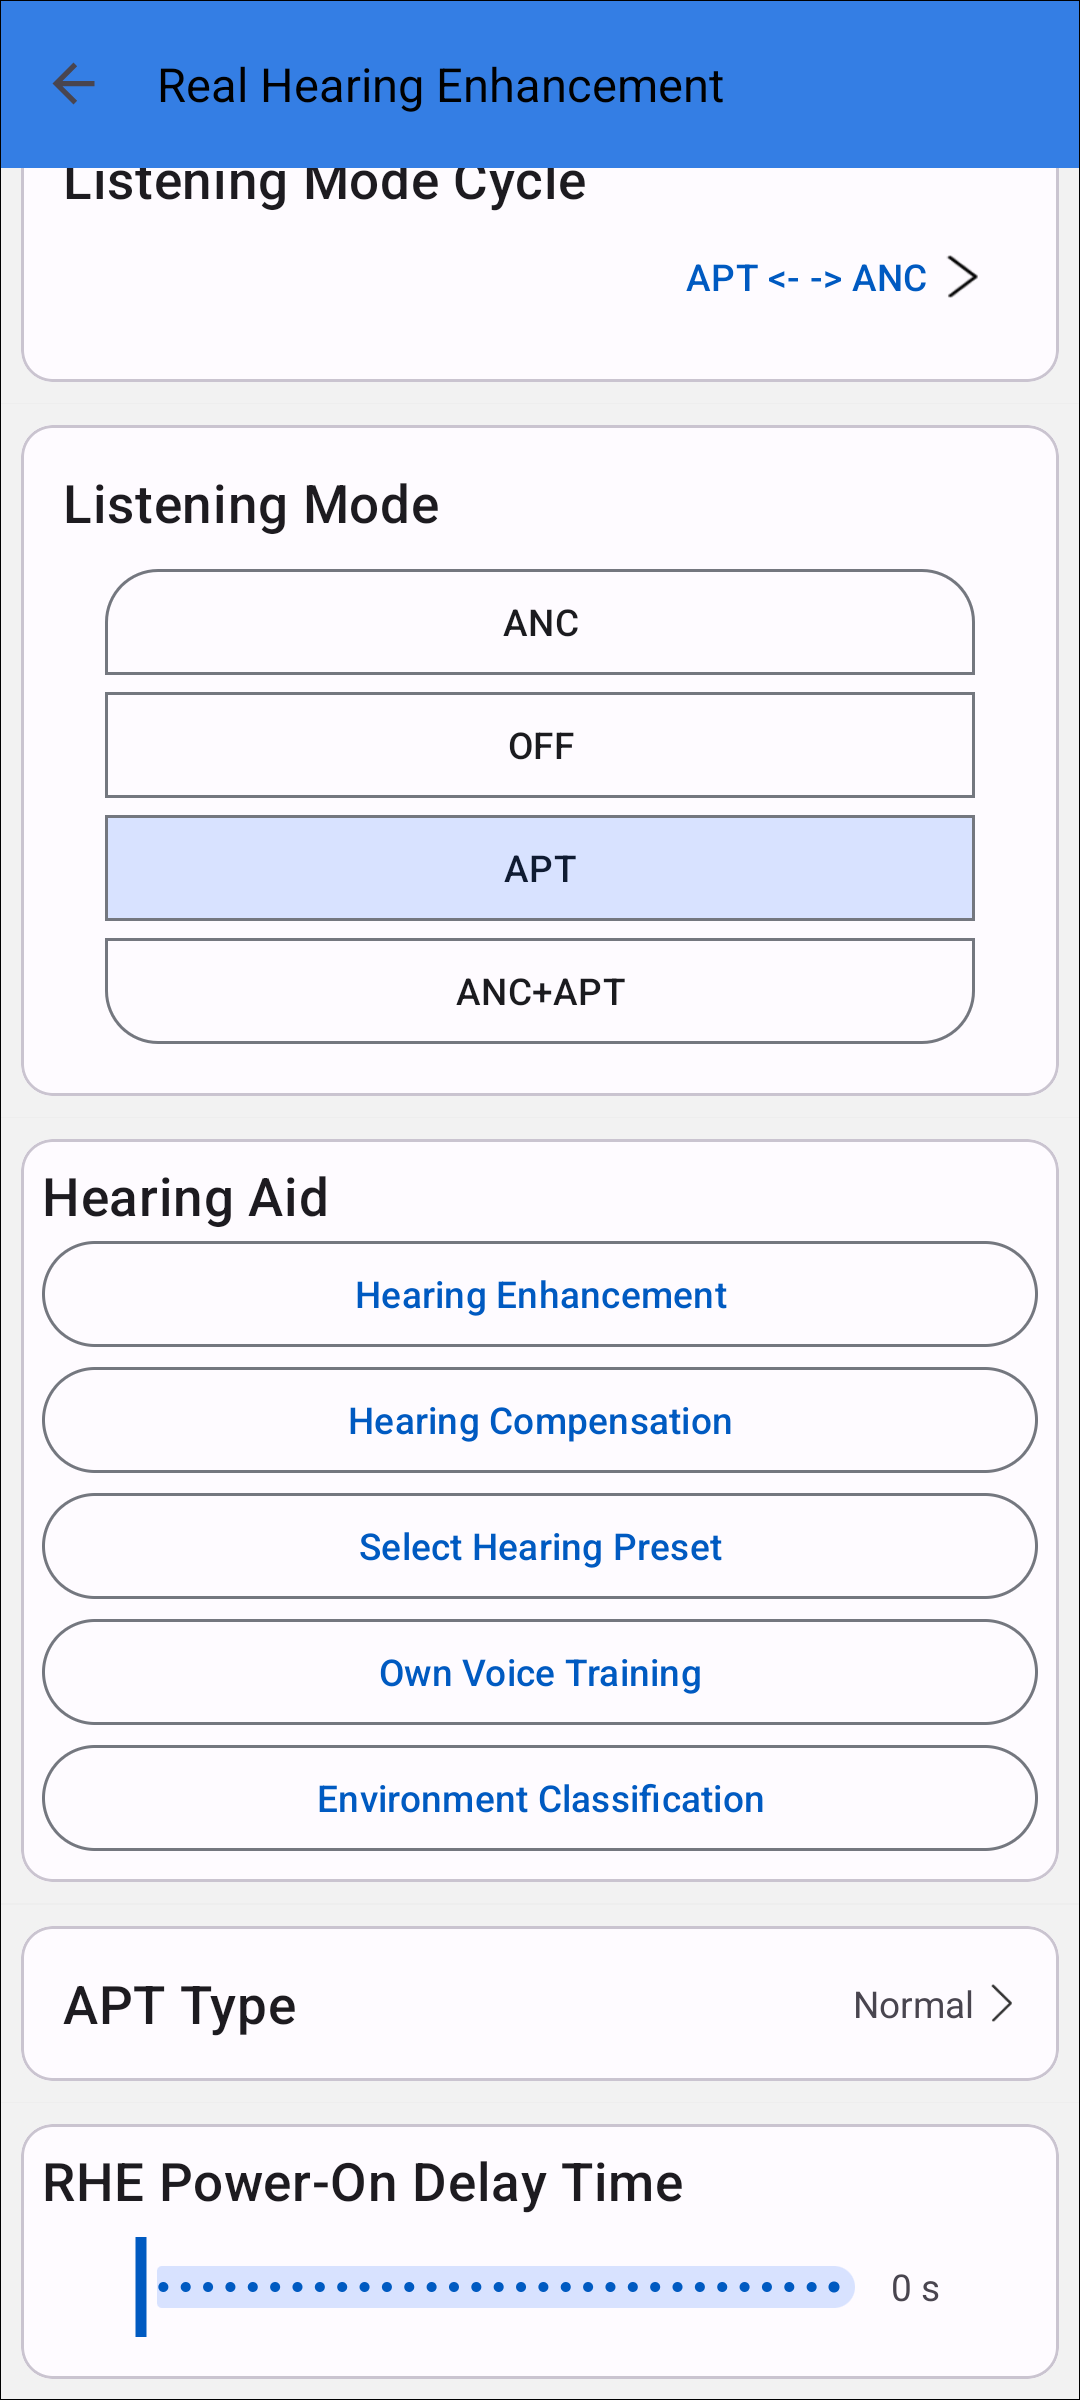
Real Hearing Enhancement
Listening Mode
Switch the listening mode through the APP, ANC <-> OFF <-> APT <-> ANC + APT. After switching, the content of the page will be dynamically displayed following the status of the listening mode.
There are at most four modes for APP.
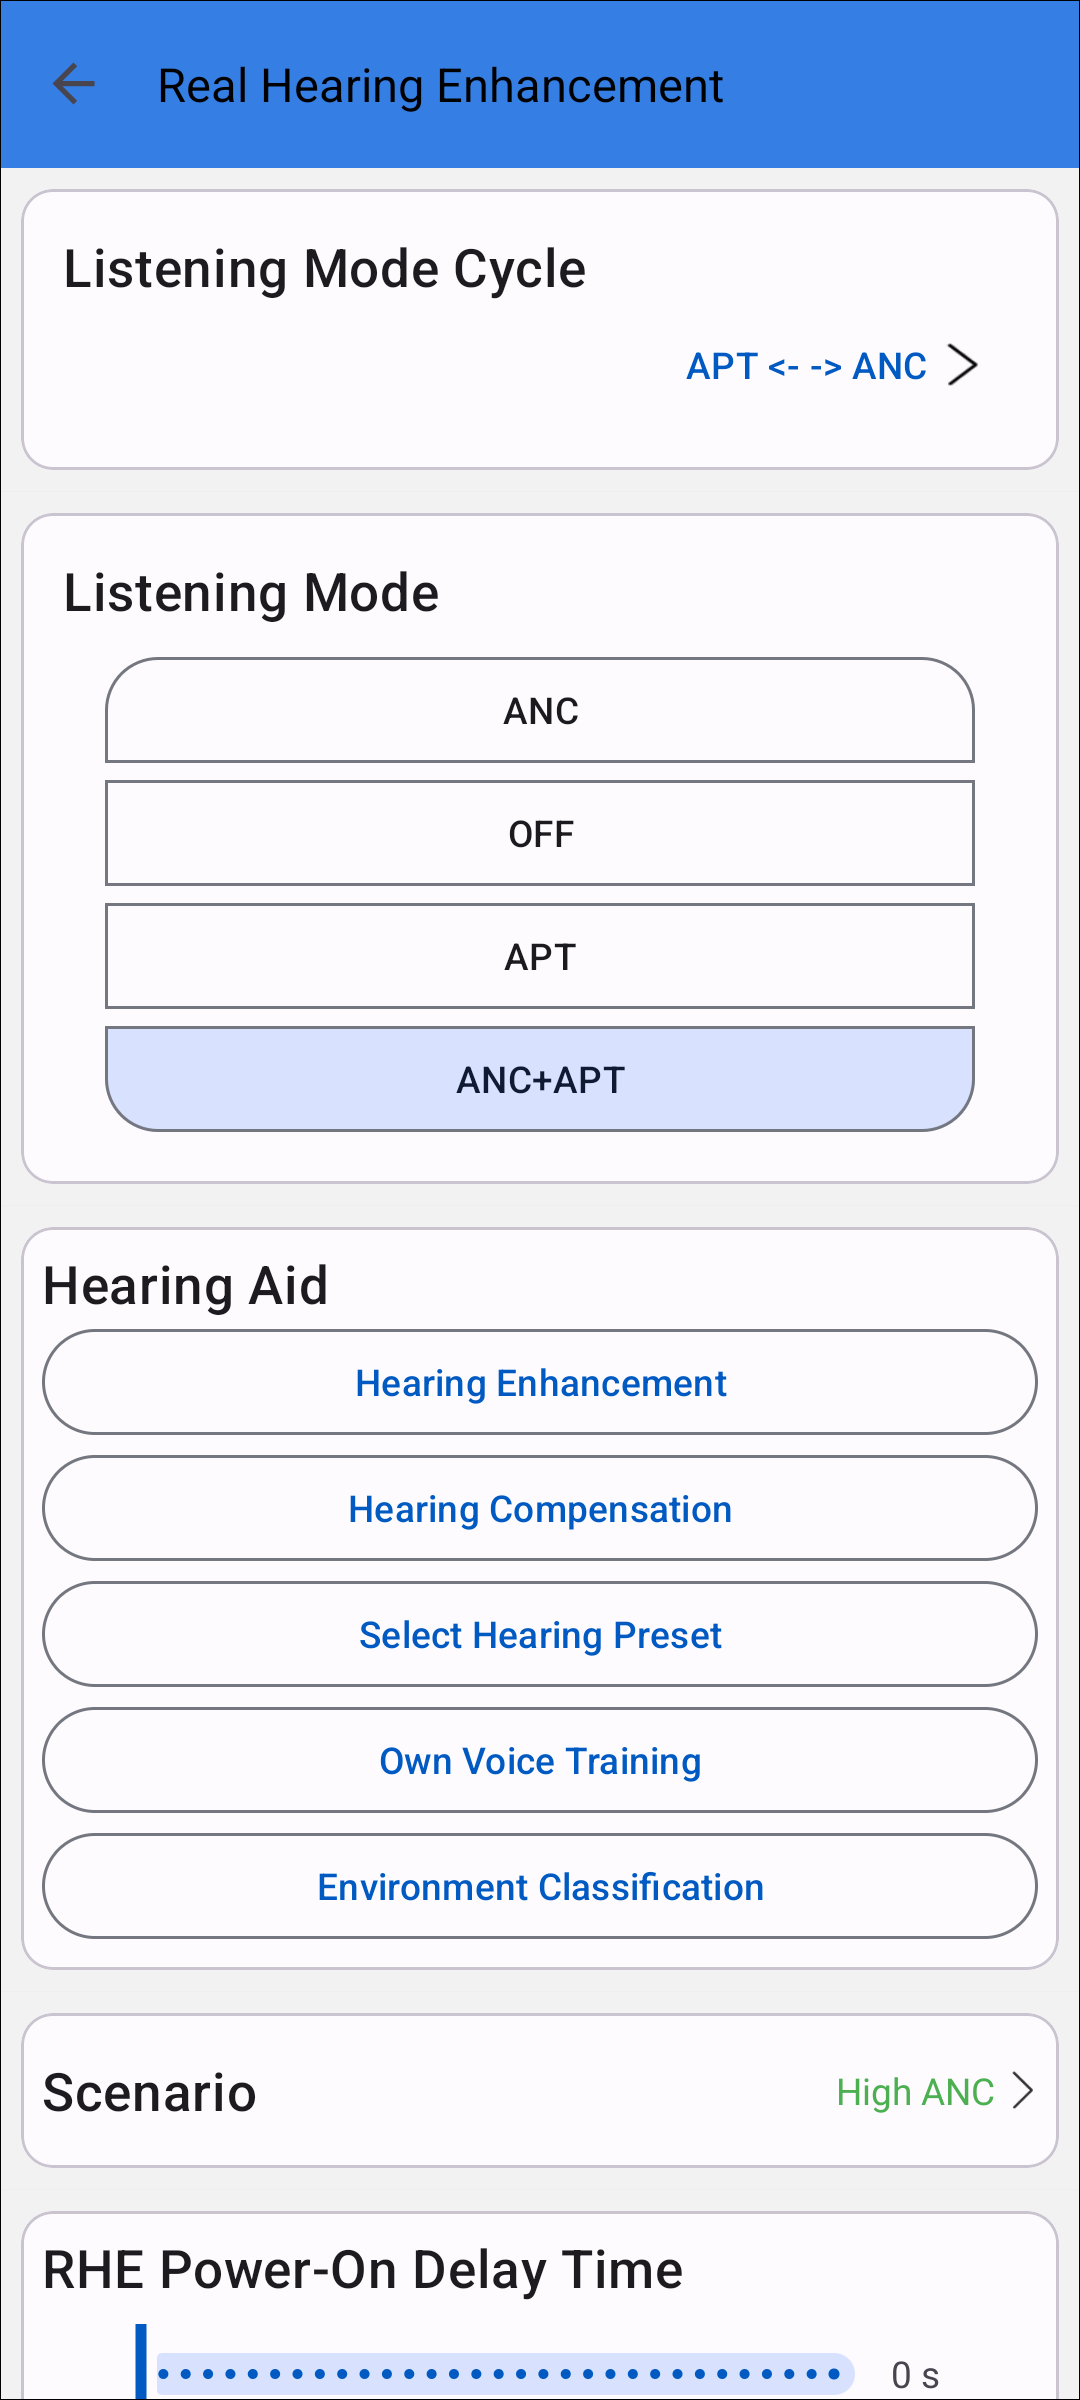
Listening Mode
Listening Mode Cycle
Set the cycle mode of the key switch listening mode, there are six options.
ALL_OFF <--> ANC ON
Custom Mode
As shown below:
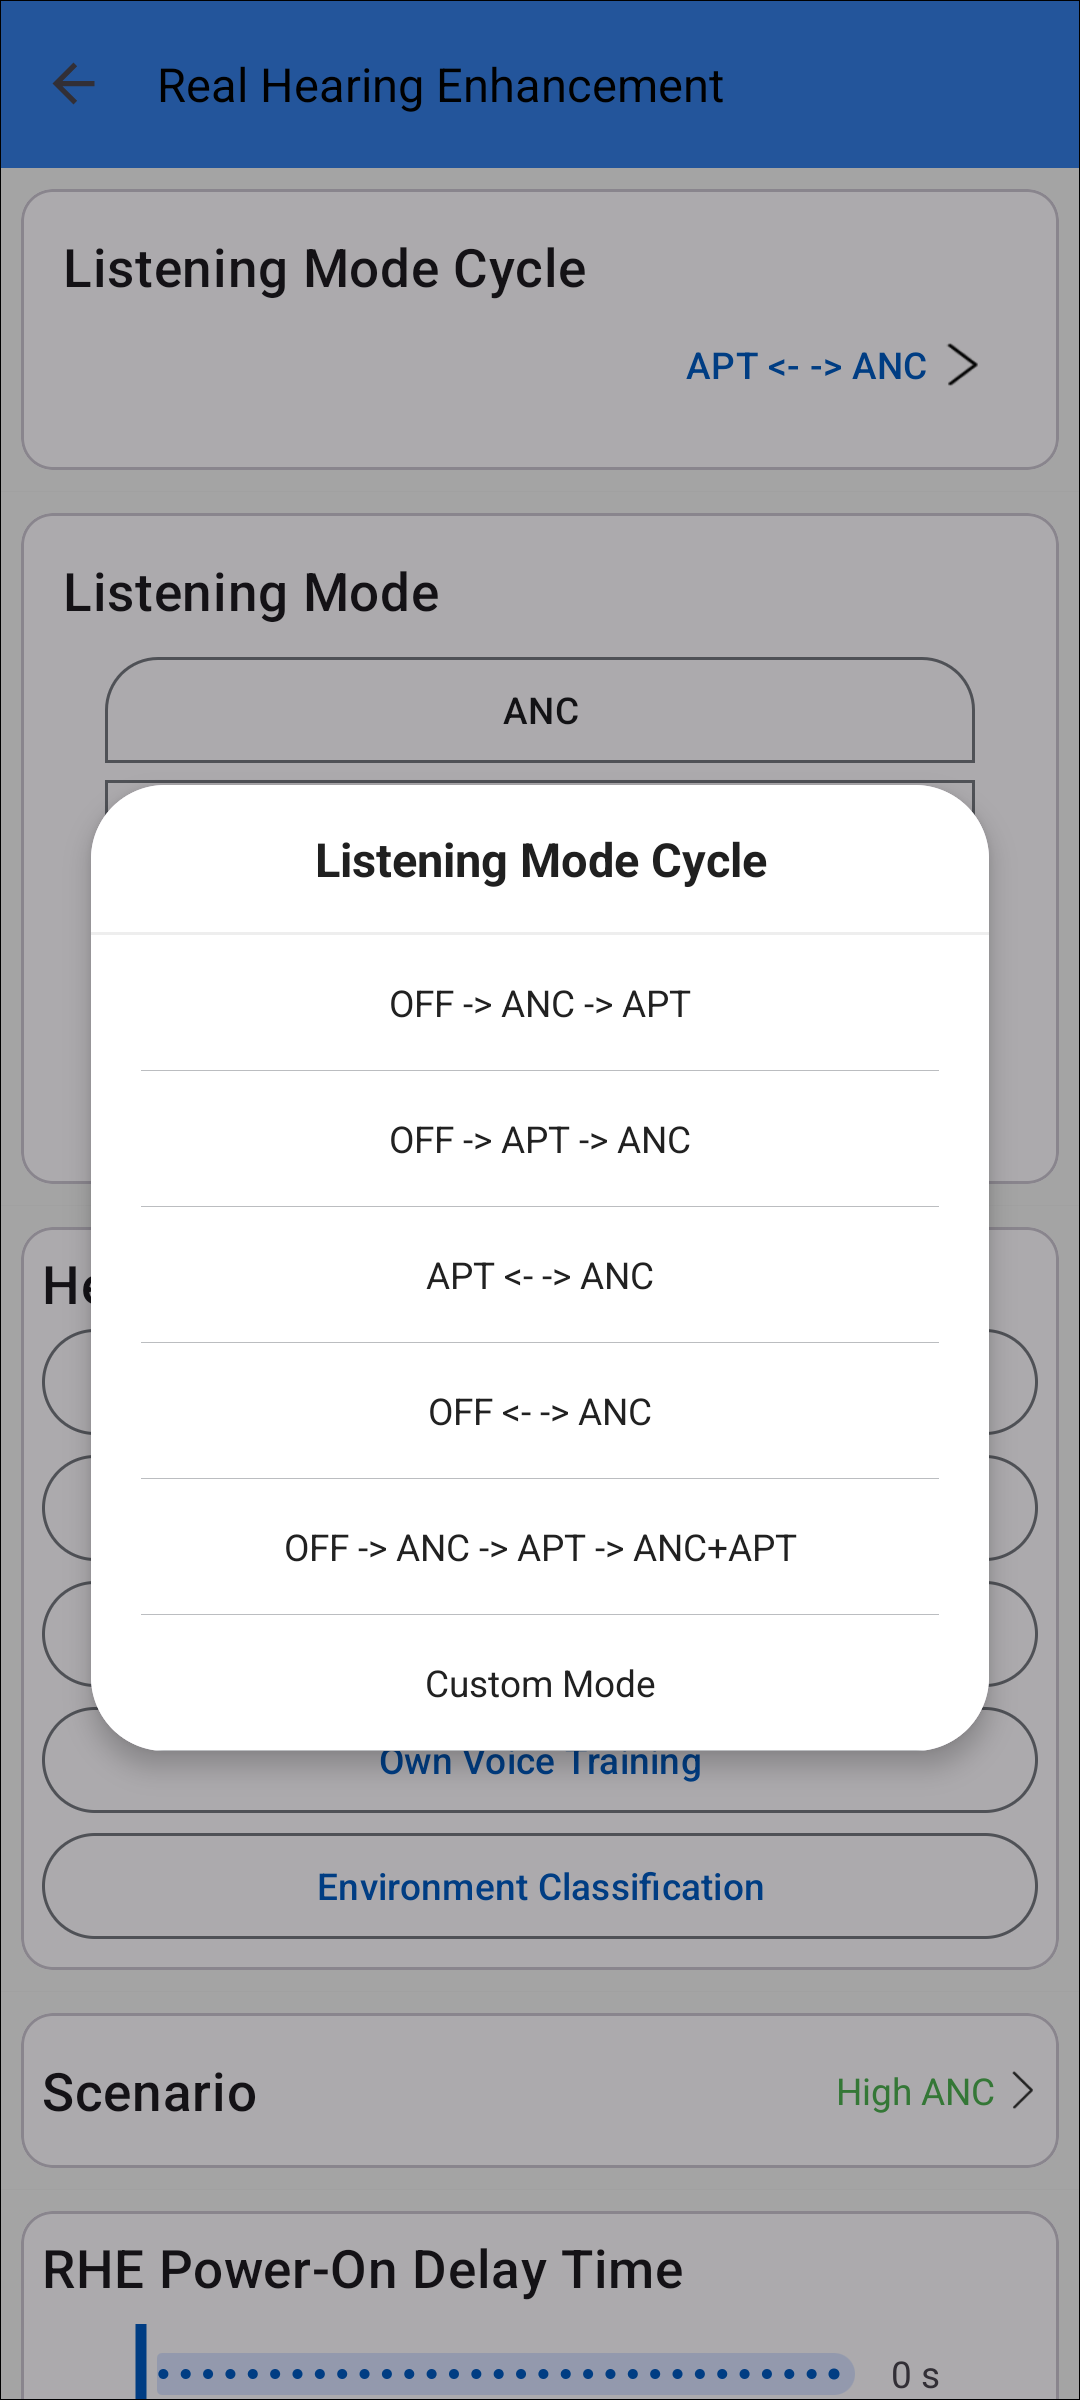
Listening Mode Cycle
APT
APT Type
Users can change the APT type between Normal and Low Latency when listening mode switches to APT.
When APT Type is Normal APT, the APP does not support LLAPT Listening Mode.
When the APT Type is LLAPT, the APP does not support the two Listening Modes of Normal APT and ANC + Normal APT.
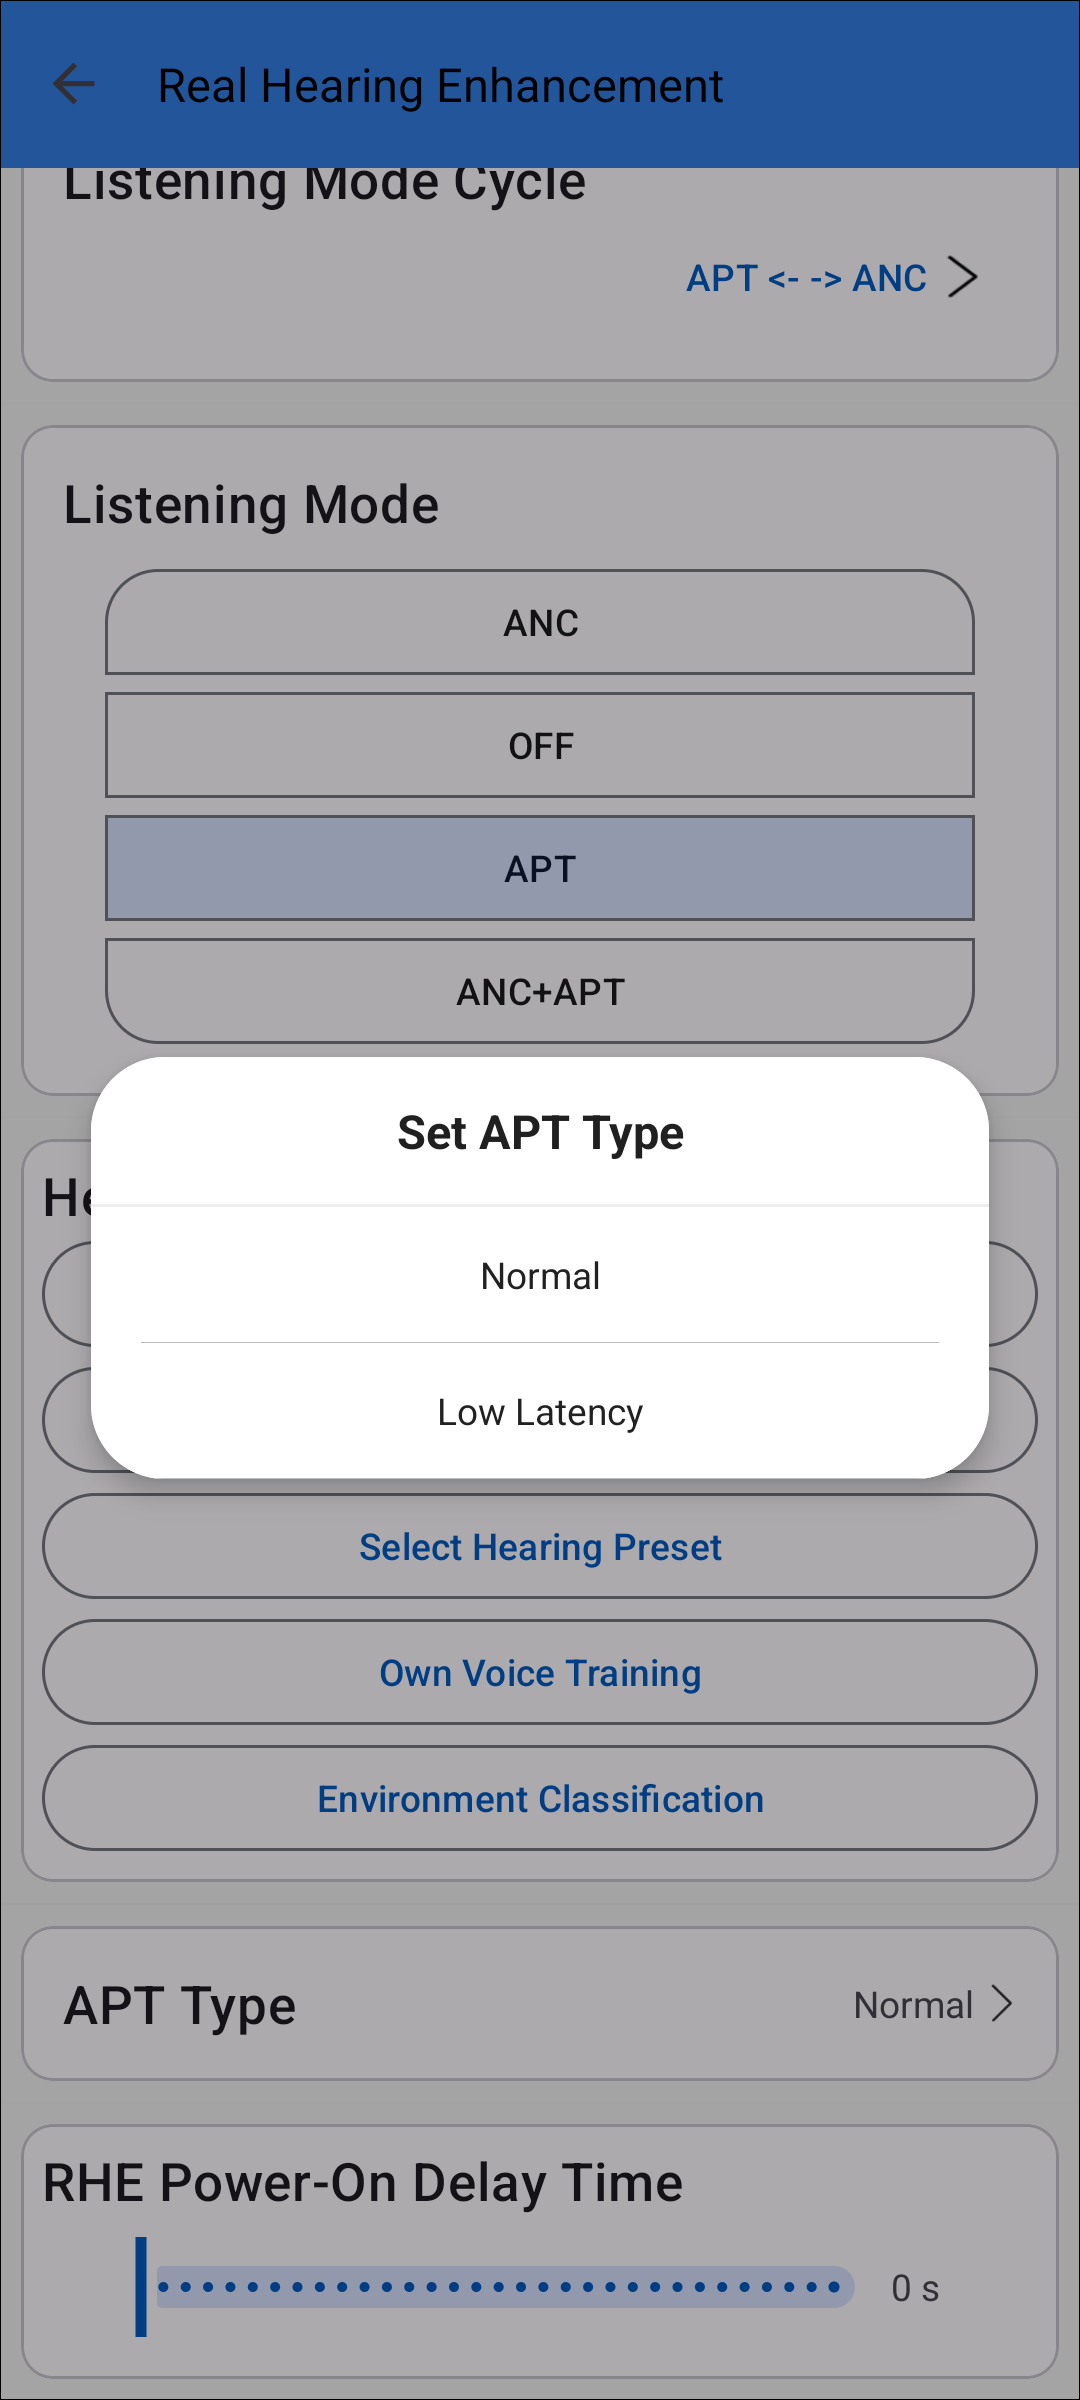
APT Type
APT EQ
When APT is turned on, users can switch APT EQ or modify parameters through the APP. Support separate adjustment for left and right ears.
As shown below:
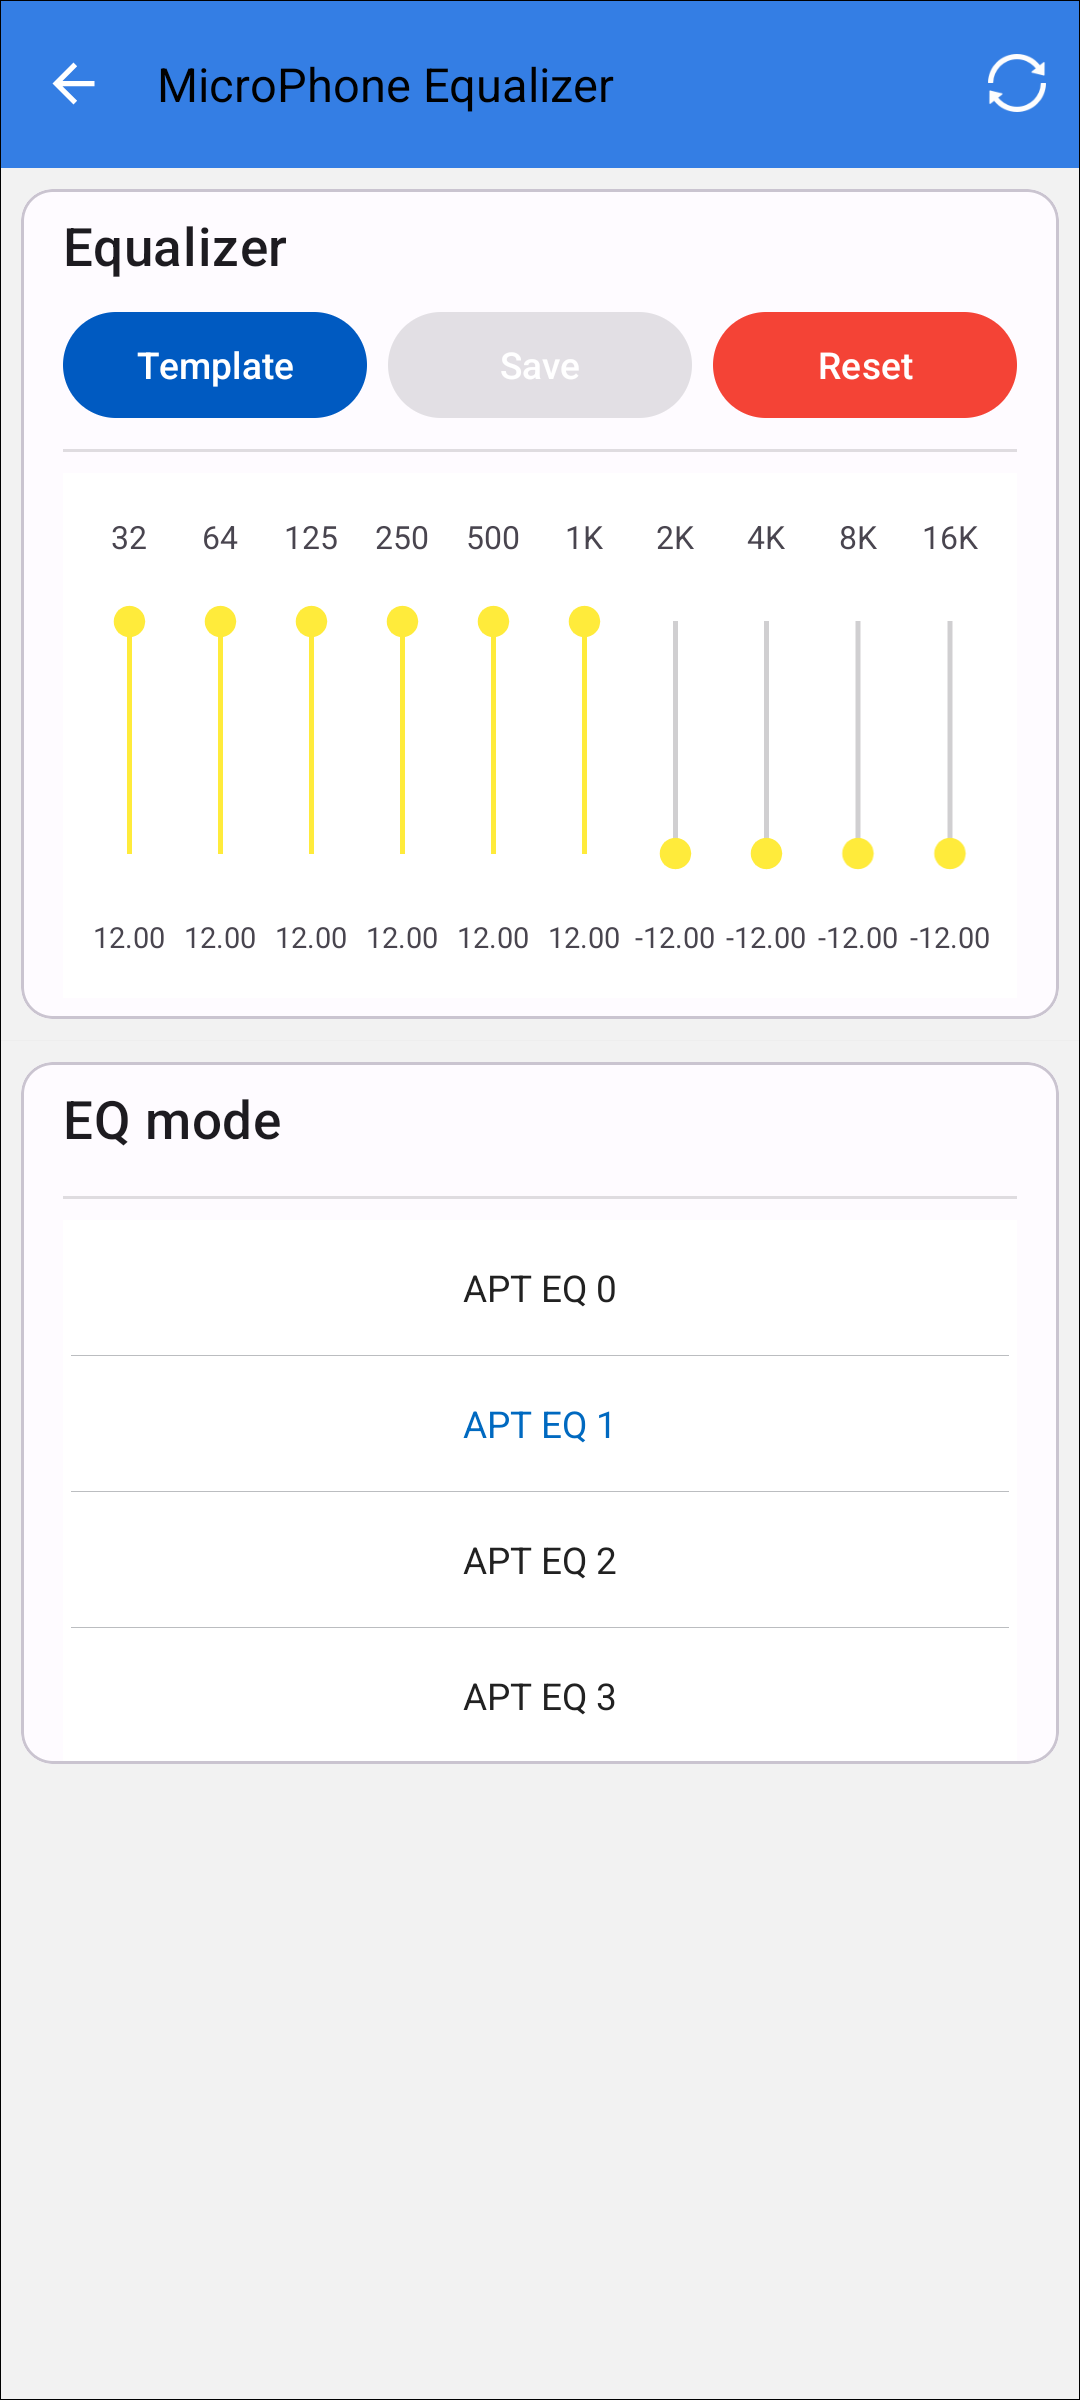
APT Type
Template: If the currently selected EQ has 10 stages, users can quickly set the sound effect parameters preset by the APP to the headphones by clicking Template.
APT Volume
Two types of volumes are supported, one is adjusted by level and the other is adjusted by step.

Change APT Volume
State |
Description |
|---|---|
Level |
Adjust APT volume by level. |
Step |
Adjust APT volume by step. |
Synchronized Adjustment |
After the sync switch is turned on, both ears will be synchronized to the same volume. If it is opened in the APP, the volume will be synchronized to an intermediate value (for example, the range is 0~15, after synchronization is turned on, the binaural volume will become 7). It will keep the last volume when it is turned on. |
Hearing Aid
When the APT mode is turned on, the Hearing Aid function will be turned on at the same time (if the device supports it). The Hearing Aid function can be further adjusted.
Hearing Aid
Hearing Enhancement
Hearing Enhancement is the hearing enhancement feature on RHA, primarily used for custom settings.
Hearing Enhancement
Switch Scenario
The scenario switching can be completed by clicking the icon above the scene bar.
Custom Scenario Name
The initial scene name will be displayed as P1, P2, and P3..., users can customize the scene name according to their needs. Long press the icon of the scene name and a modified dialog box will pop up, and users can enter a new scene name in the dialog box.
Note
Due to device storage limitations, when users enter a long scene name, it may not be saved.
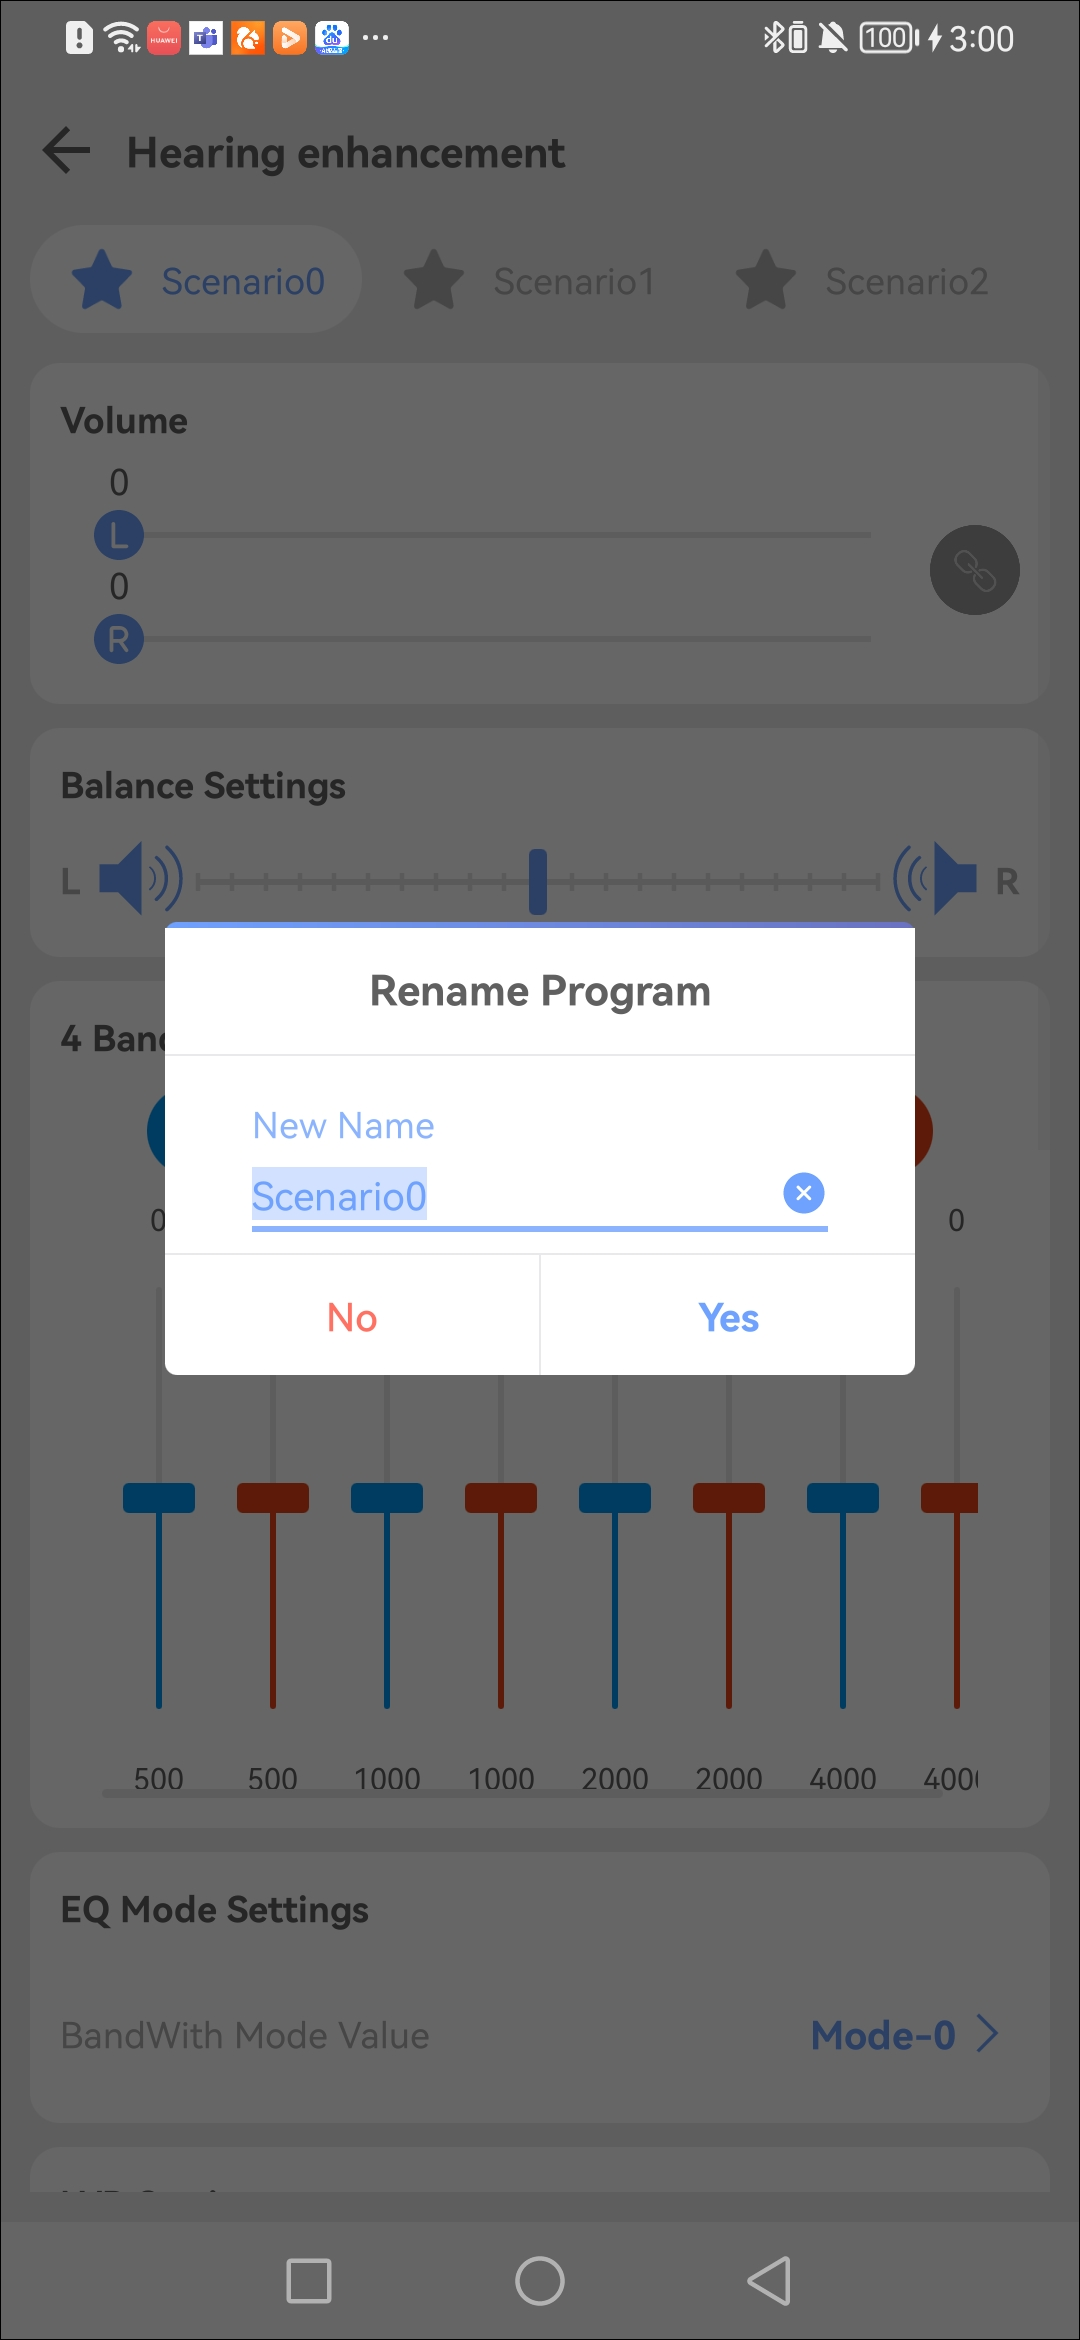
Custom Scenario Name
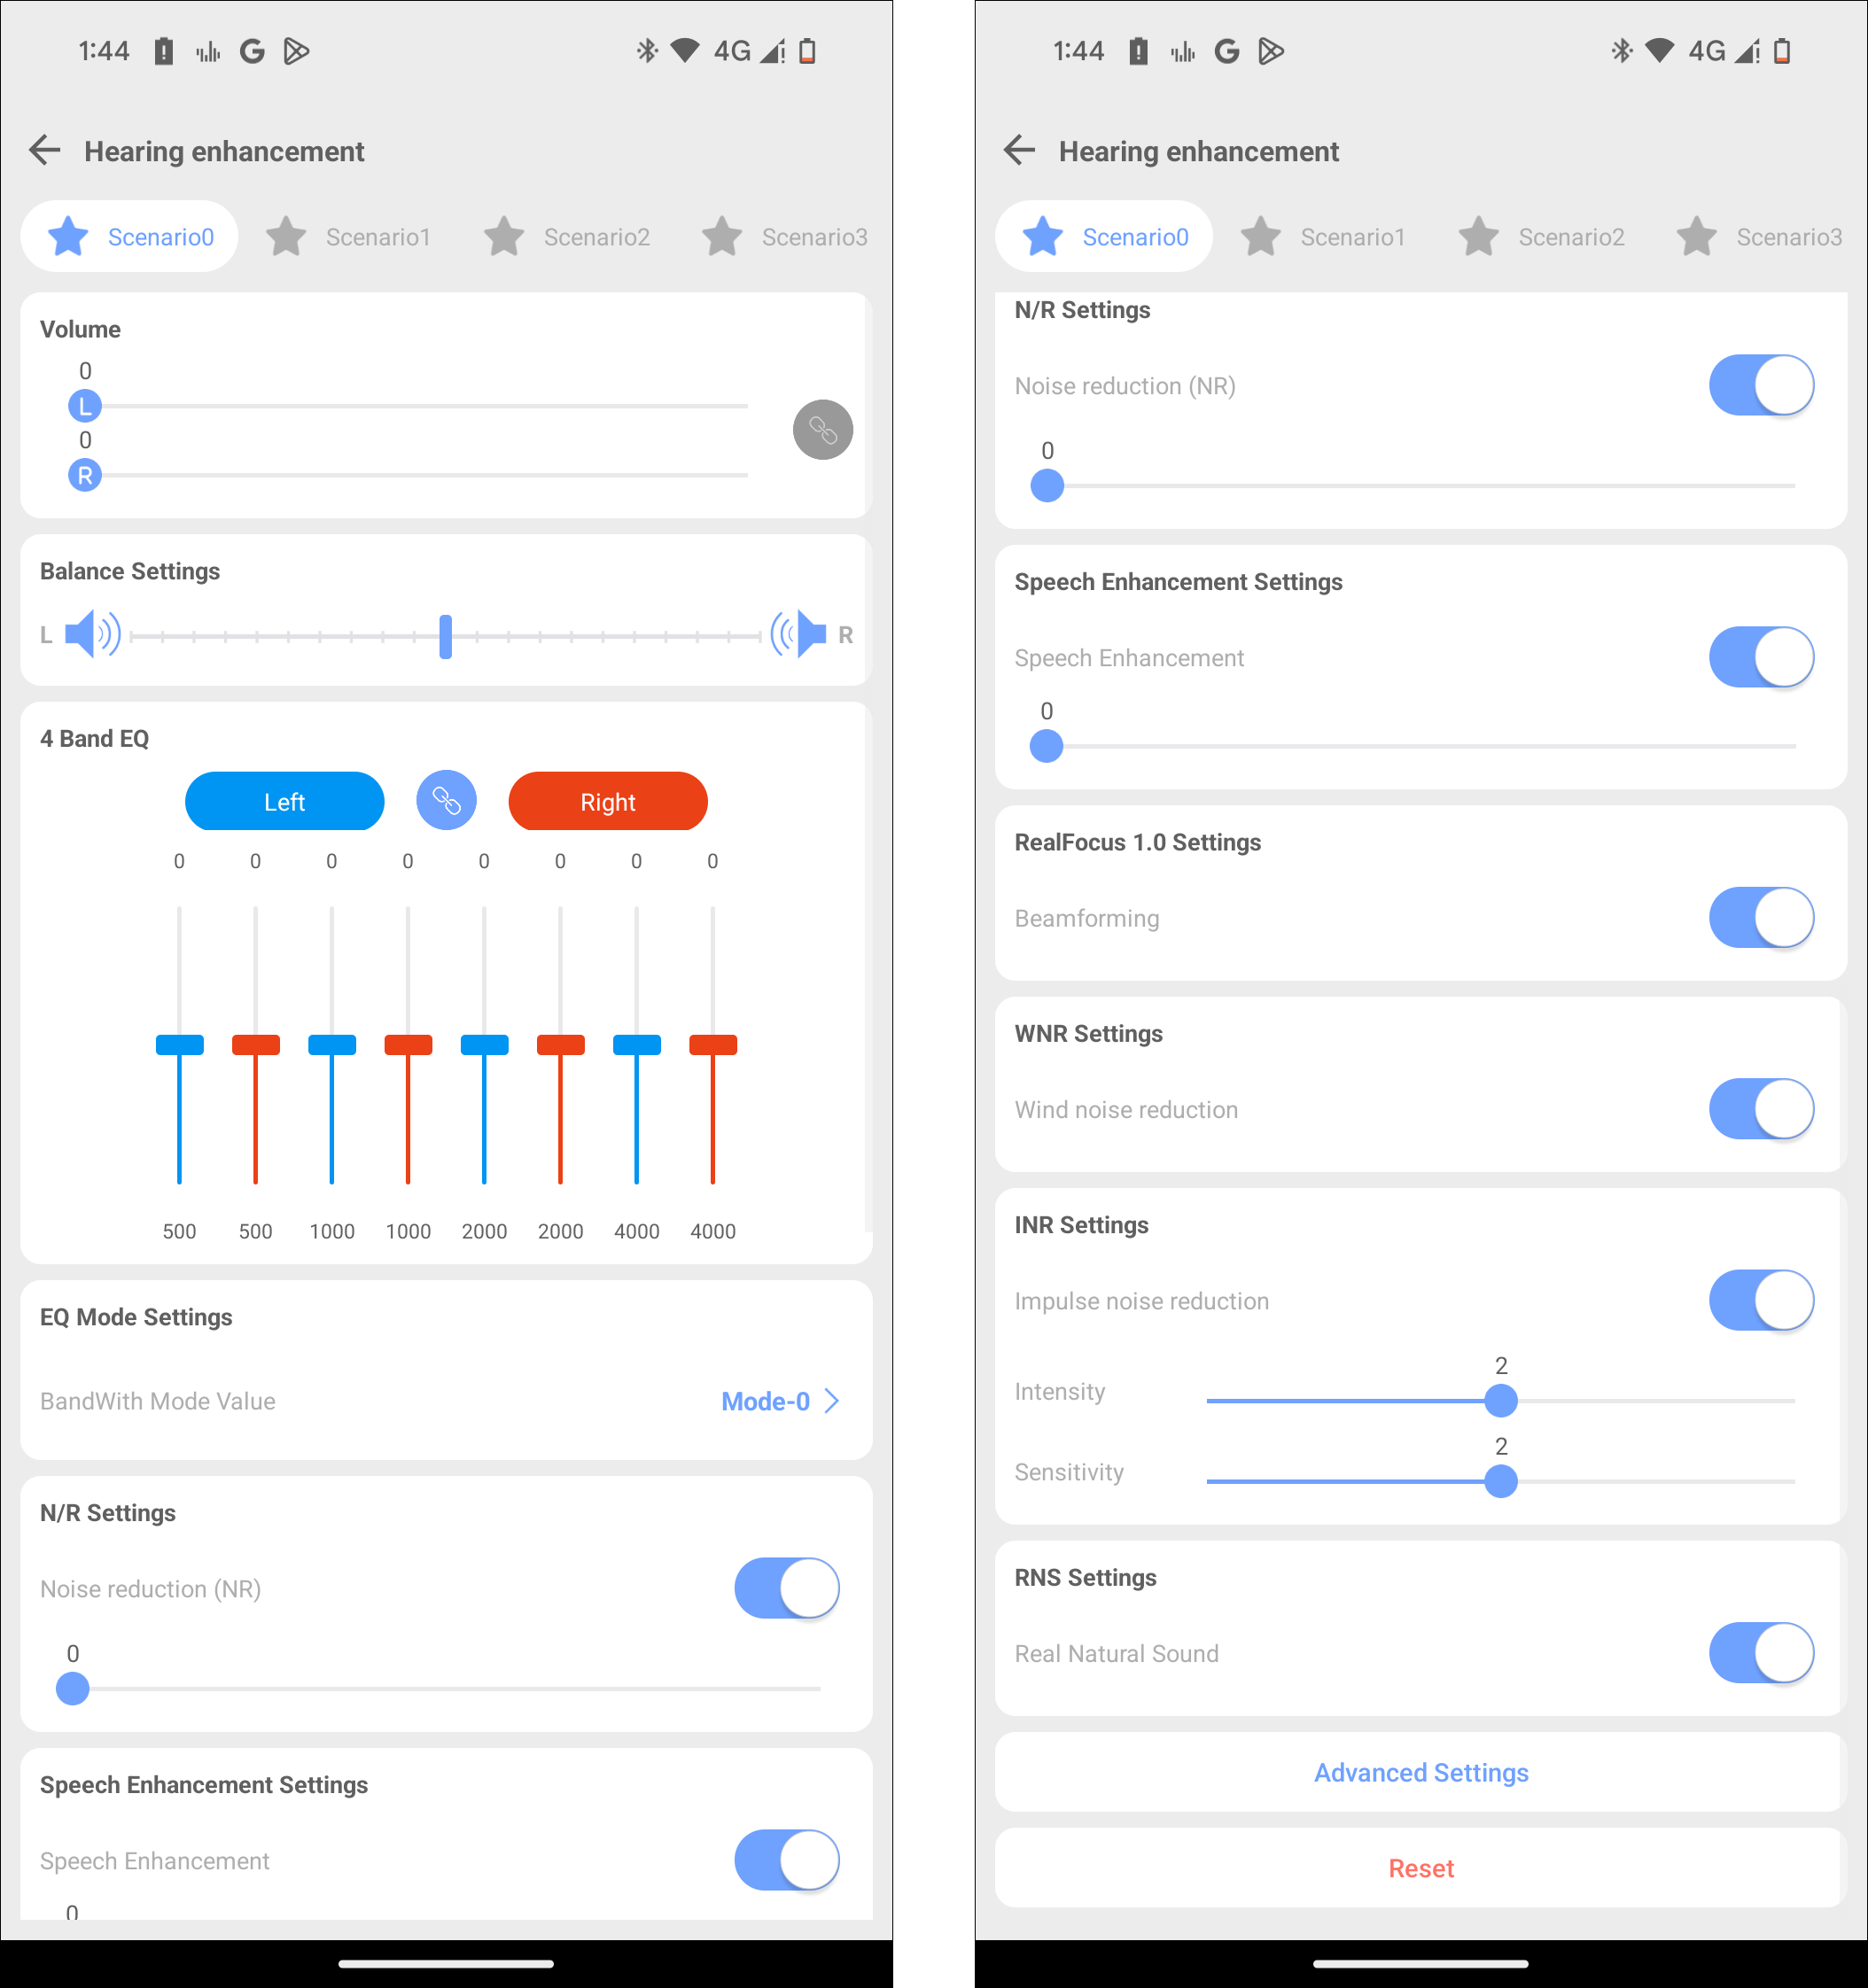
Scenario Function Settings
Currently supports the configuration of one or more sets of scene parameters, and multiple scene parameters can be switched and worked independently. When entering the hearing enhancement page, it will automatically display the number of scenes supported by the current device. Users can configure multiple sets of personalized scene parameters as needed.
The configurable parameters for each scenario is as shown below:
-
Environment Volume
The environment volume can be adjusted by dragging the sliders, and the adjustment range is 0~100.
-
Balance Settings
Dragging the slider to adjust the volume balance of the left and right ears, and the center of the slider is the initial balance position.
-
Graphic EQ
Currently supports 4 bands of graphical EQ adjustment. Users can adjust the Graphic EQ parameters of the left ear and right ear respectively according to the situation. When users click the Link button in the middle, the left and right ears will be adjusted at the same time. The adjustment range of each Band is -50~50. Up is equivalent to zooming in on Gain, and down is equivalent to reducing Gain.
-
Output DRC Settings
The output signal level can be controlled by the Output DRC function that reduces the volume of loud sounds.
-
Noise Reduction Settings
Intelligently suppress stationary and non-stationary noise mixed in the speech signal.
-
Speech Enhancement Settings
The Speech Enhancement function is used to enhance the speech component of input signal.
-
Beamforming Settings
The output signal highlights the sound source from the desired direction, while suppressing noises from other directions.
-
WNR Settings
The WNR function is use to mitigate the negative effects of wind noise.
-
INR Settings
The INR function is use to reduce the impact of sudden and impulsive noises on the user's hearing.
-
FBC Settings
An adaptive filter is used to model the feedback path. The output of the adaptive filter is subtracted from the microphone signal to cancel the acoustic and mechanical feedback picked up by the microphone, thus allowing more gain in the hearing aid.
-
Other Settings
Integrate some rarely used features for internal debugging.
-
Reset
Reset all settings in the current scene, such as the scene name, NR value, EQ values, etc.
Click the Reset button below to restore the current scene parameters to the initial state.
Real Hearing Assessment
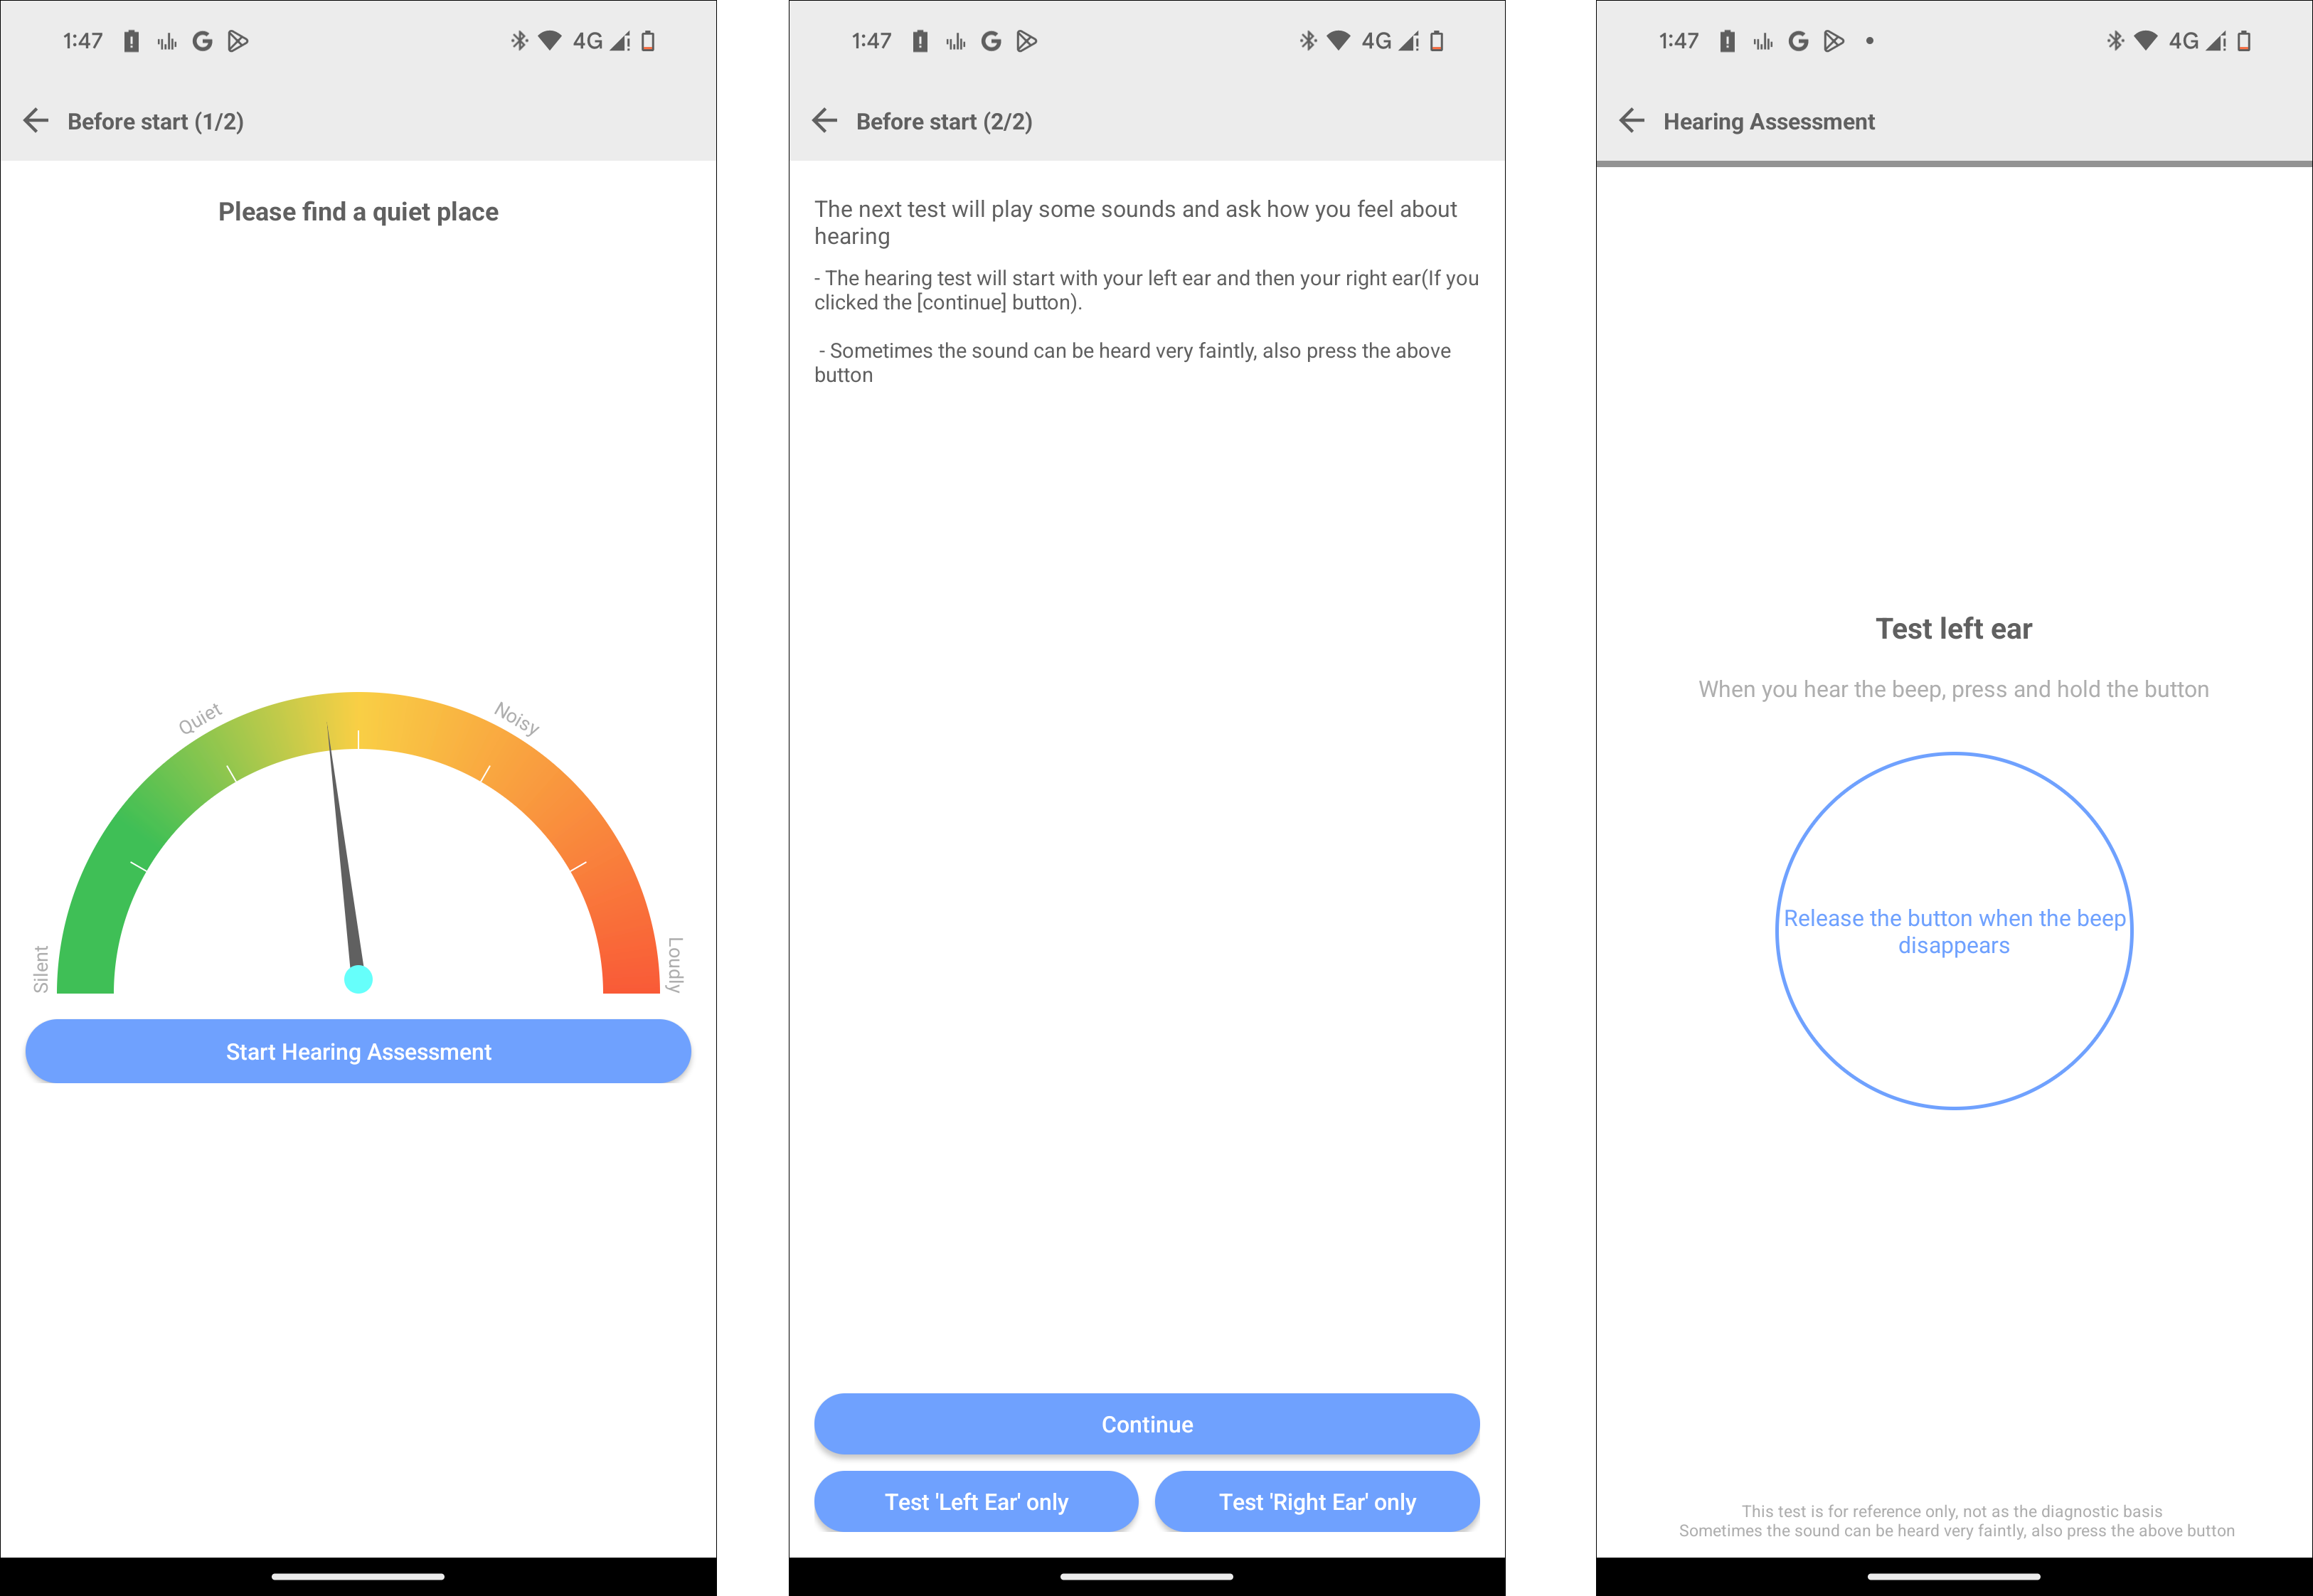
Hearing Test
-
Check Noise
Please find a quiet place before starting.
-
Locate to Specified Location
Click Start Hearing Assessment button, and please do not change the system volume.
-
Hearing Test
Click Continue or Test 'Left Ear' only, Test 'Right Ear' only button to start the hearing test.
Real Hearing Compensation
Input Audiogram
Please input the frequency of the left and right ears and the measured hearing threshold respectively below.
Users can add or remove thresholds.
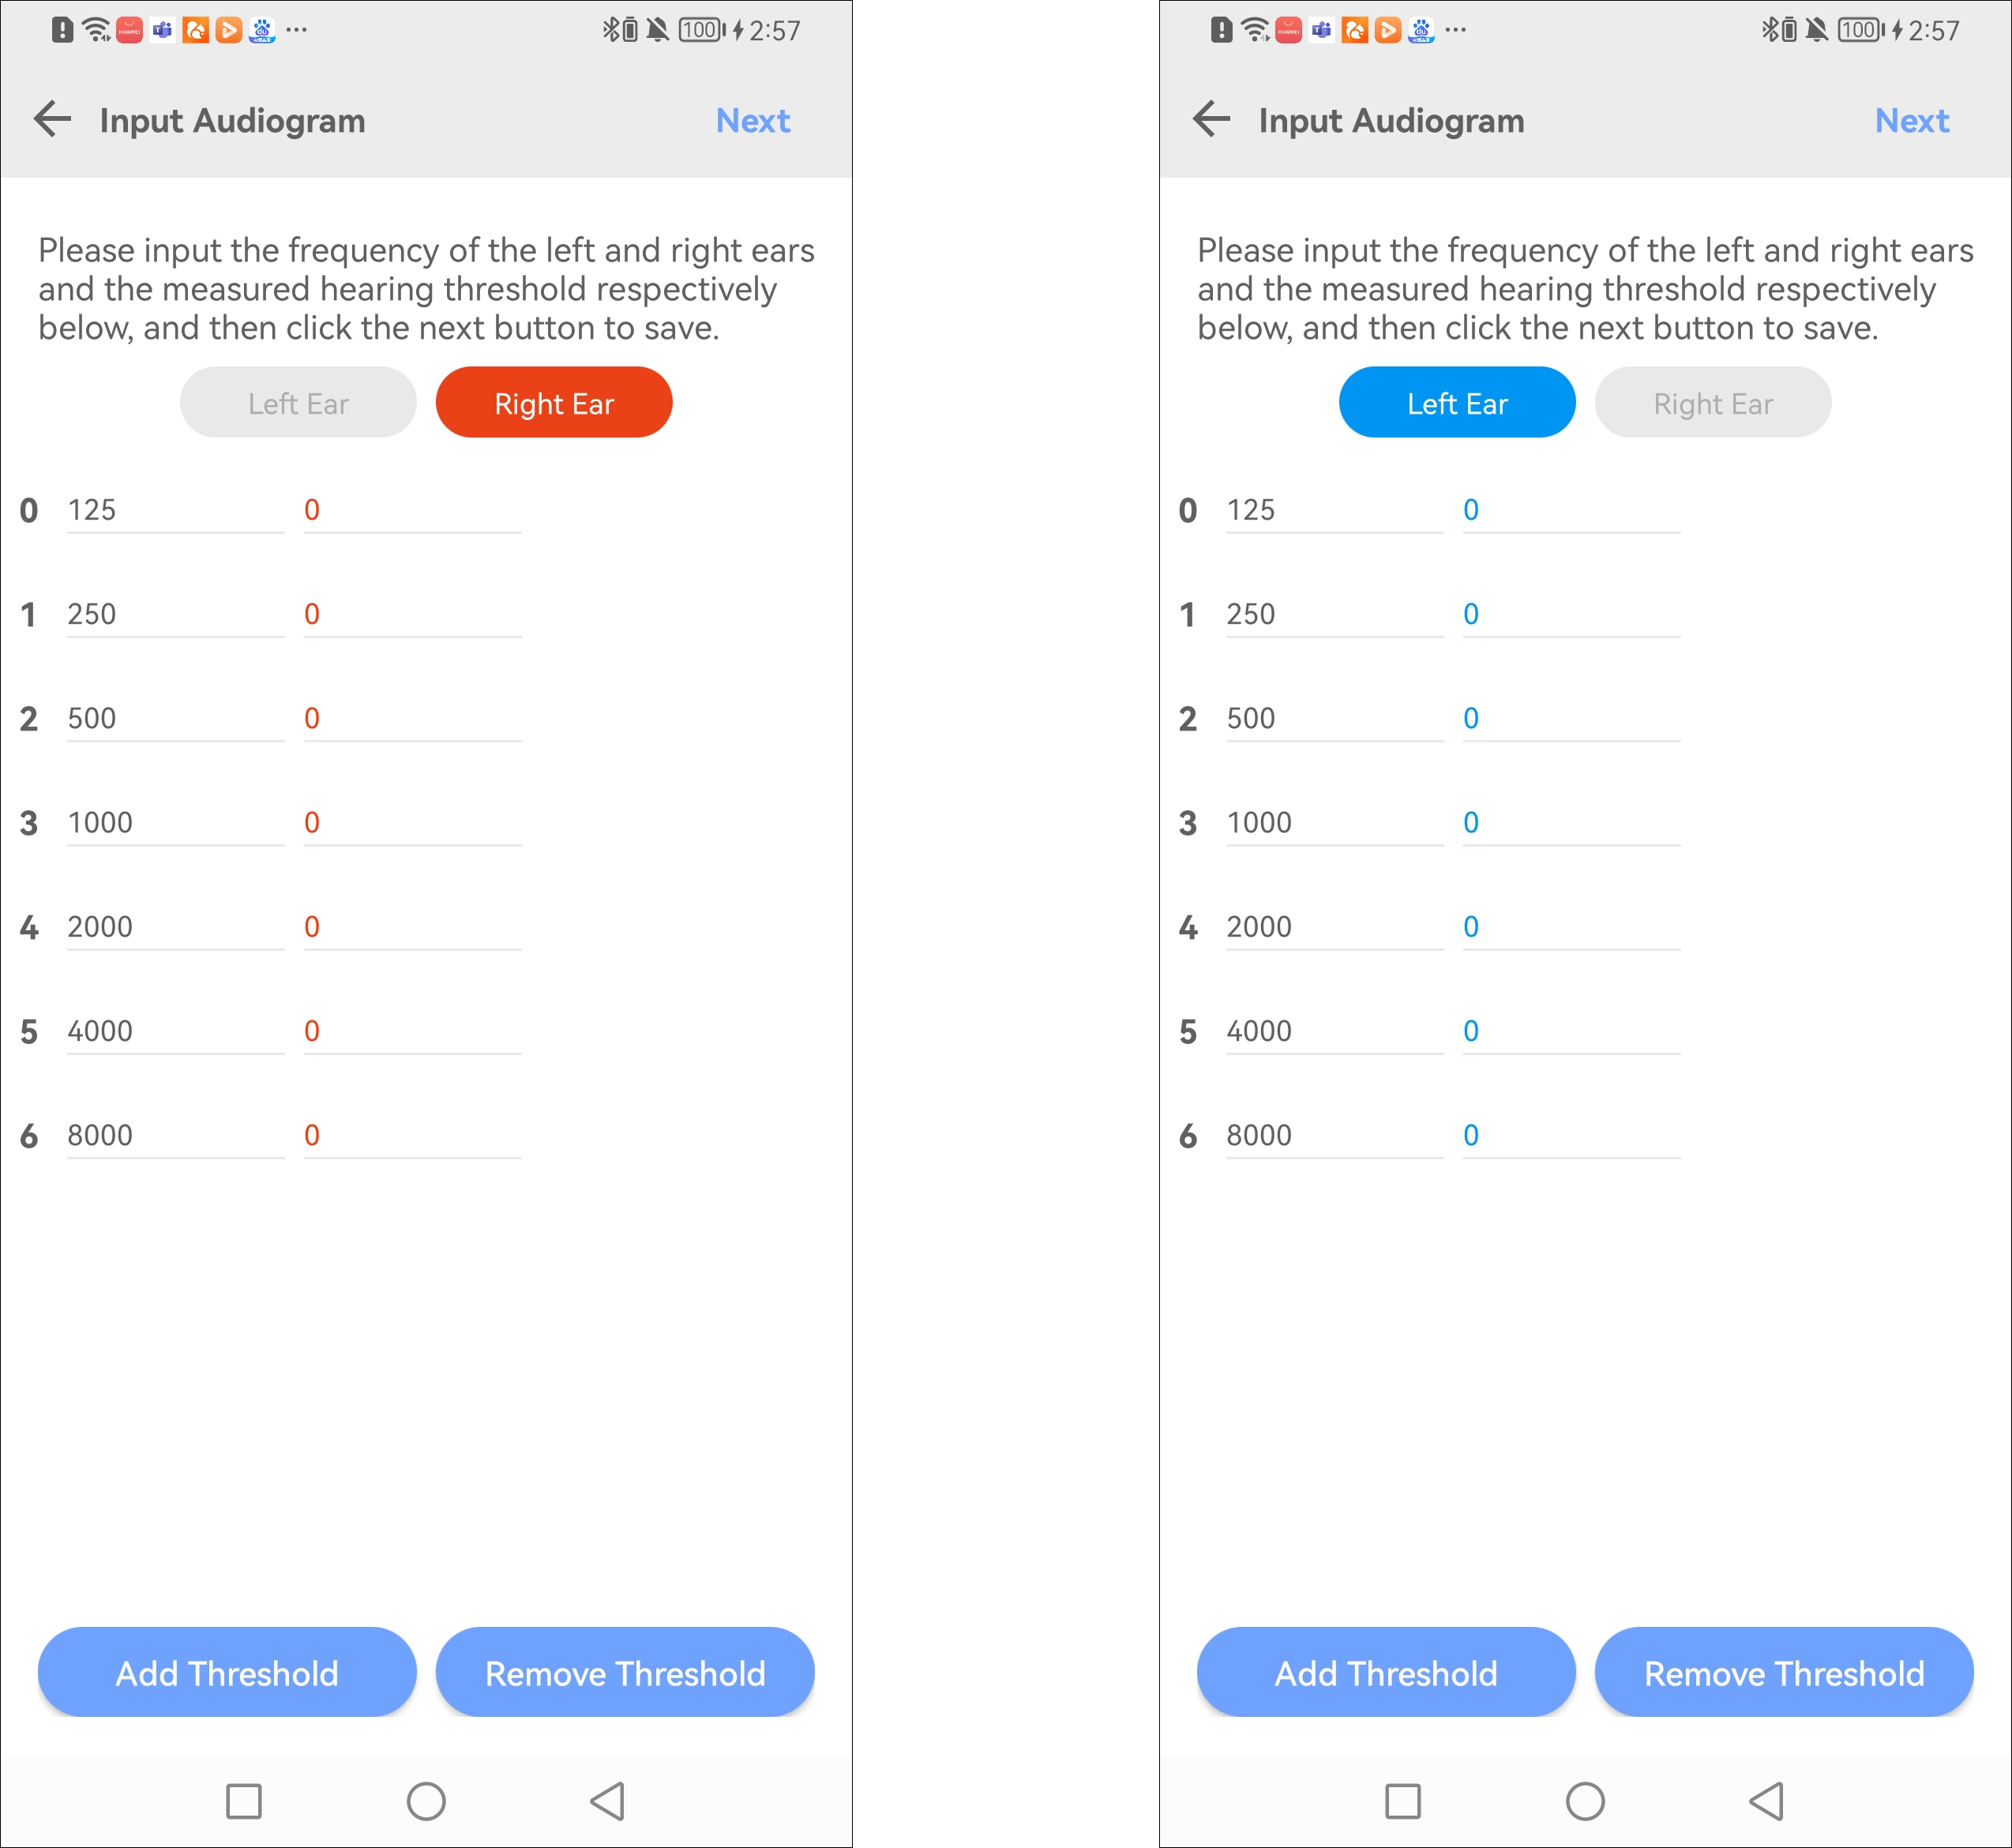
Input Audiogram
Input Confirm
Here is the audiogram user input.
Click Save Hearing Compensation Data button to save completely. For EQ that supports SPK EQ Compensation capability, the hearing compensation data can be used to adjust the gain of the EQ. Refer to EQ Hearing Compensation.
Click Apply to hearing buds button to apply to earphones.
Click Remove from hearing buds button to remove from earphones.

Input Confirm
ANC
ANC EQ
Please refer to ANC Mode EQ.
Toggle Scenario
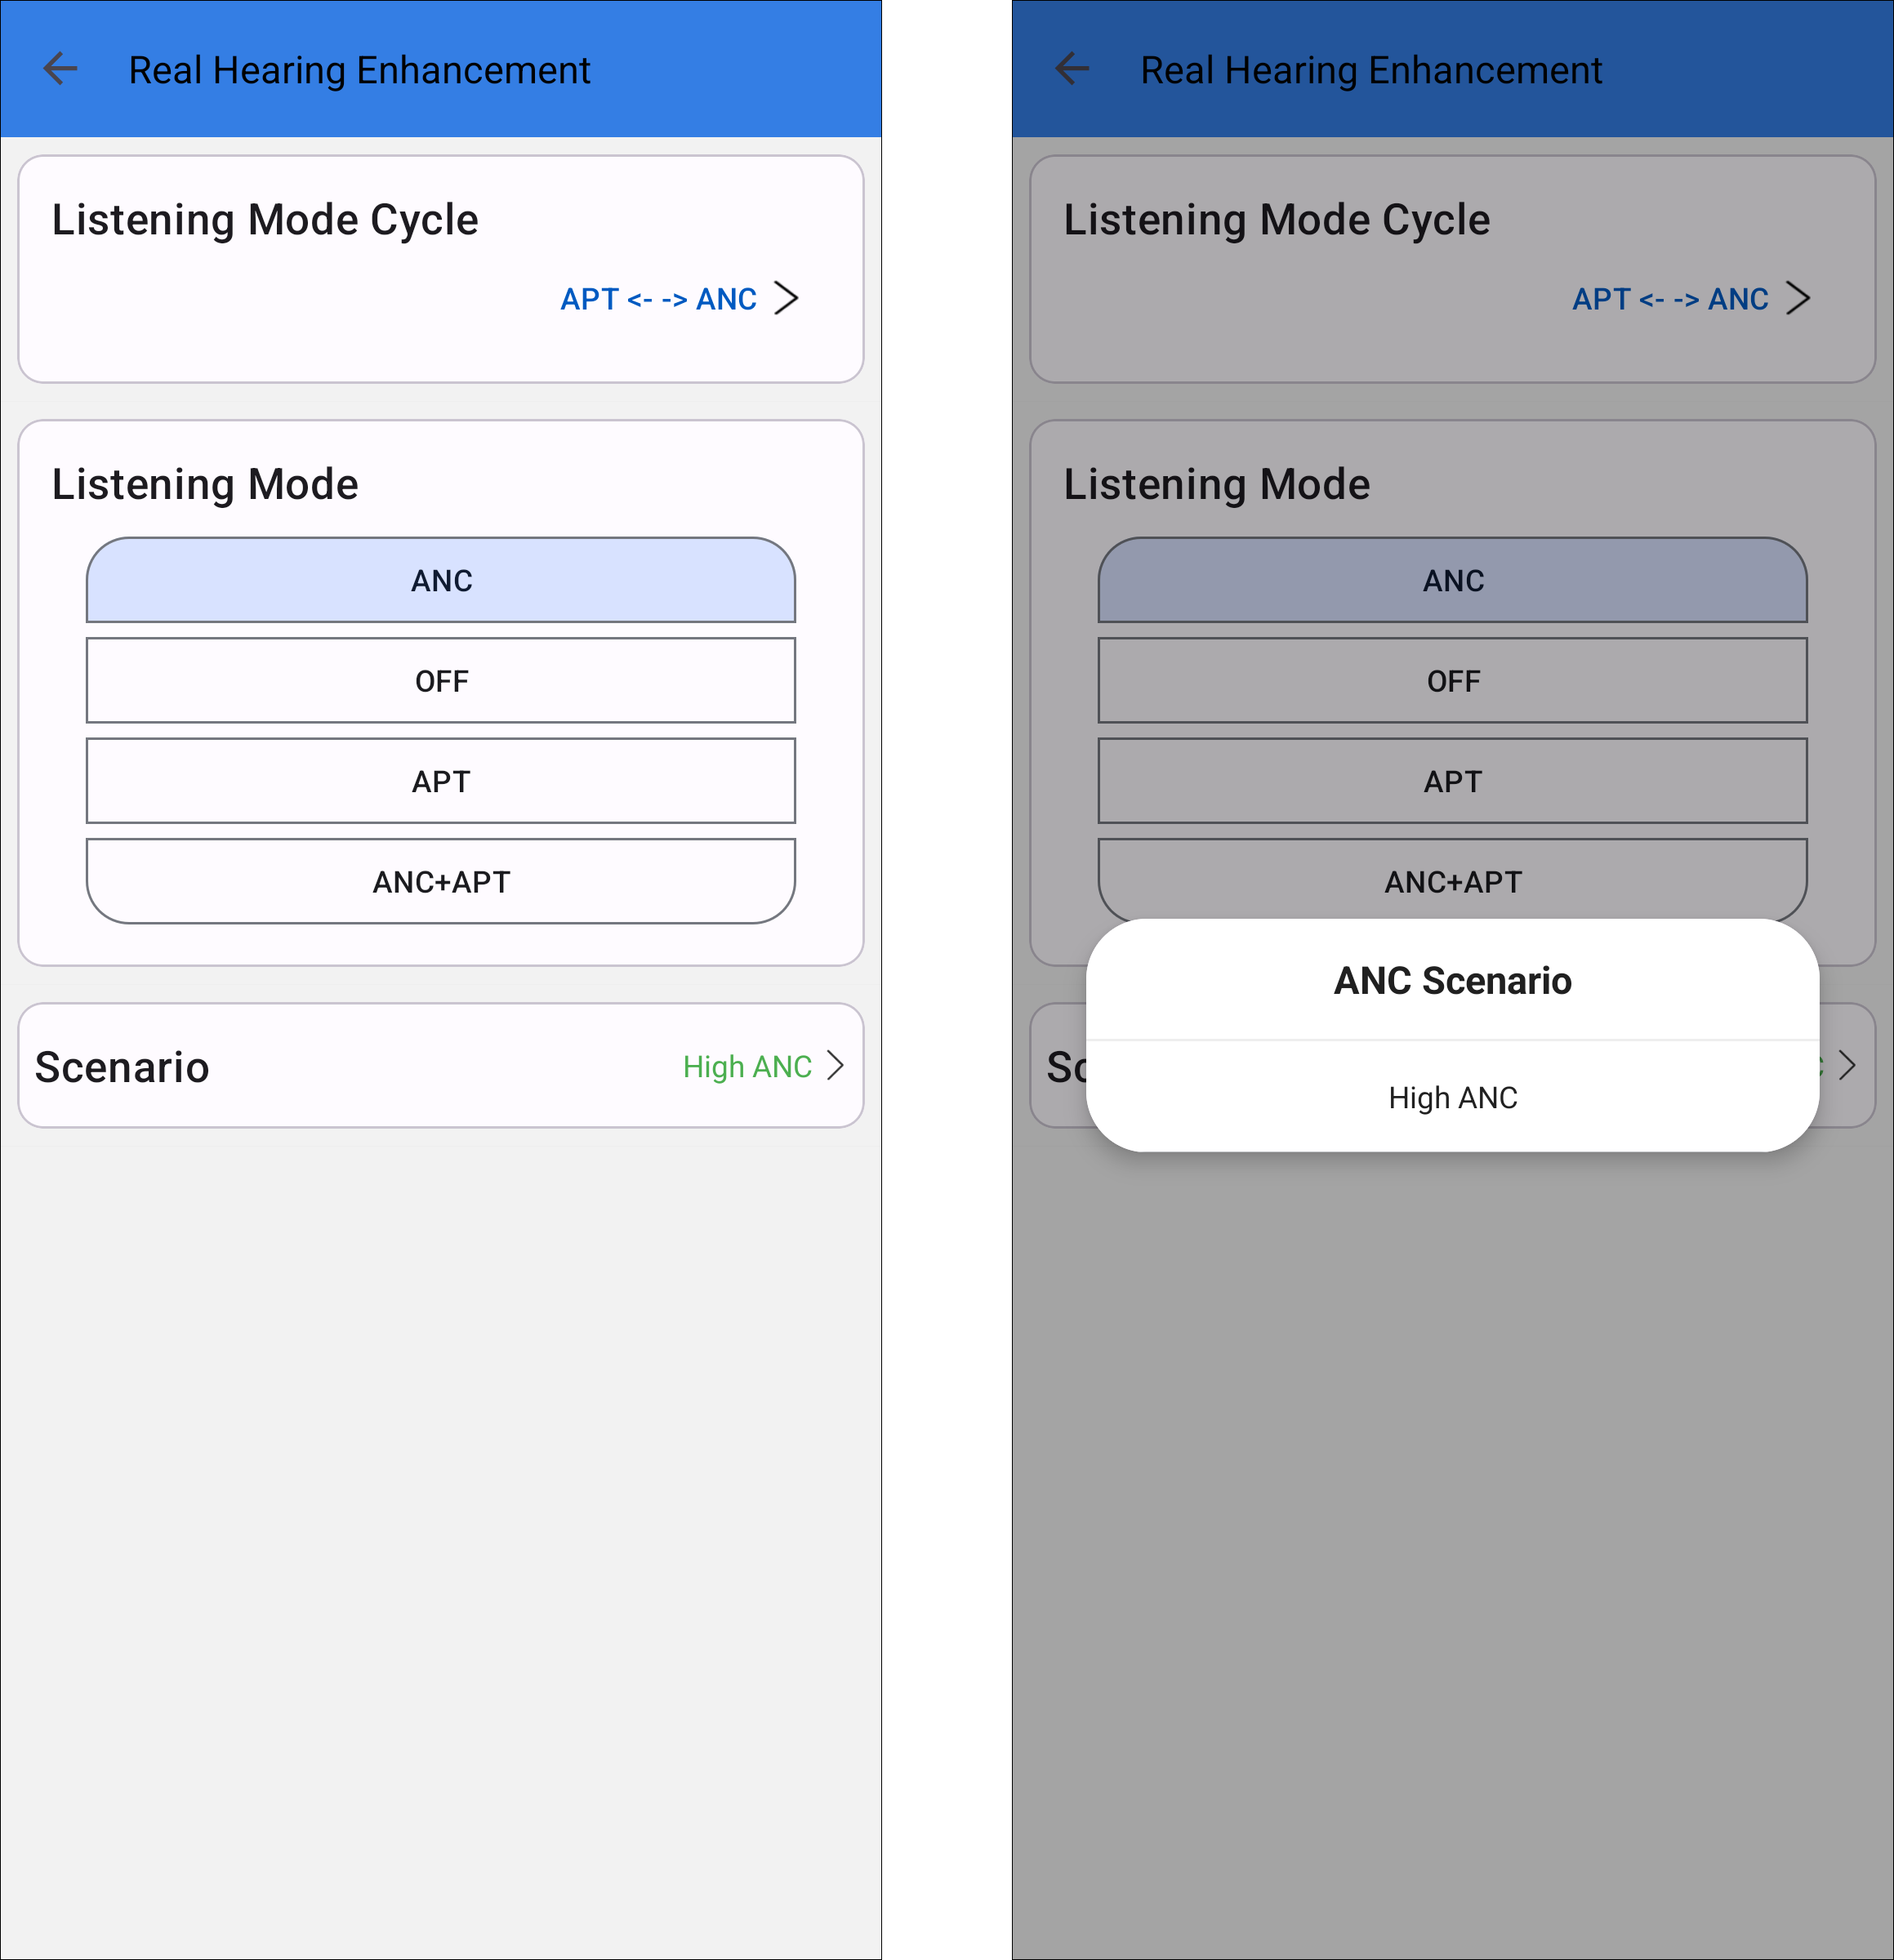
Toggle Scenario
Scenario Group
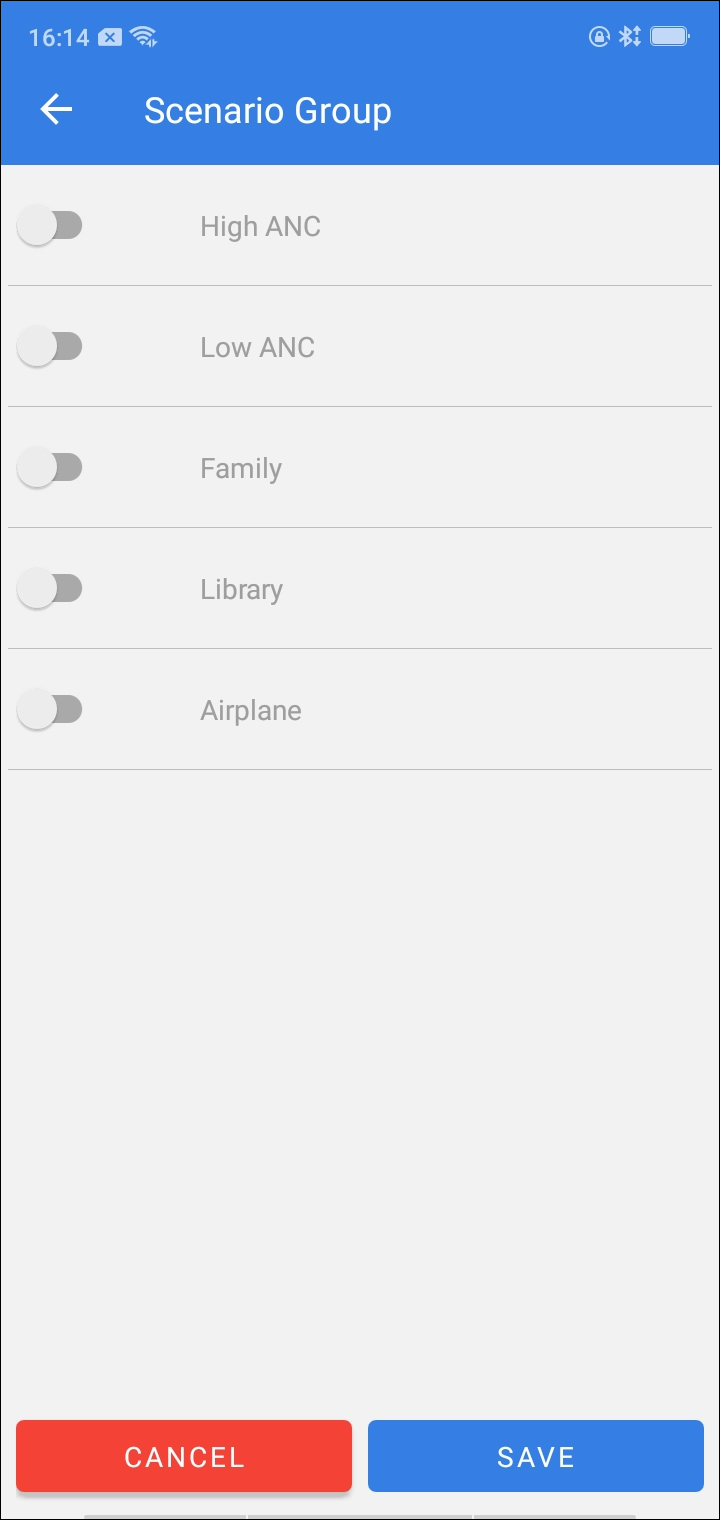
Scenario Group
Gaming Mode
When the gaming mode is turned on, the latency level can be adjusted, and each level corresponds to a different latency value.
When the gaming mode is turned off, the latency level cannot be adjusted. No matter what the current latency level is, the corresponding latency value is the default value of 280ms.
Toggle Gaming Mode
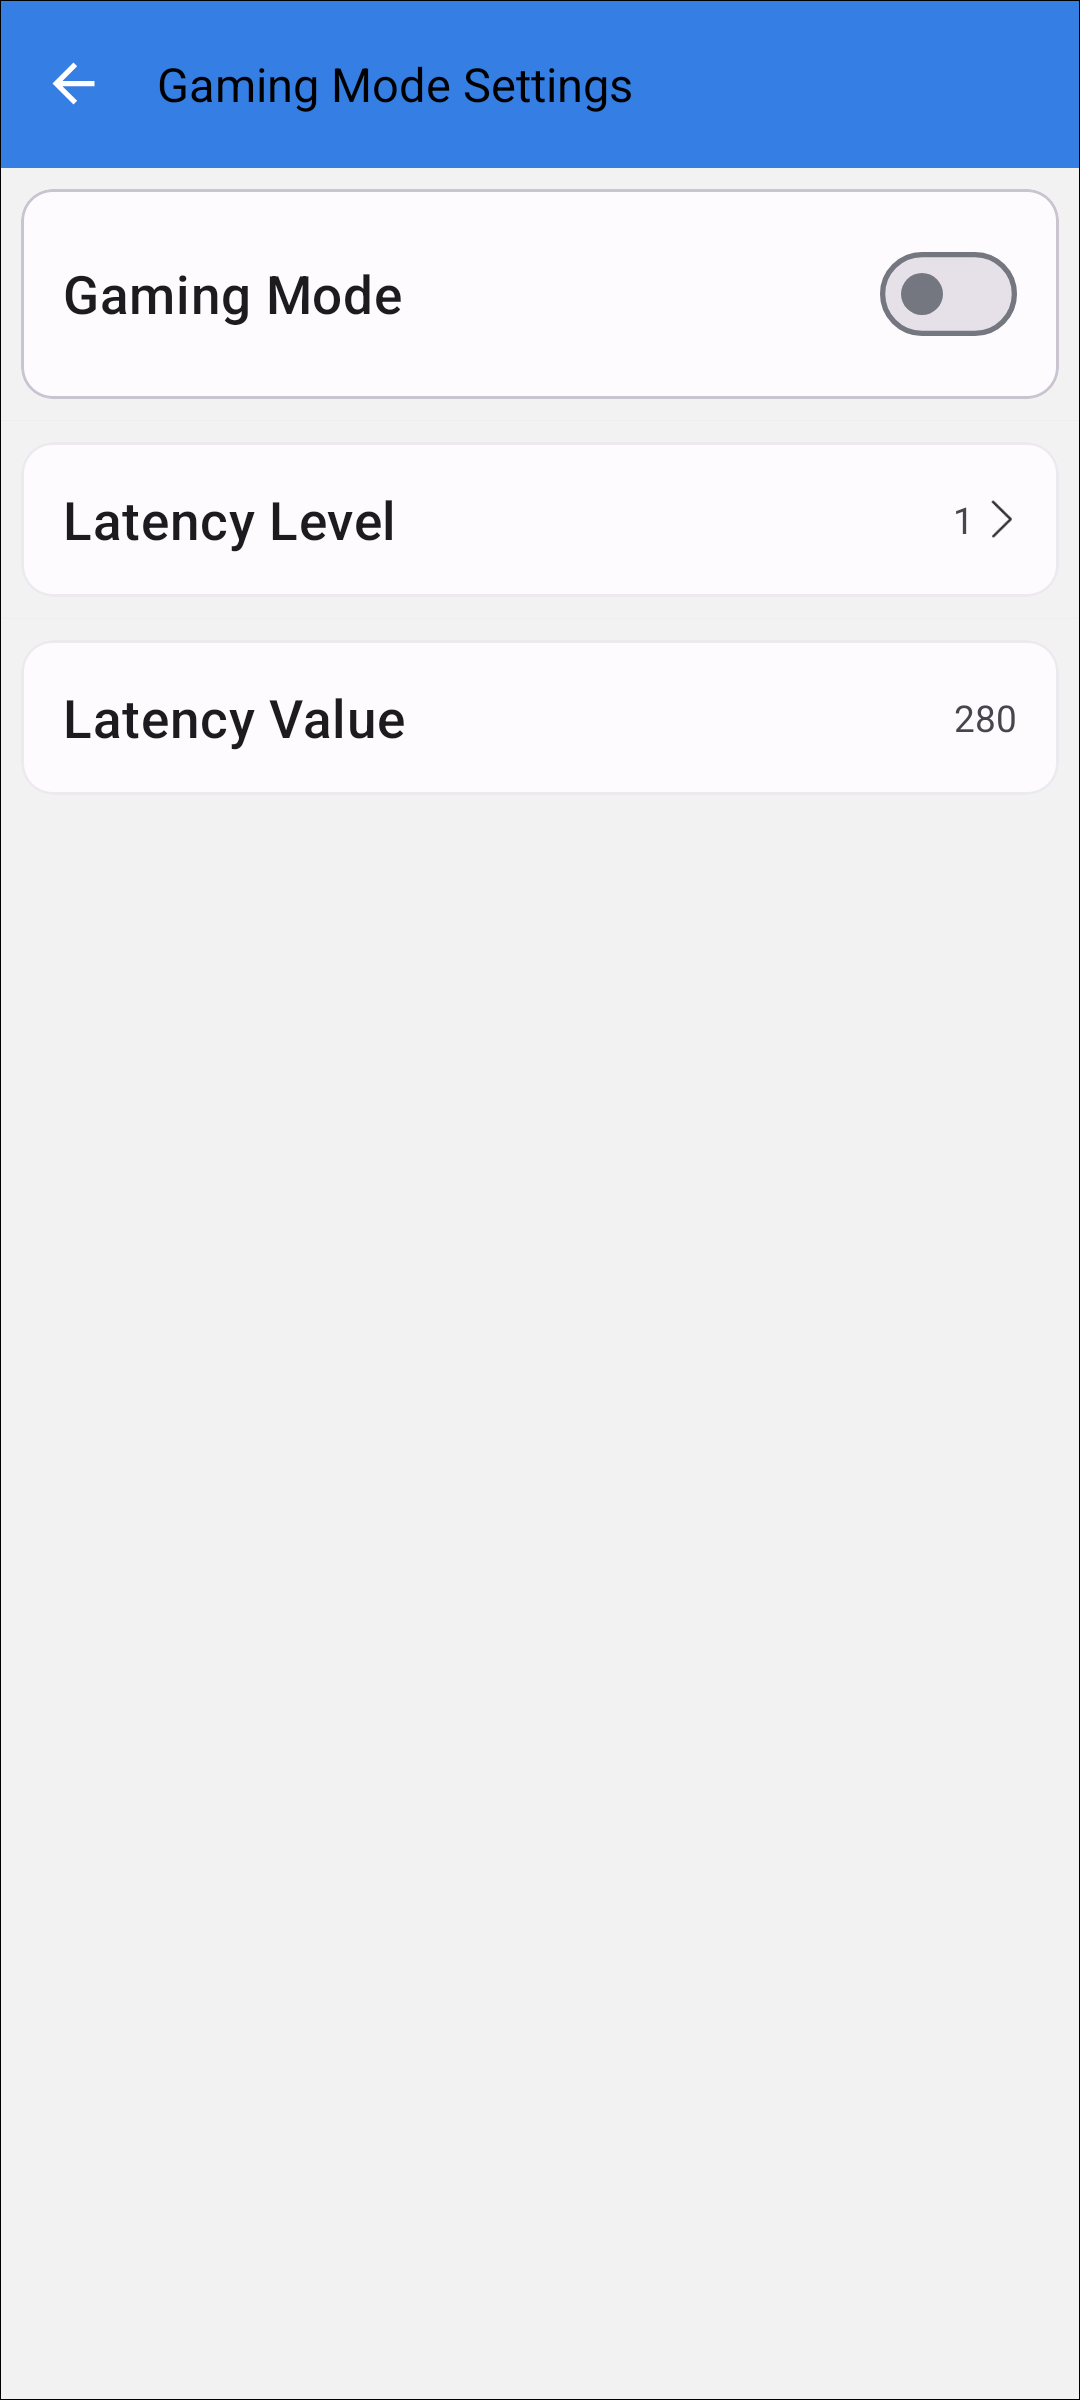
Toggle Gaming Mode
Set Latency Level
Supports 5 different level settings.
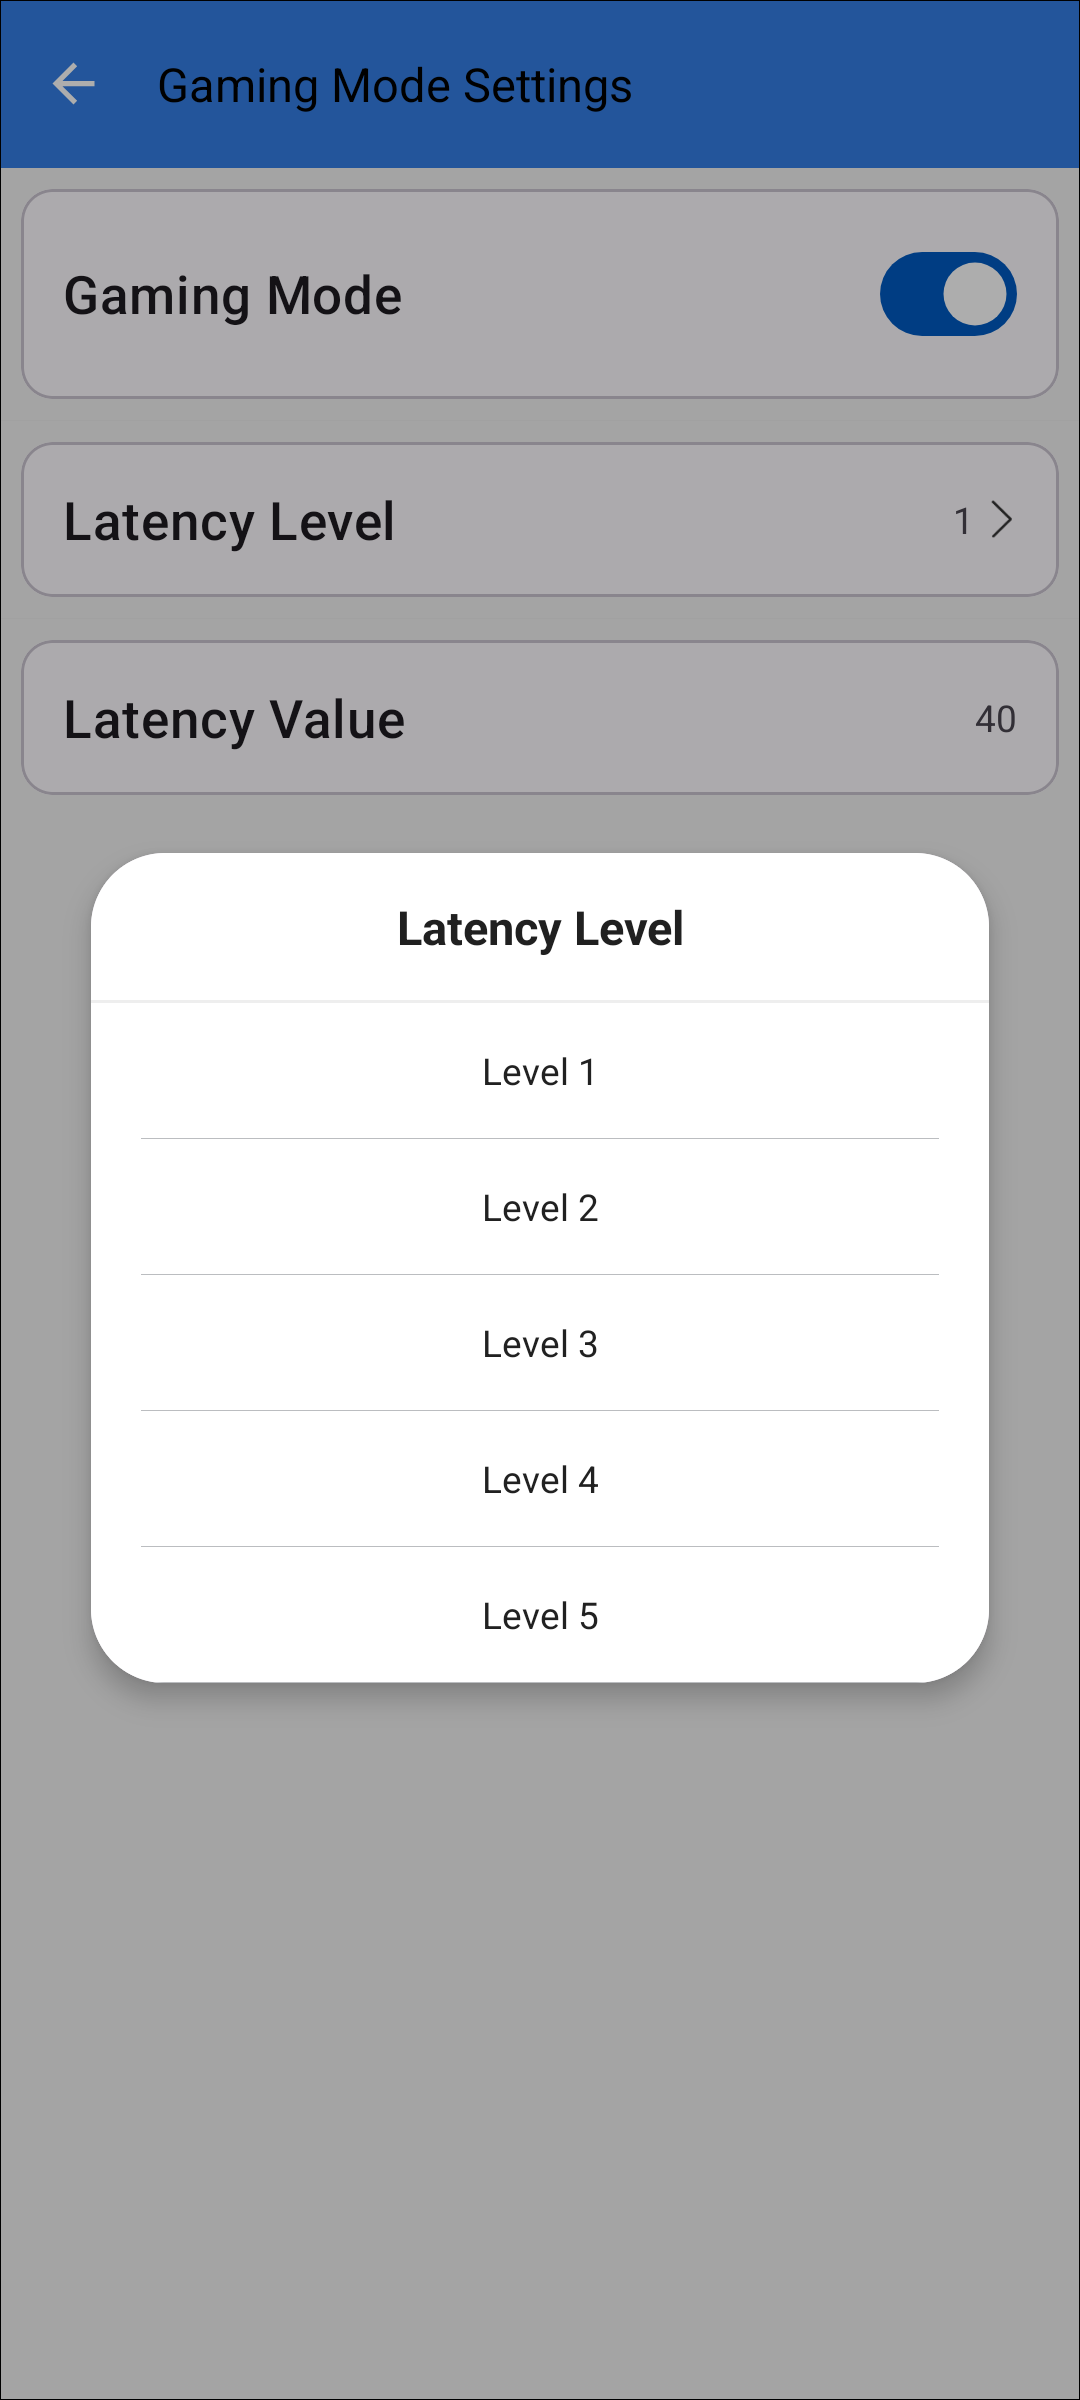
Set Latency Level
Notification
VP/Ringtone Volume
Set the volume level of VP/Ringtone. When the sync switch is turned on, the volume of the left and right ears remains the same. When the sync switch is turned off, the left and right ears can be adjusted separately. After the earphones are in the box, hide the slider bar and volume.

VP Ringtone Volume
VP Language
Modify the voice broadcast language.
Note
VP currently only supports English.

Modify VP Language
Equalizer
This chapter introduces two types of EQ, Speaker Audio EQ and Voice EQ.
Each mode of EQ can do quick setting, save, reset and change EQ index.
Only use the template quick set when stage number is 10.
Equalizer
Among them, the save button is inoperable by default. Only when the current UI parameters change, the button becomes operable. The user can click to realize the save function. After the operateion is completed, the button becomes the default state (inoperable).
If the current interface parameters have changed, and the user has not clicked the save button, if the user directly returns, a dialog will pop up asking whether to save the current sound effects.
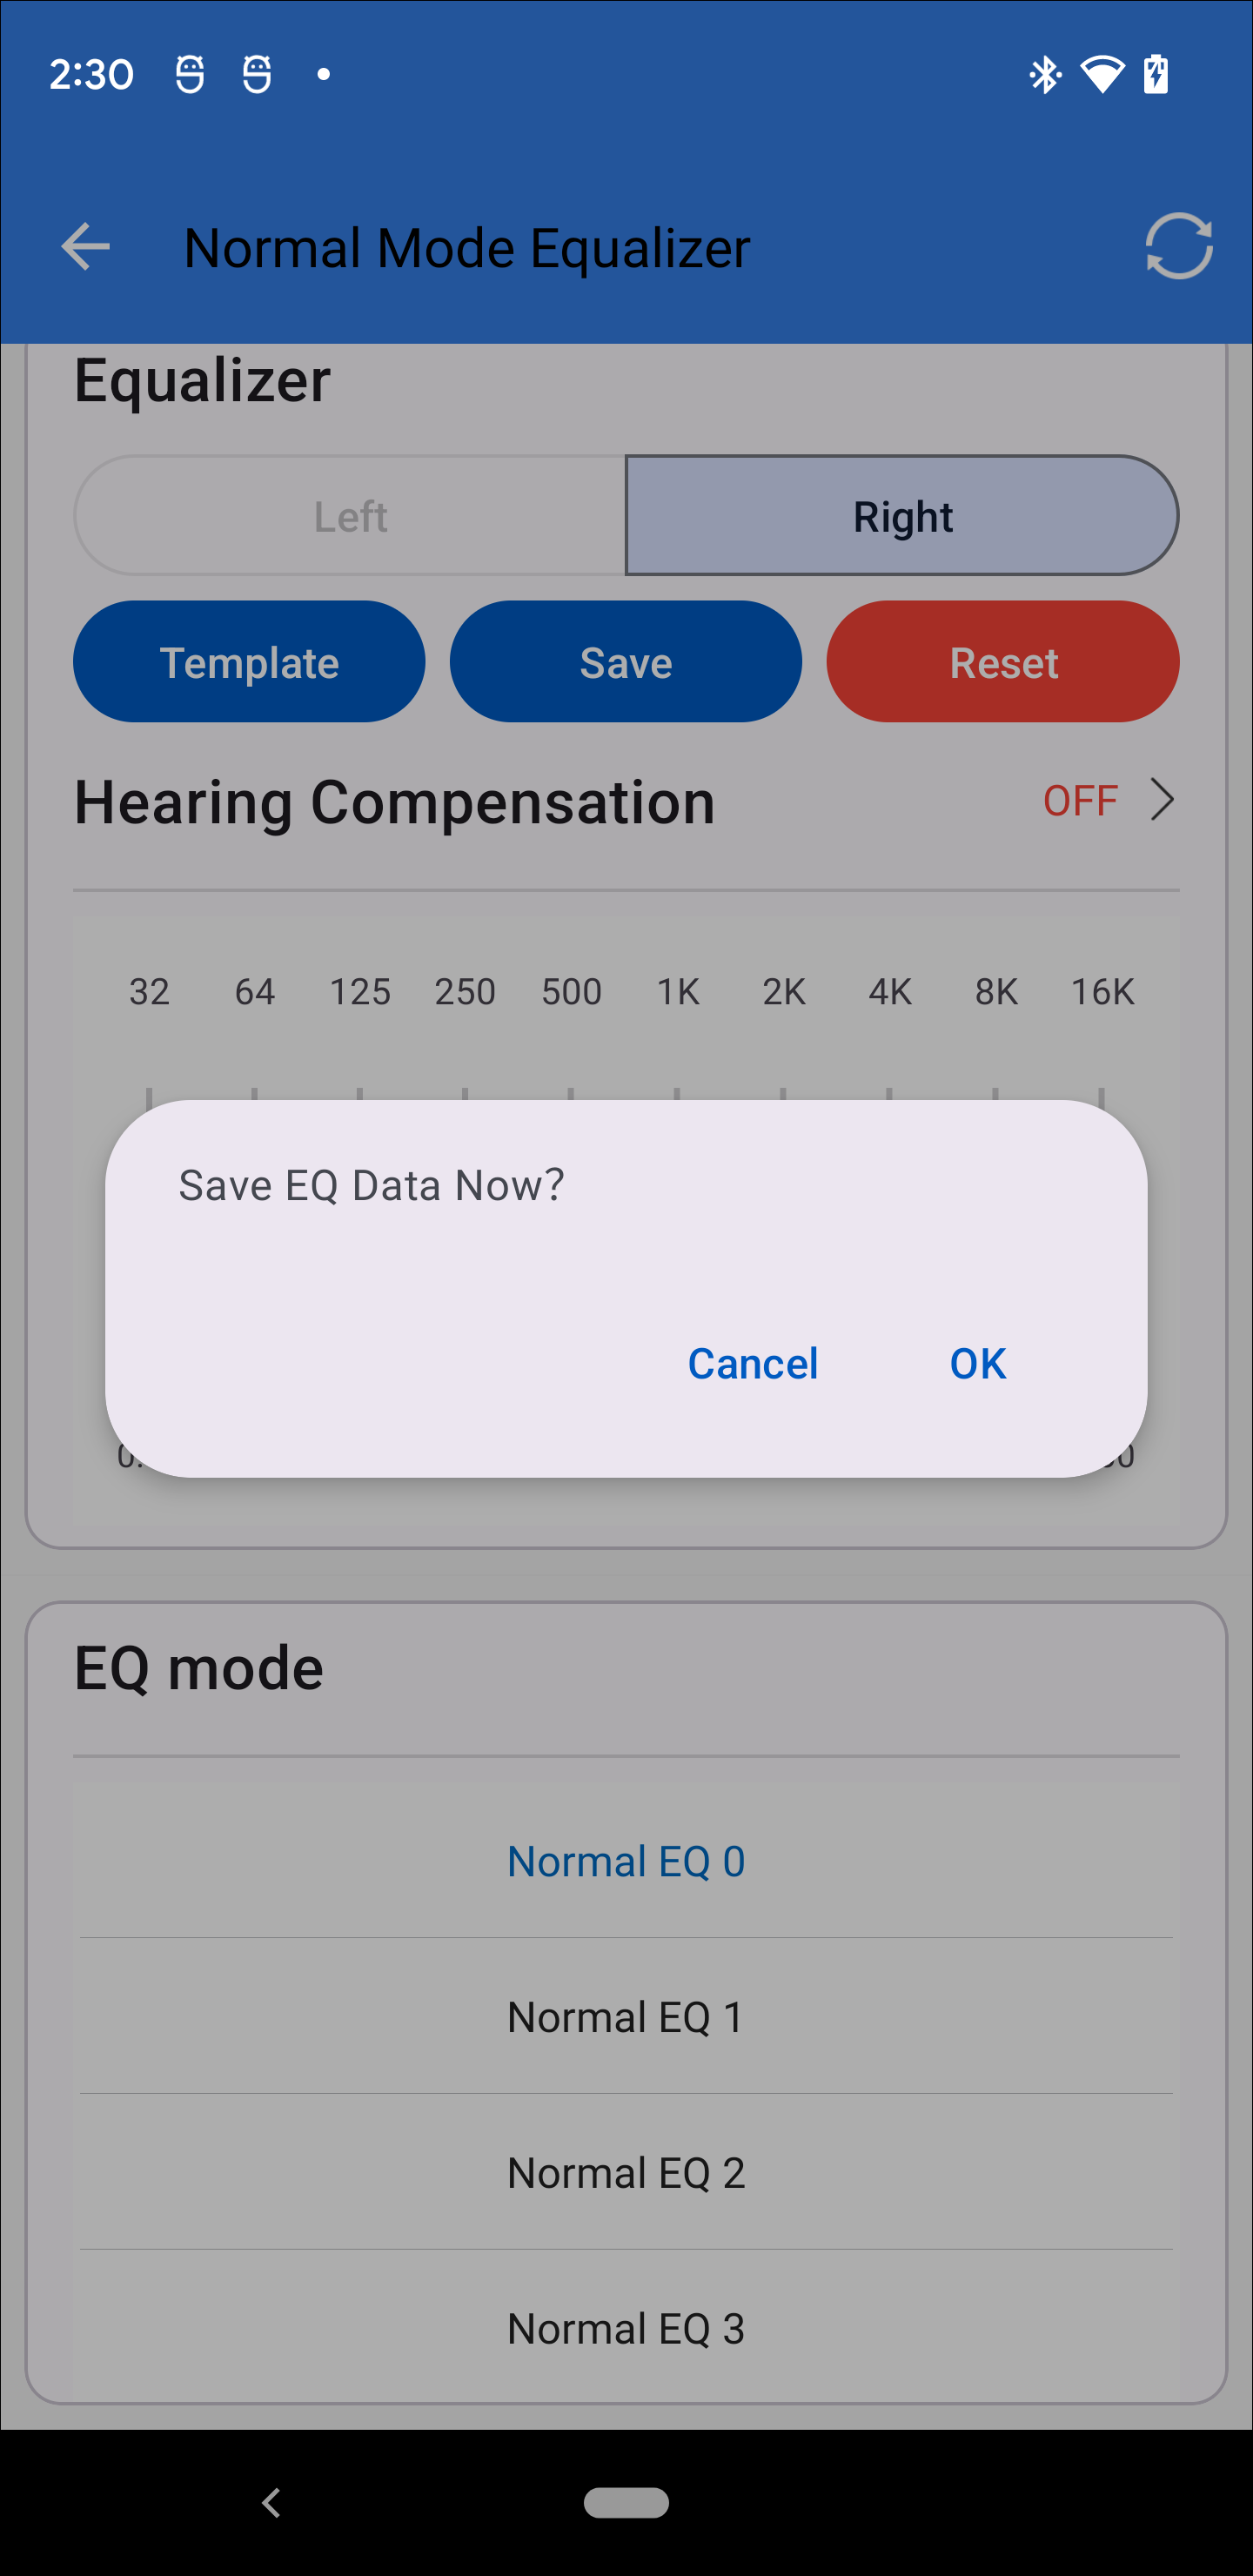
Save EQ Data
Speaker Audio EQ
There are three modes of Speaker Audio EQ. Only one EQ Mode can be used at the same time. The priority is Gaming Mode EQ, ANC Mode EQ, and Normal Mode EQ from high to low.
For Speaker Audio EQ, if Music is not playing, EQ is not recommended.
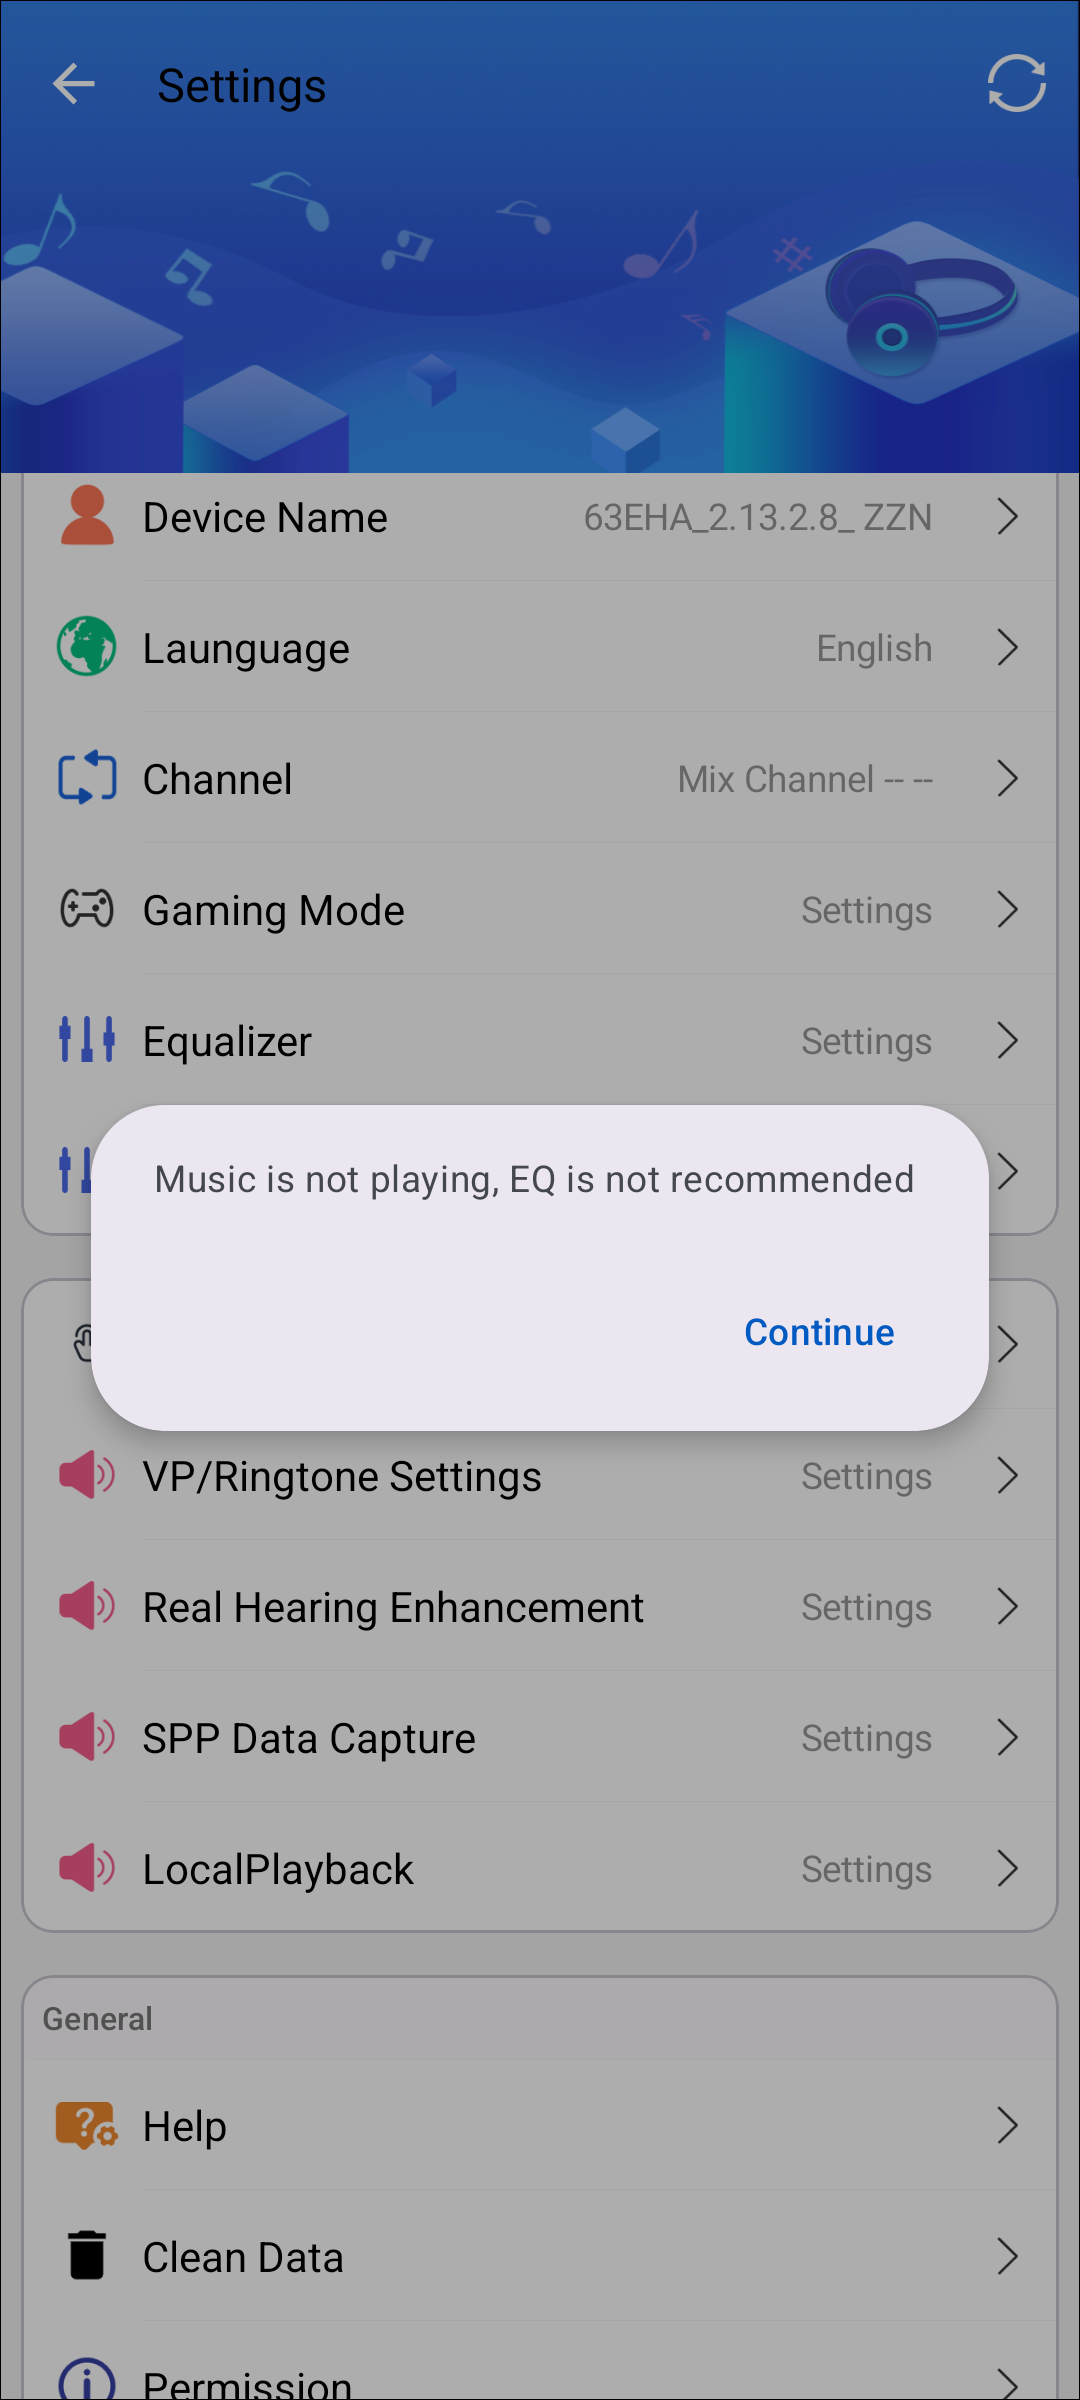
Music is Not Playing Prompt
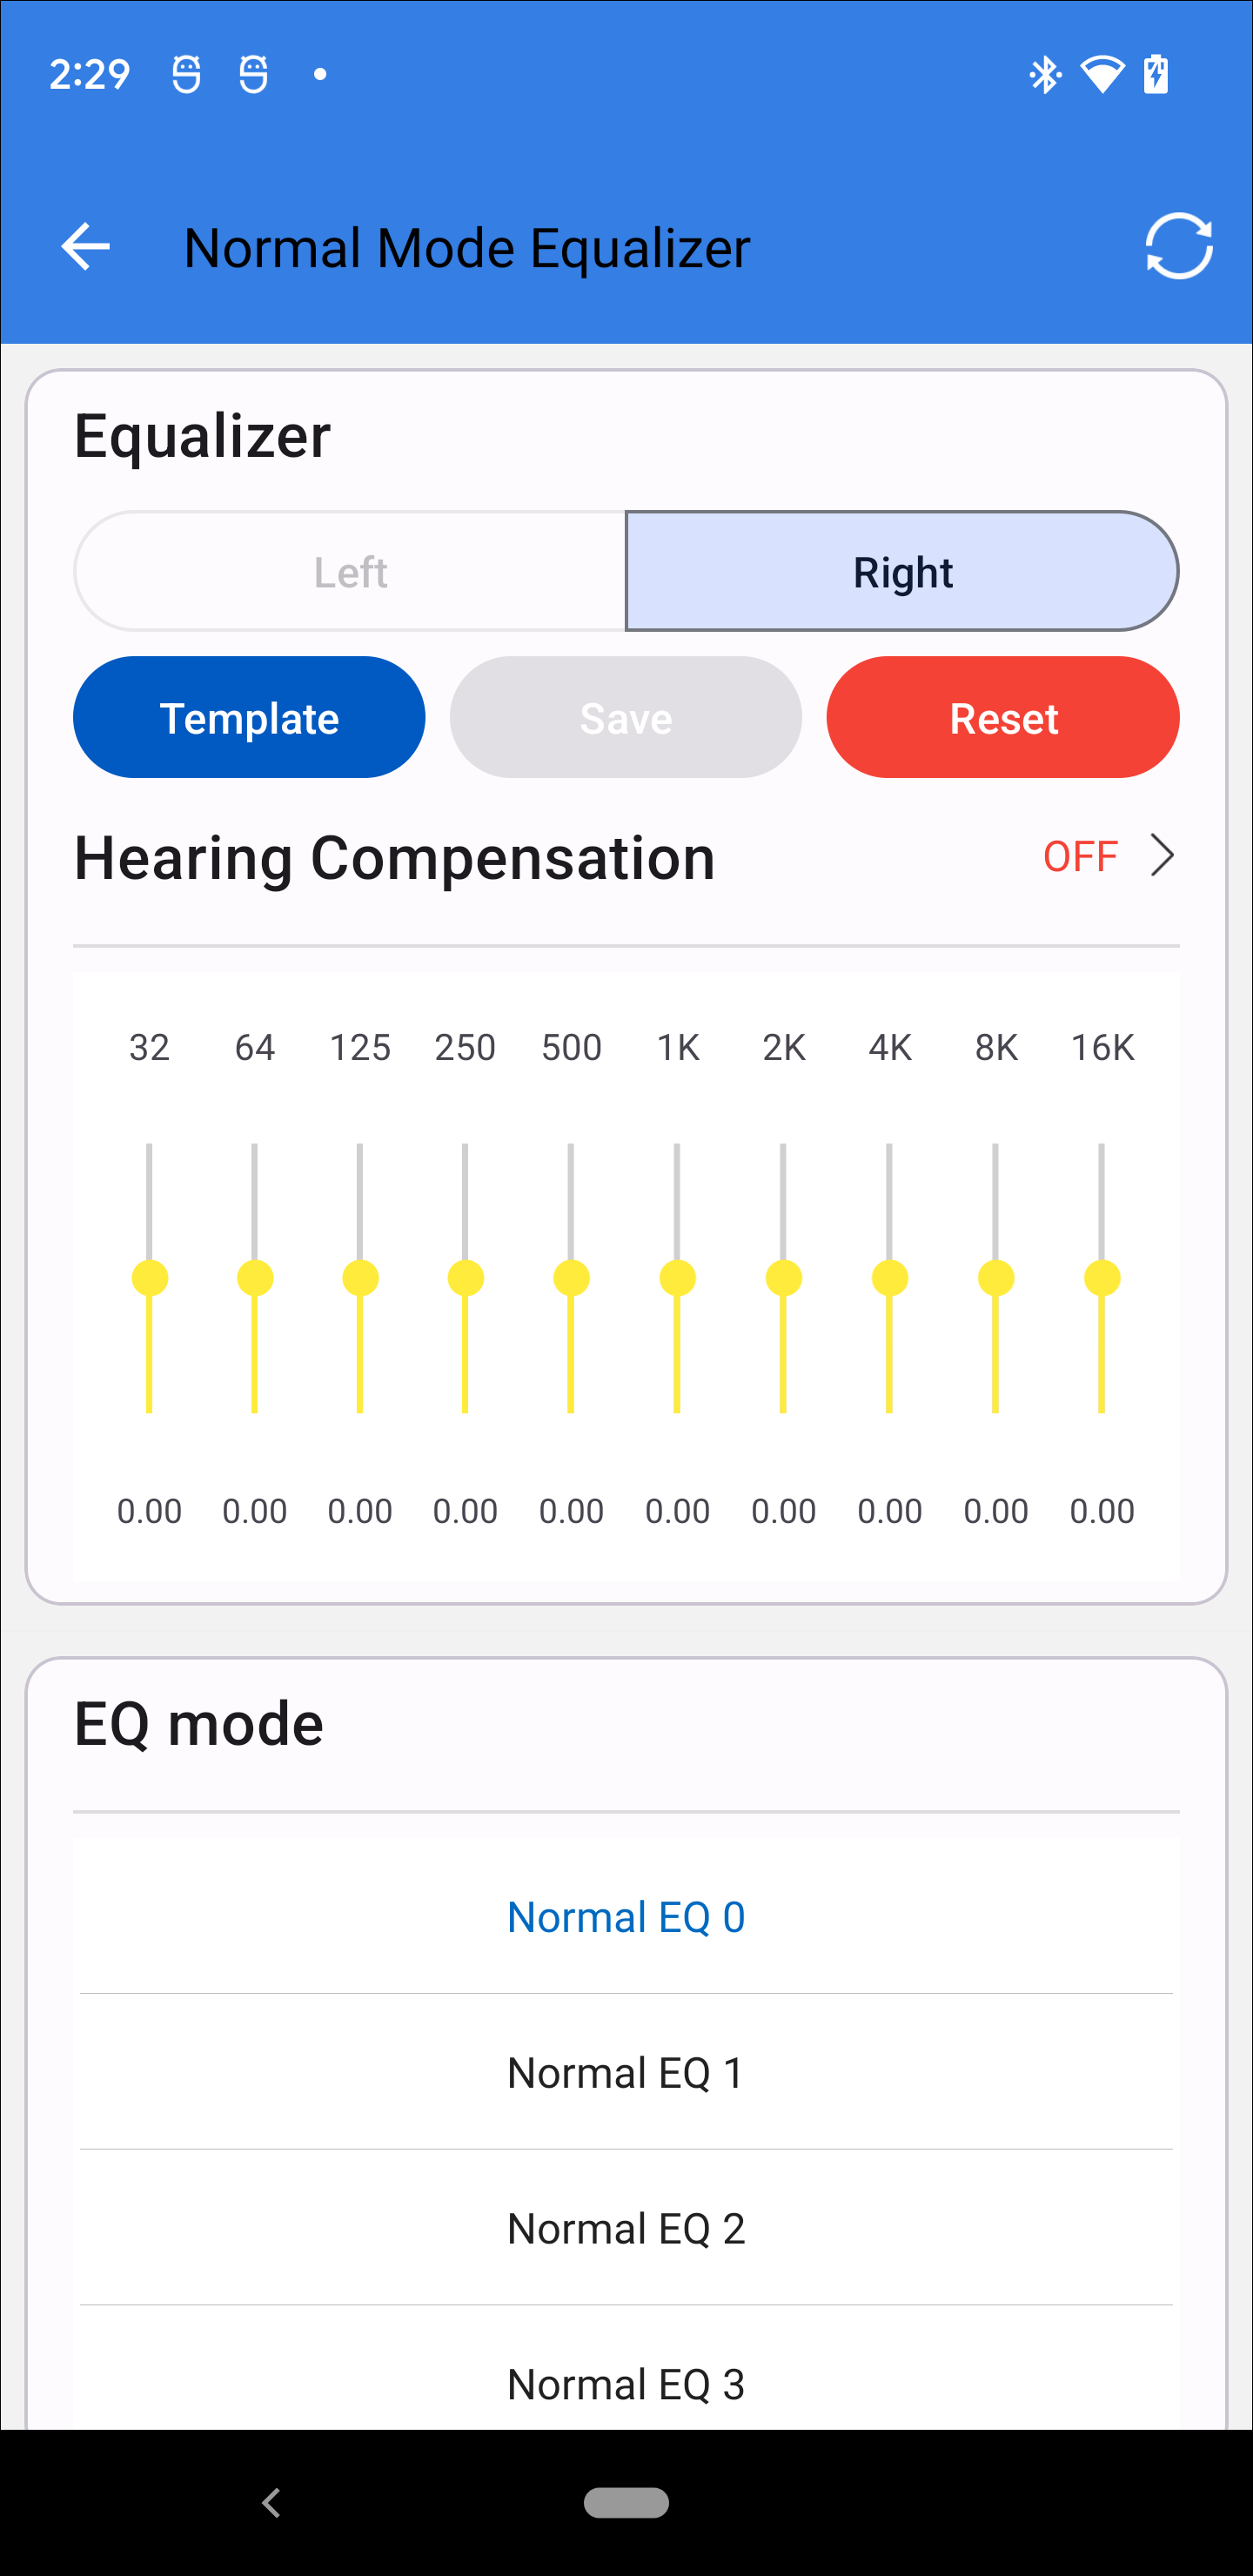
Normal Mode EQ
Switch to Normal Mode EQ when gaming mode is closed and listening mode is set to off.
Normal Mode EQ
Gaming Mode EQ
Switch to Gaming Mode EQ when gaming mode is turned on.

Gaming Mode EQ
ANC Mode EQ
Switch to ANC mode EQ when gaming mode is closed and listening mode is set to ANC.
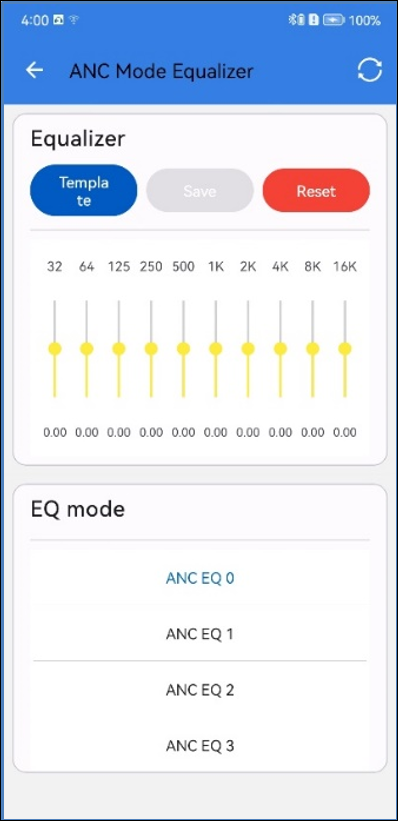
ANC Mode EQ
Voice EQ
Voice EQ is not recommended when a telephony call is not established.
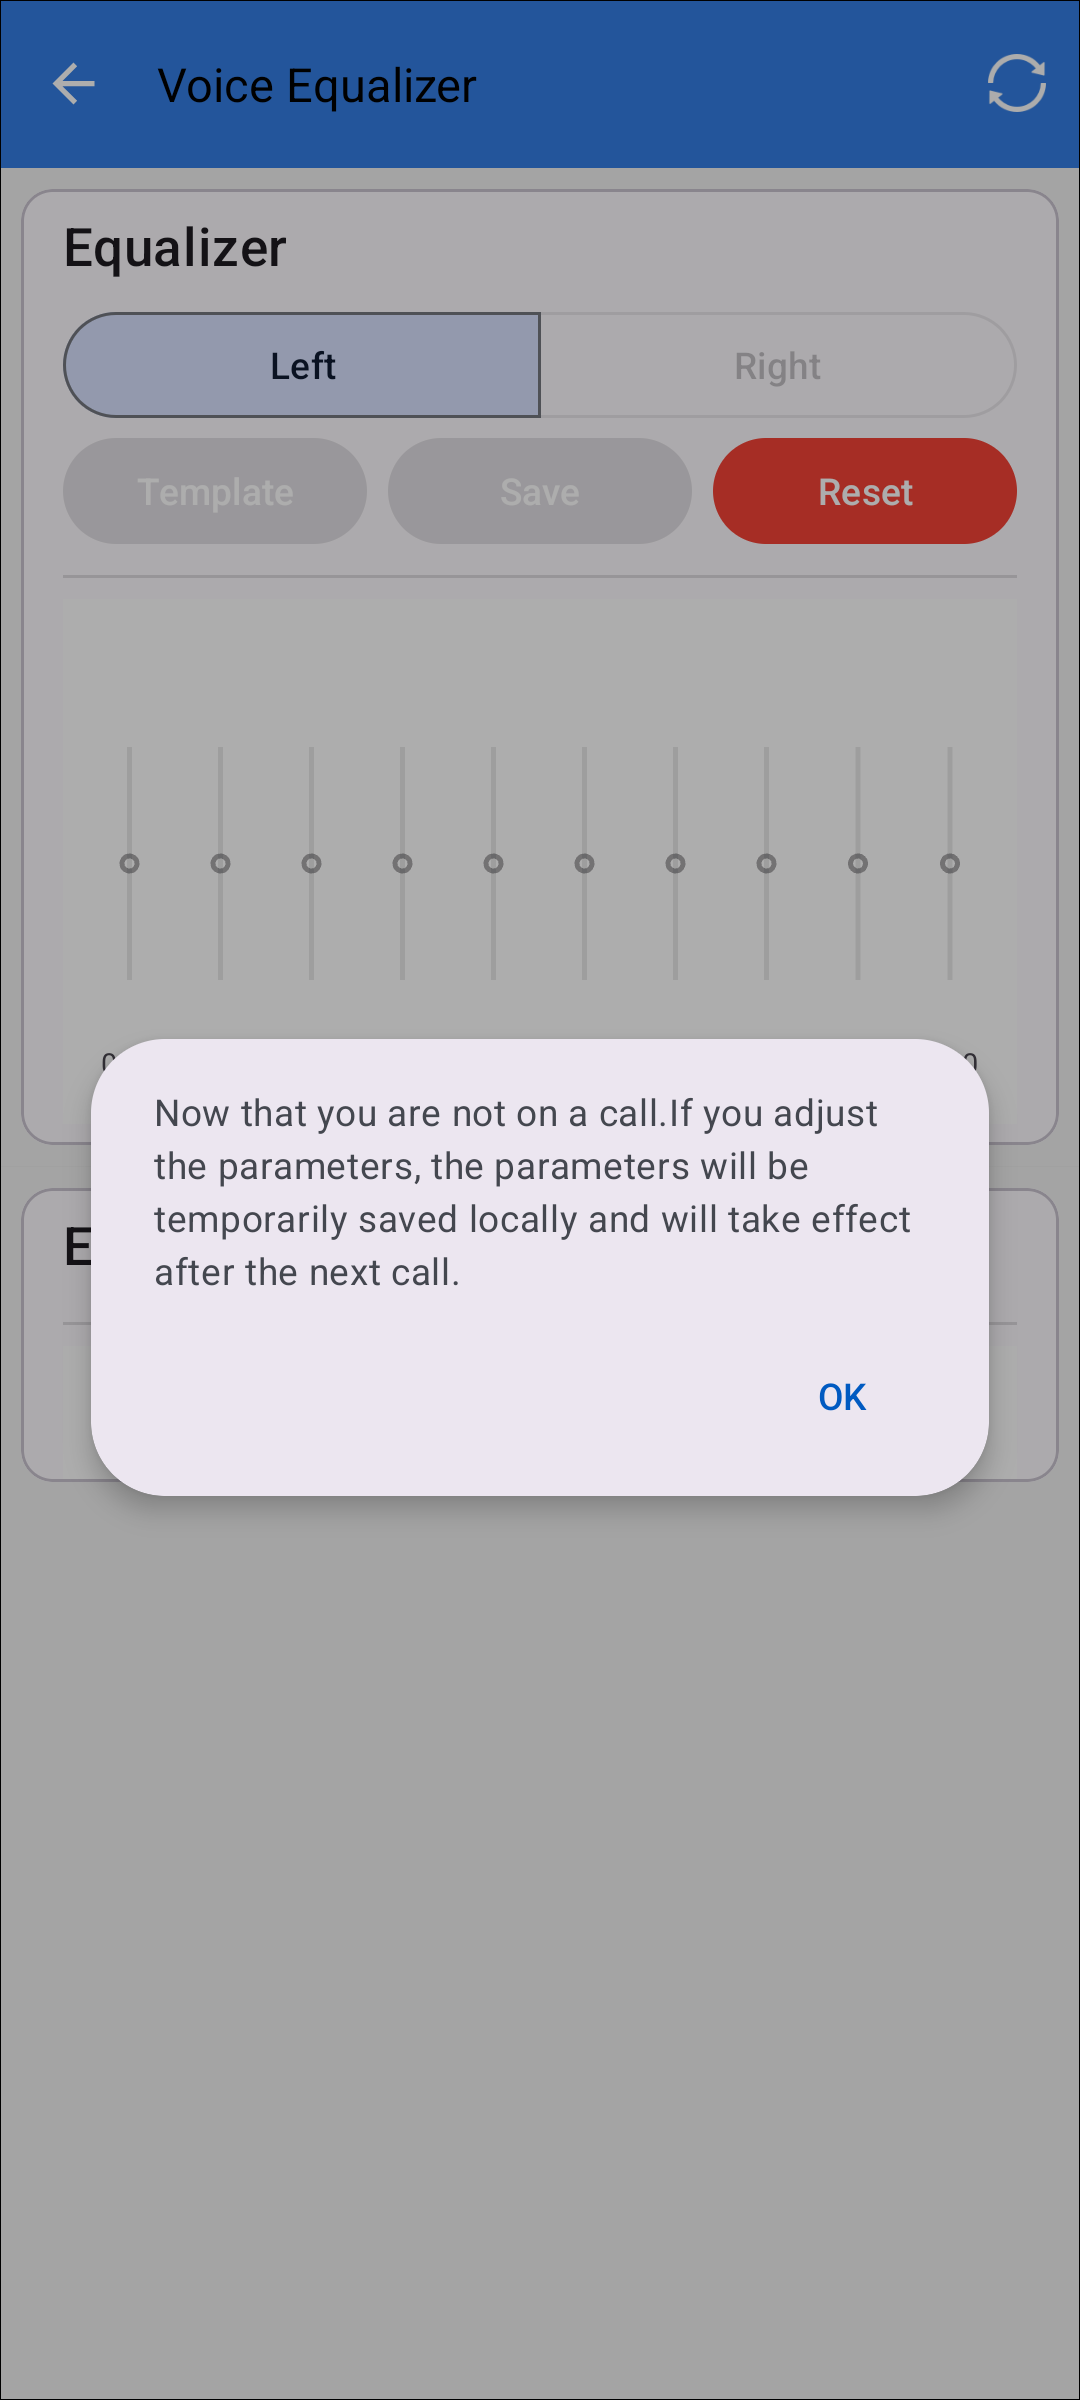
Telephony Call Prompt
When voice EQ is supported, the settings will display.
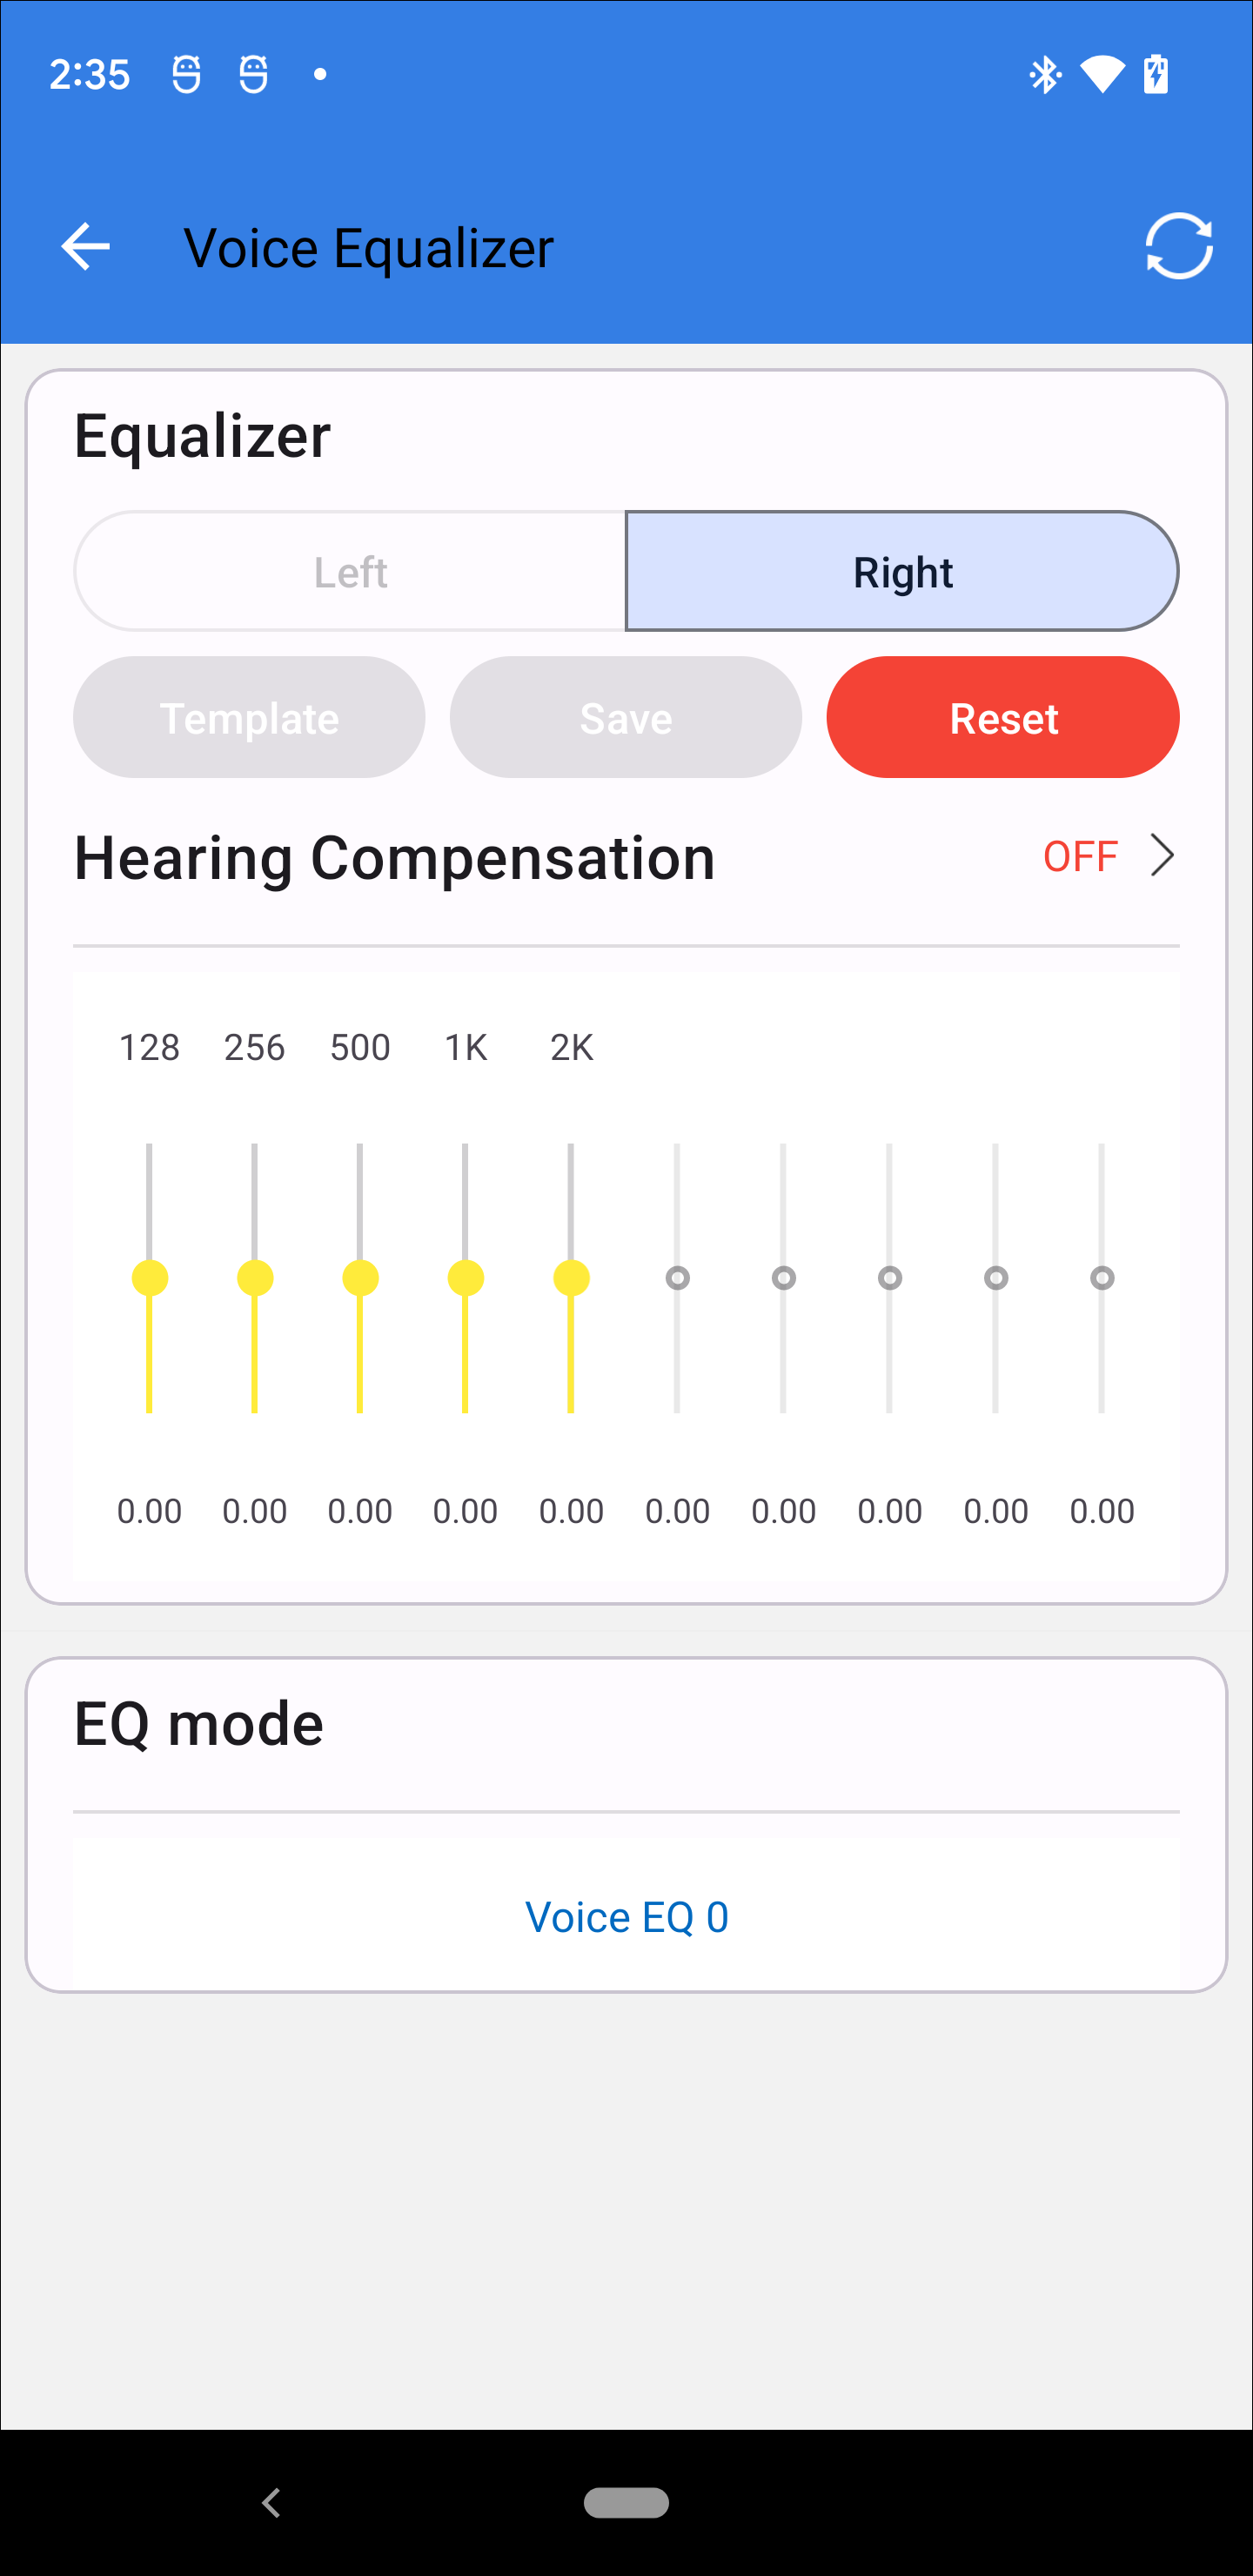
Voice EQ
EQ Hearing Compensation
For EQ that support speaker EQ Compensation capability, Hearing Compensation will show in the current UI page. And the hearing compensation data can be used to adjust the gain of the EQ. So user need to calculate the hearing compensation in the HA page first. Refer to Real Hearing Compensation.
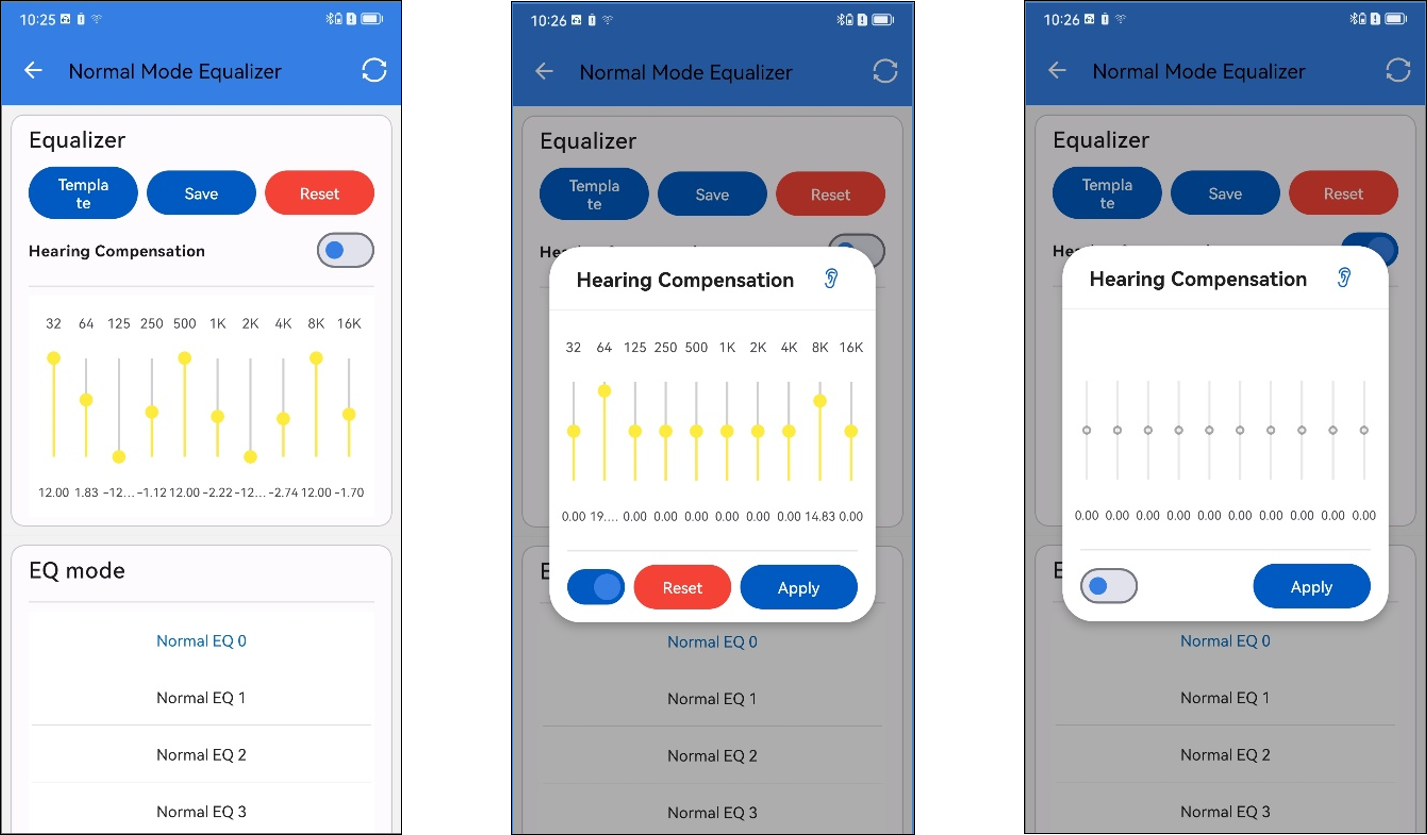
Apply Hearing Compensation
Click Hearing Compensation button to bring up the Hearing Compensation Parameters window. The last saved hearing compensation gain value is displayed by default.
Click on the little ear icon will update the slider on the UI below based on the hearing compensation calculated on the HA page.
Slide to adjust the new hearing compensation gain value.
Click Reset button to restore the gain value on the UI to the last gain value saved by the APP.
Toggle the state of the hearing compensation switch. When the switch is on, it shows the default parameters; when the switch is off, it hides the default parameters and Reset button.
Click Apply button to save the hearing compensation gain value and the state of the hearing compensation switch on the UI.
SPP Data Capture
When SPP Data Capture is supported, the settings will display.
The SPP Data Capture page is as shown below:
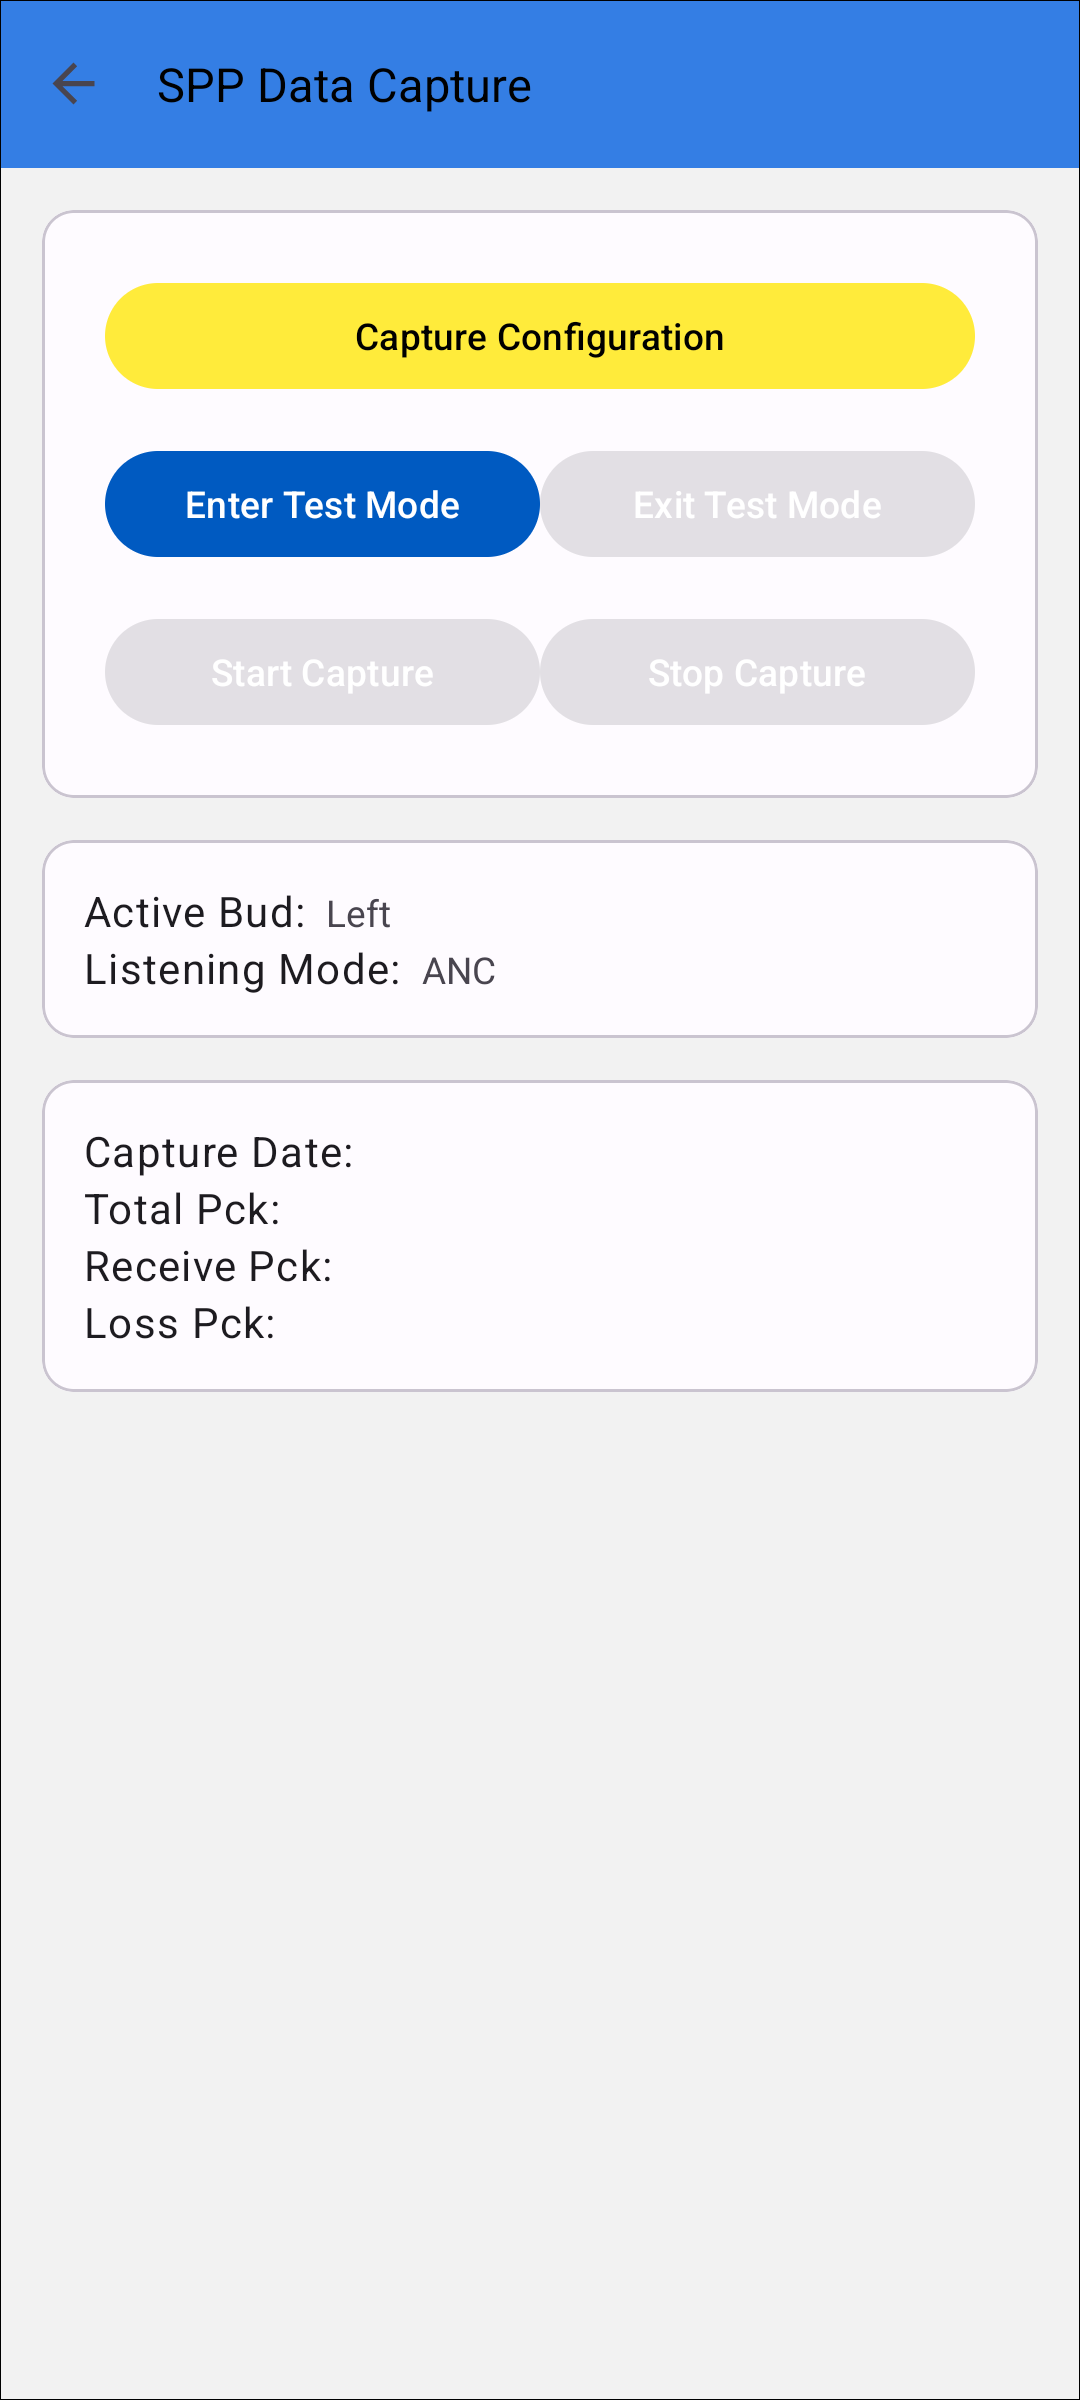
SPP Data Capture
Capture Configuration
Click on Capture Configuration to enter the configuration page.

SPP Data Capture Configuration
Probe Config
Probe Source only supports single-selection. User can choose either the TX_IN_CH0 or RX_IN_TDM4CH0 channel, where TX_IN_CH0 represents the speaker signal, and RX_IN_TDM4CH0 represents the microphone signal.
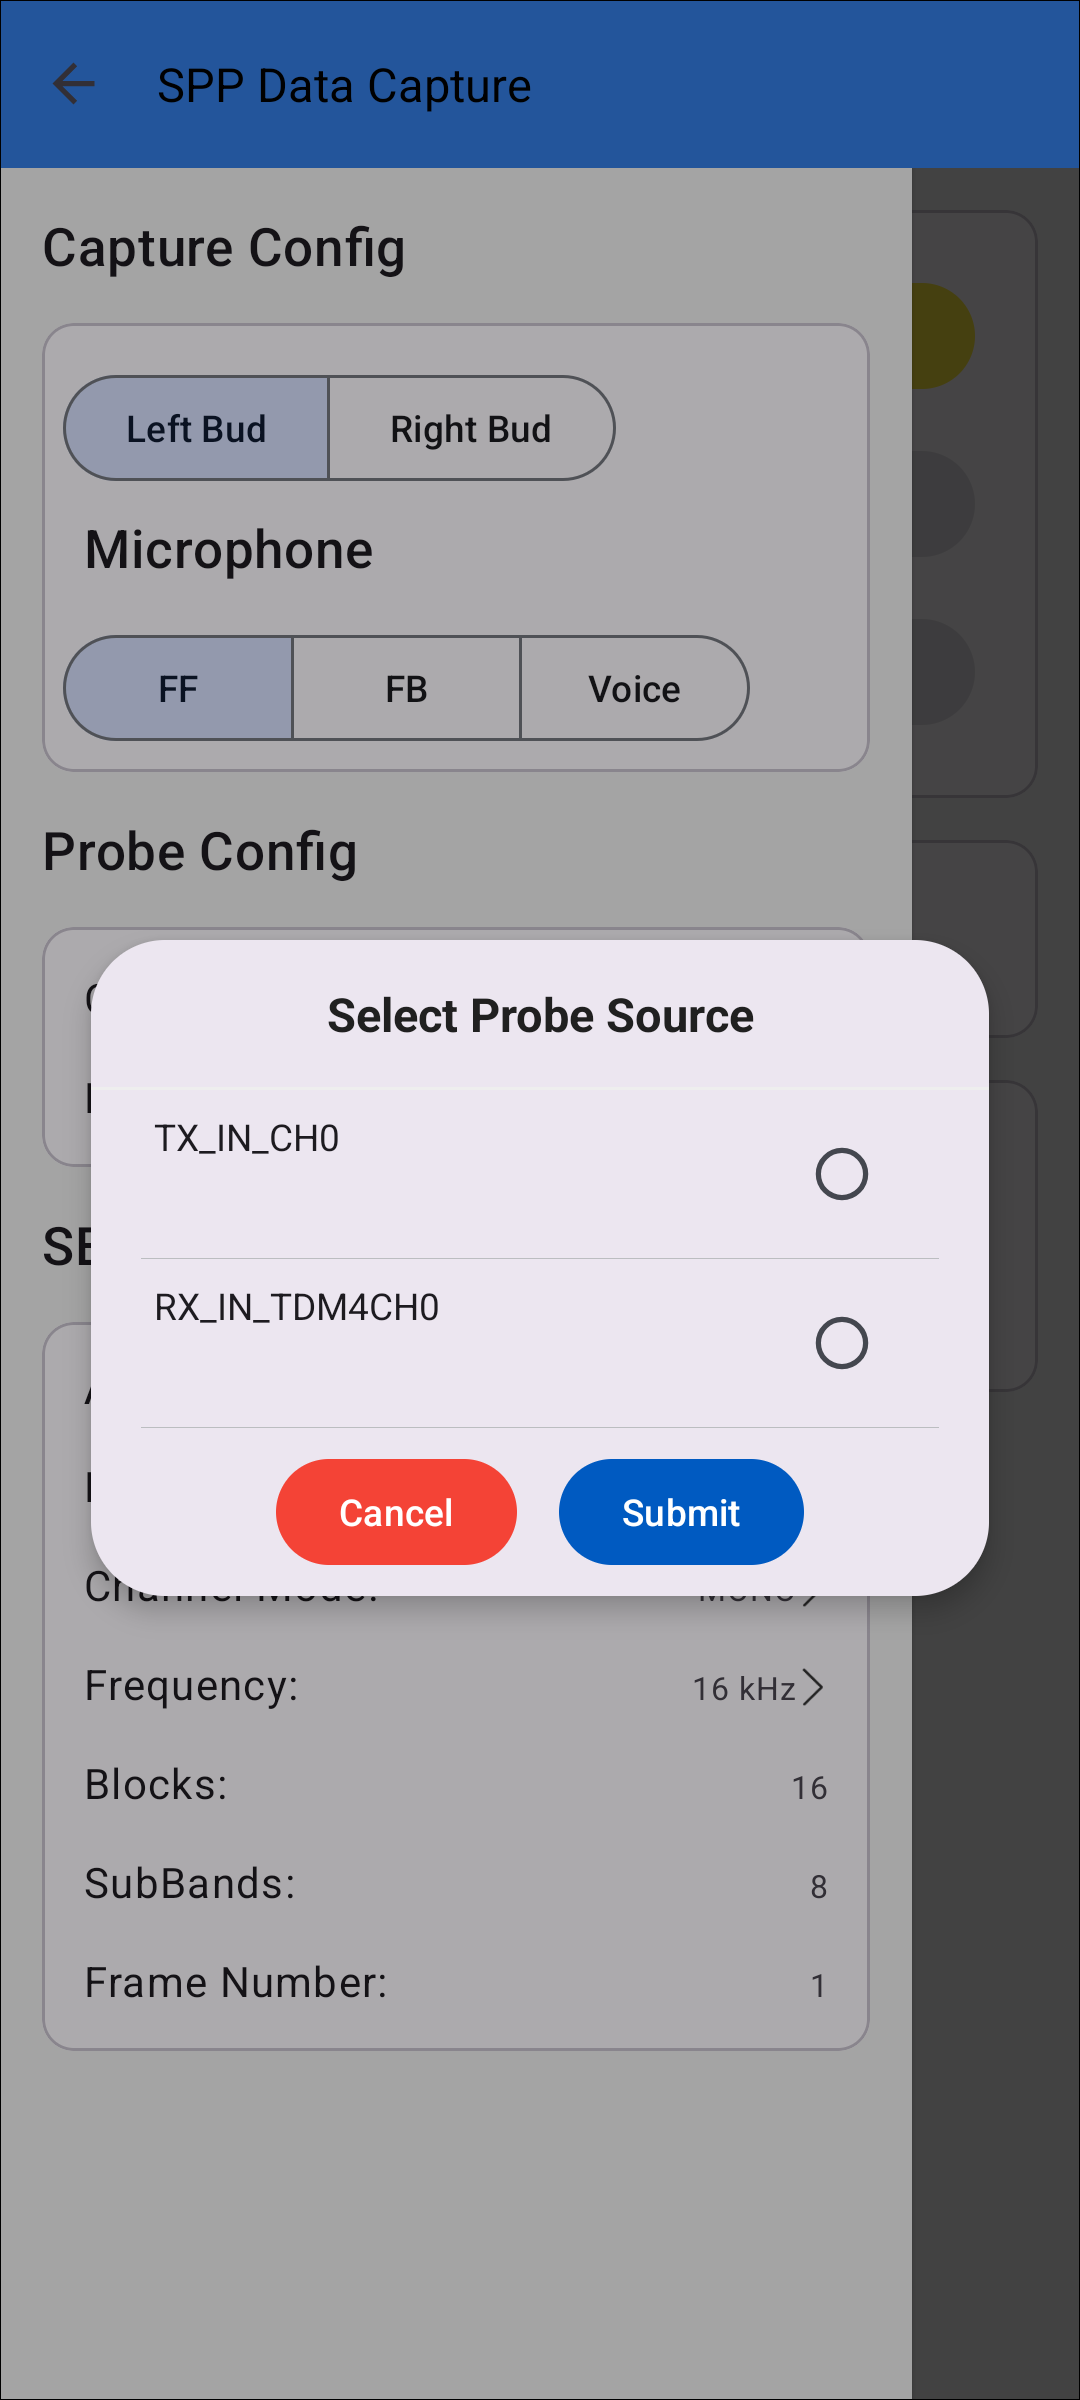
Probe Configuration
SBC Config
The SBC supports the configuration of the following parameters, including allocation, bit pool, channel mode, frequency.
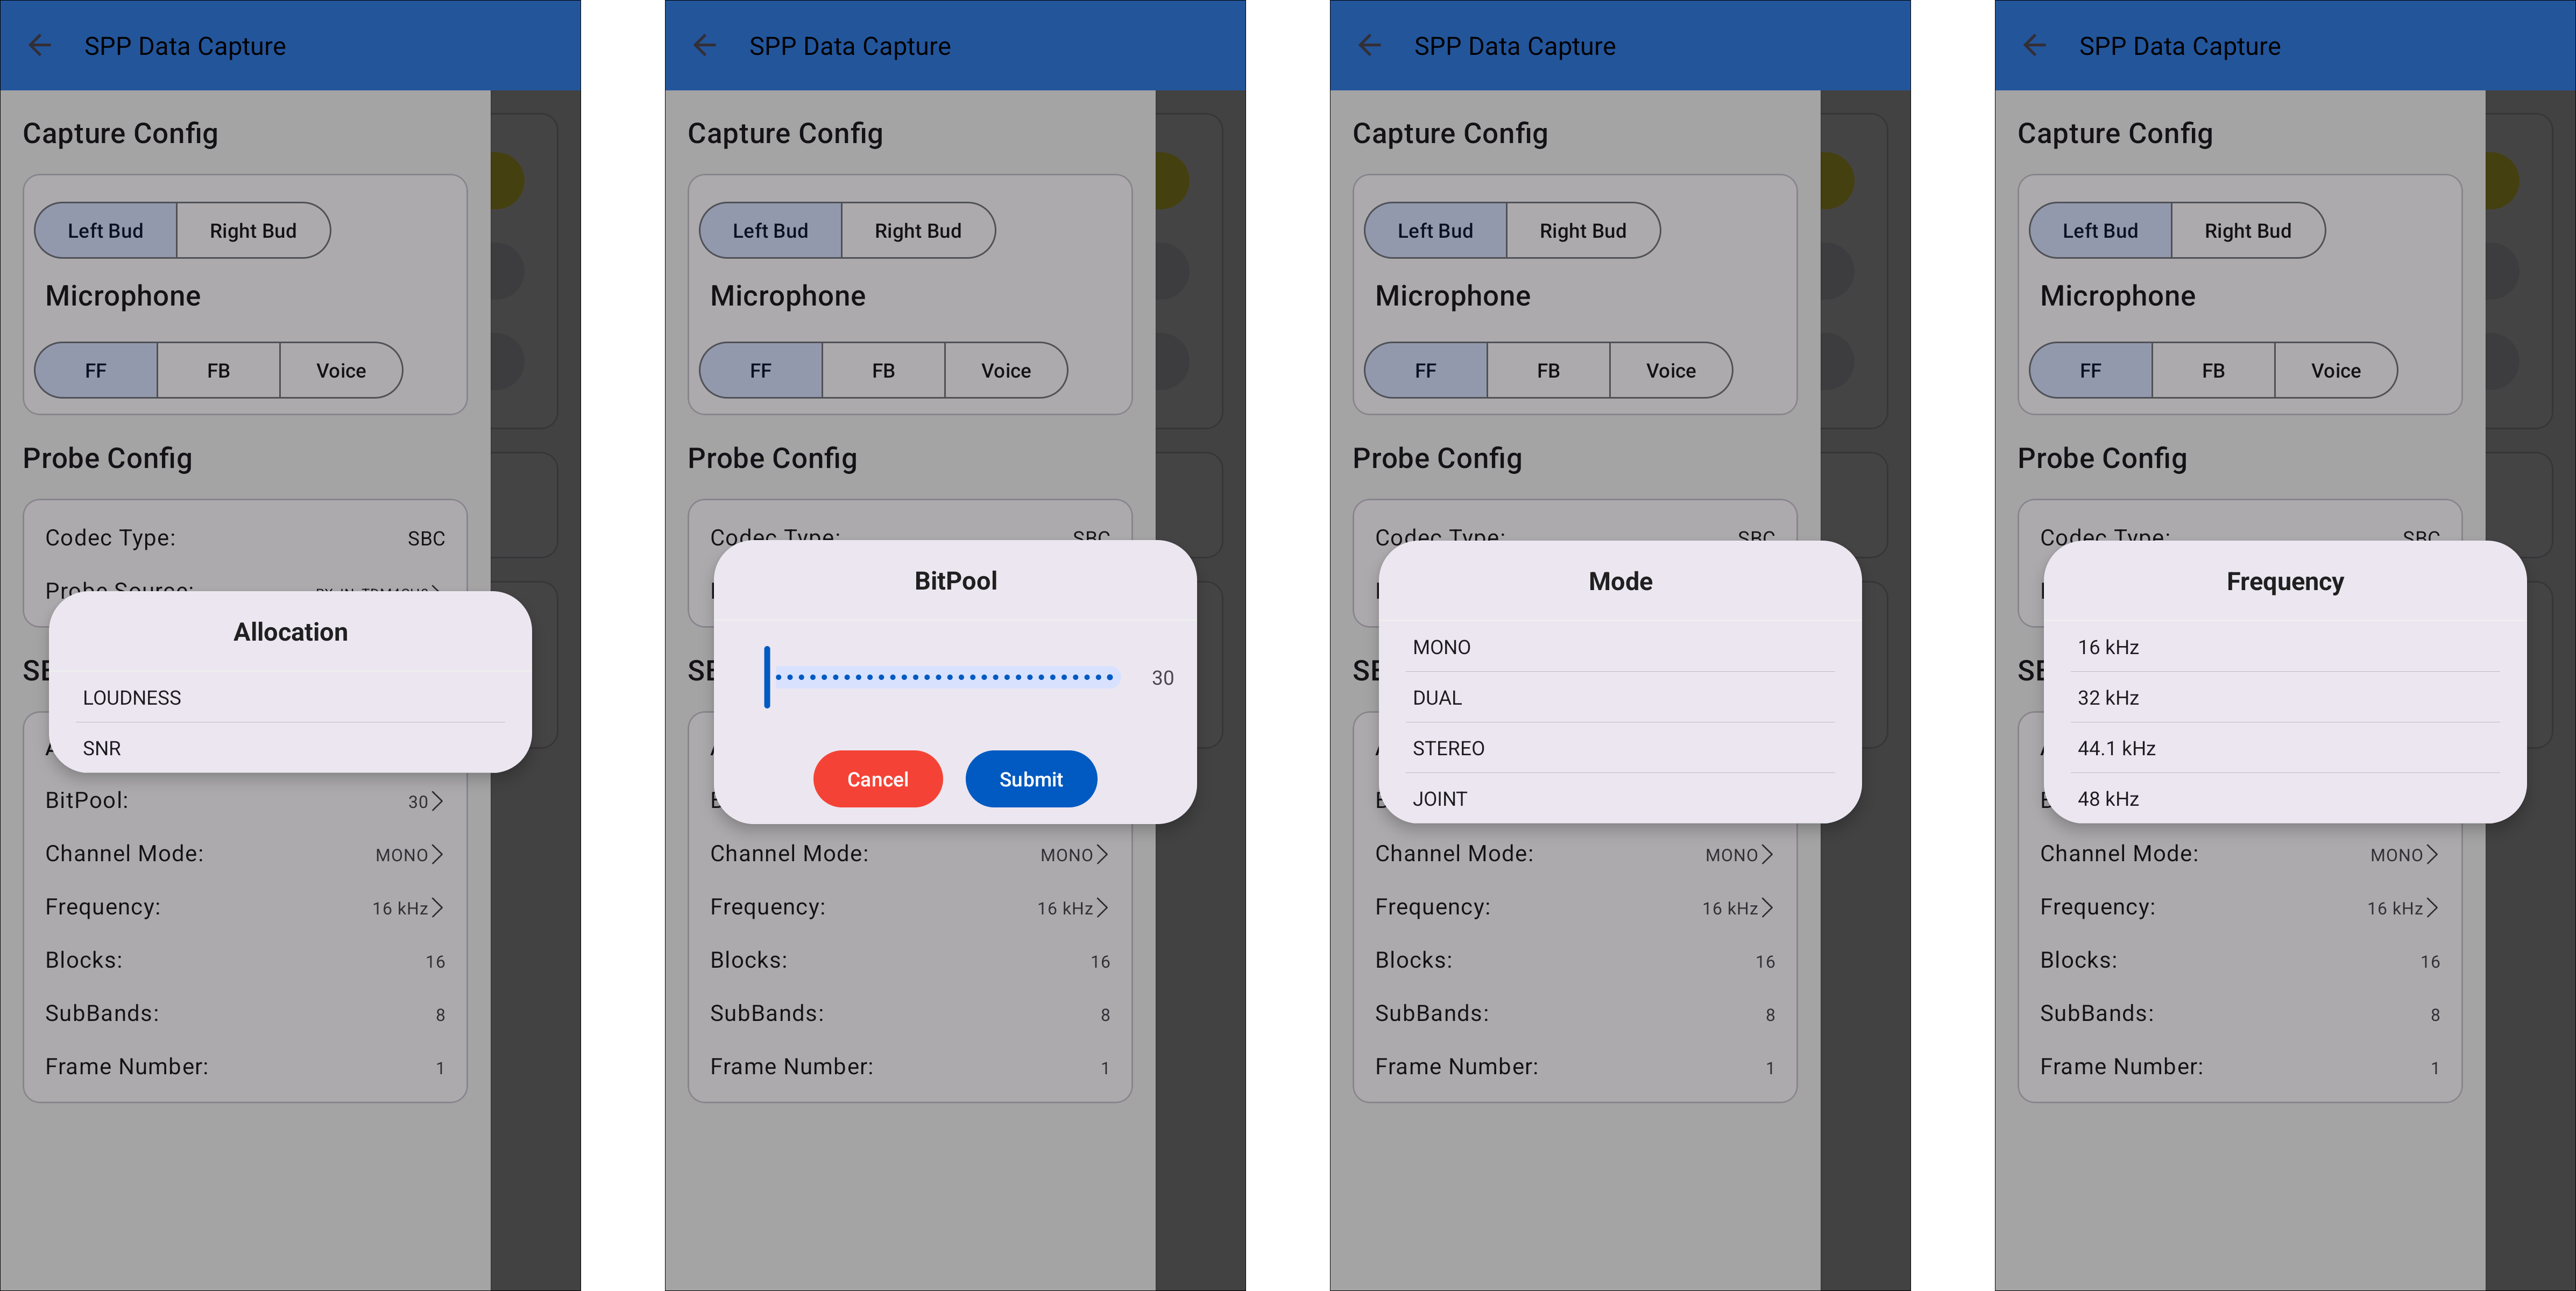
SBC Configuration
Capture Data Procedure
After the configuration is complete, the user can start capturing data.
Step 1: Enter Test Mode. Enter Test Mode is not allowed for music/telephone call/DSP APT ON.
Step 2: Start Capture. If TX_IN_CH0 is selected in the Probe Config, music must be already playing to start capture.
Step 3: Stop Capture. Stop capture SPP data.
Step 4: Exit Test Mode. Cannot exit test mode while playing music.
Exit test mode before the user can exit the current page.
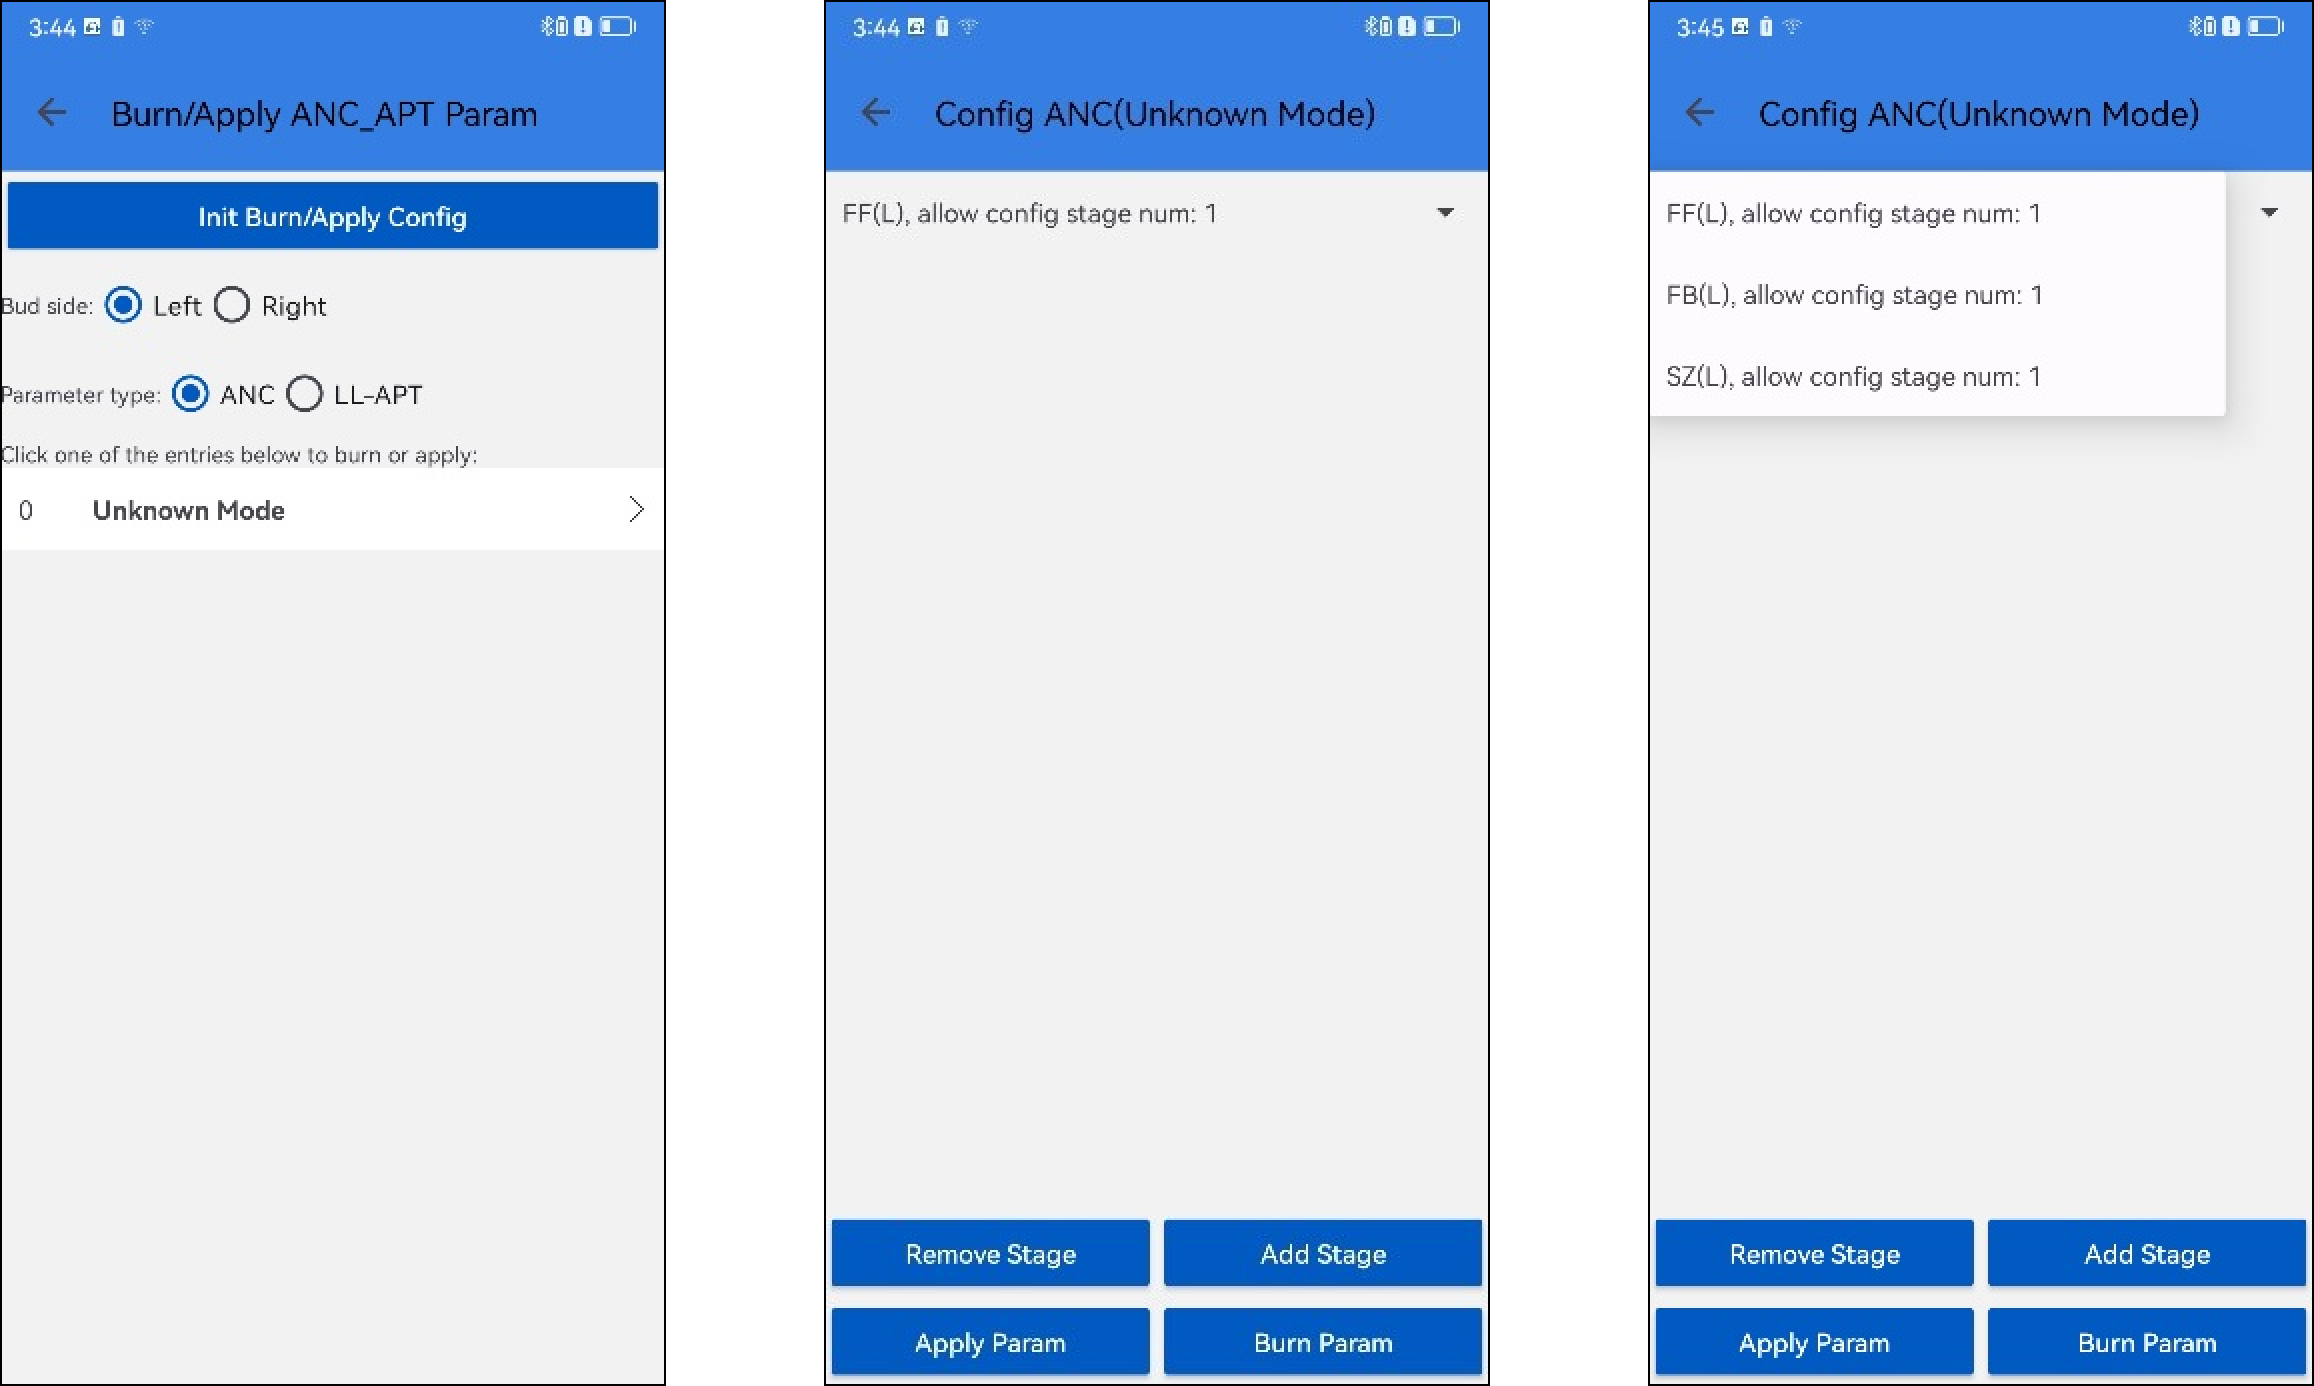
Burn/Apply ANC_APT Param
This function allows writing ANC or LLAPT circuit parameters (APT or SZFilter) to the 8773CO series IC via phone APP, so that the user can perform personalized gain and compensation operations for a certain ANC or LLAPT scene.
The writing here supports the following two modes:
-
Staging mode:
Apply mode, the parameter will take effect directly, but not stored in the flash, and will disappear after power down or reset.
-
Permanent mode:
Burn mode, the parameter is updated in the flash, and it will take effect directly. The parameters are updated in flash and take effect directly, and can be saved even after power down.
Init Burn/Apply Config Entrance

Init Burn/Apply Config Entrance
Init Burn/Apply Config
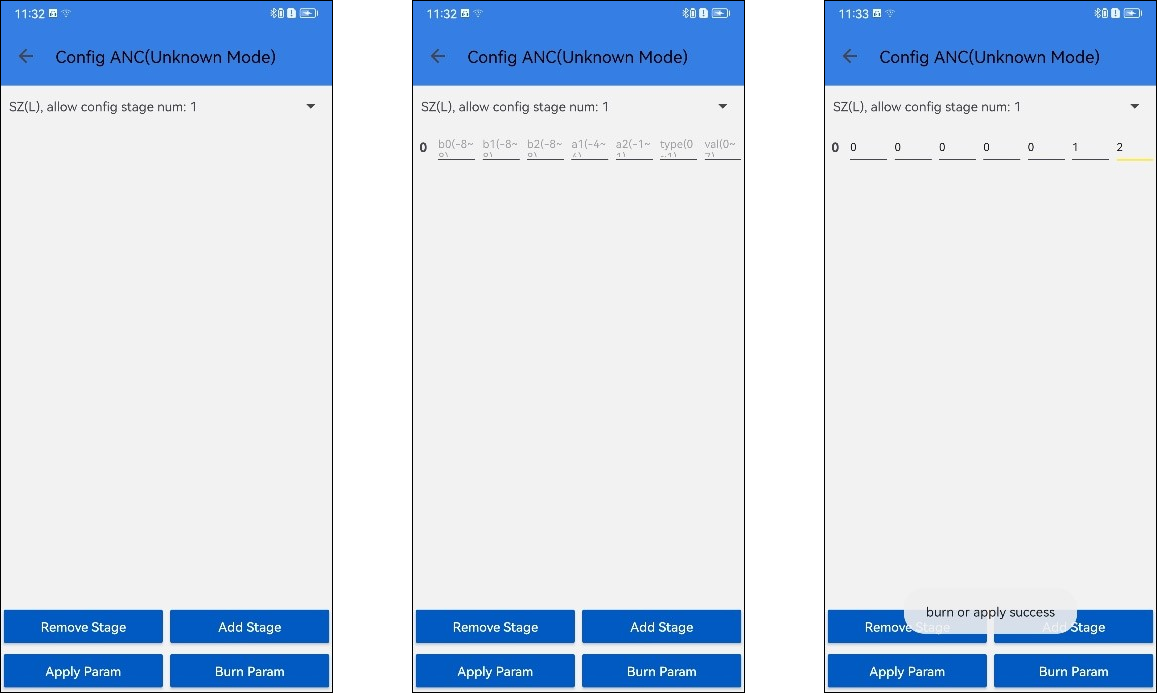
In the following, the operation of Apply and Burn in the ANC scenario will be introduced.
The LLAPT scenario operates in a similar process to the ANC scenario.
All active scenarios supported by the current ANC will be displayed.
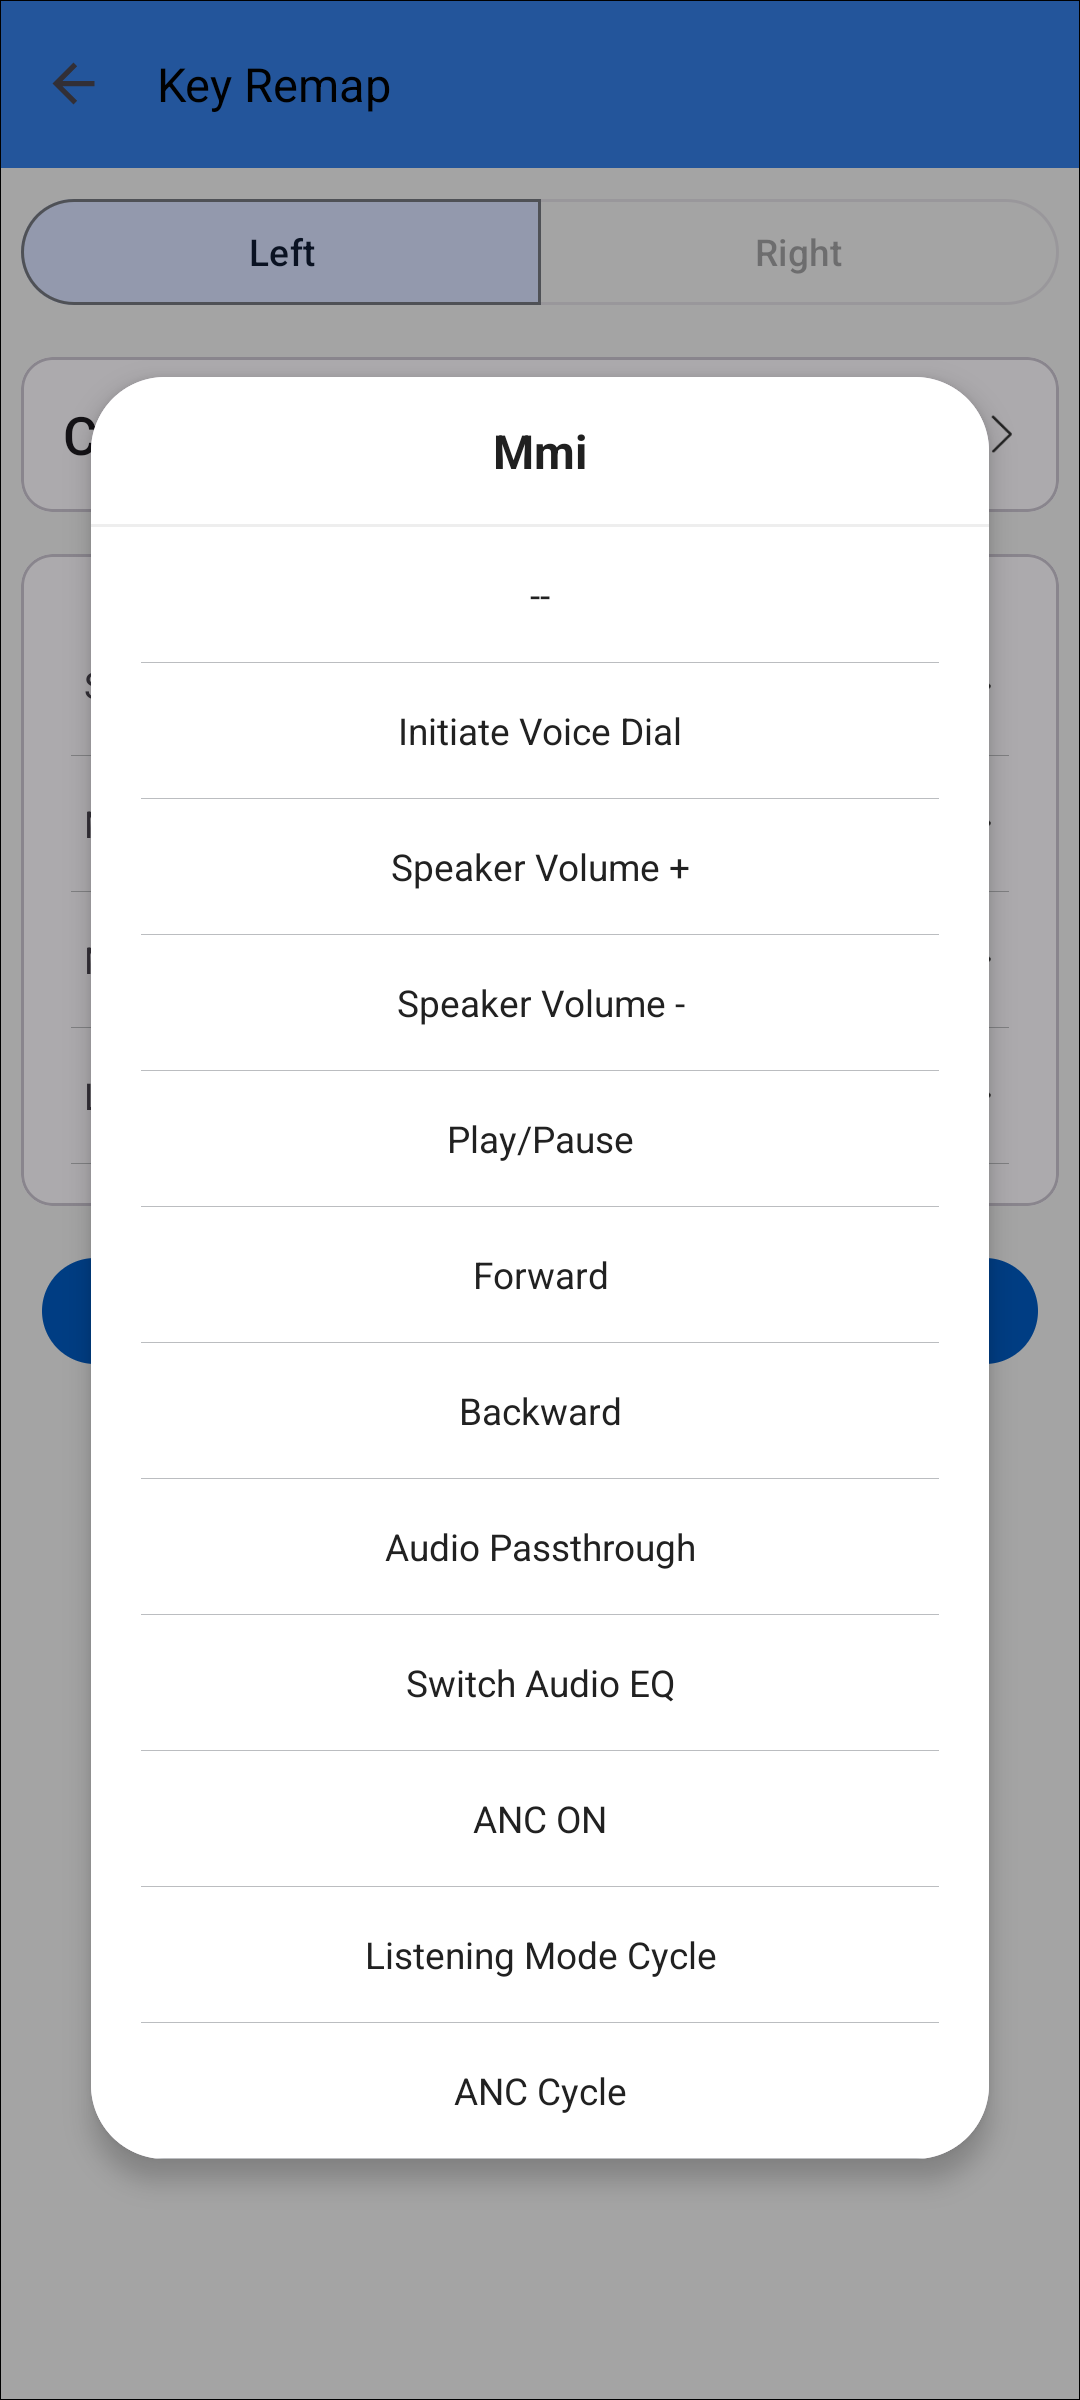
Key Remap
Set the button behaviors of the left ear and right ear in different states through the APP: single, double-click, triple-click, and long-press.
Key remap supports separate configuration for left and right ears. When a single ear is connected, only the currently connected ear can be operated.
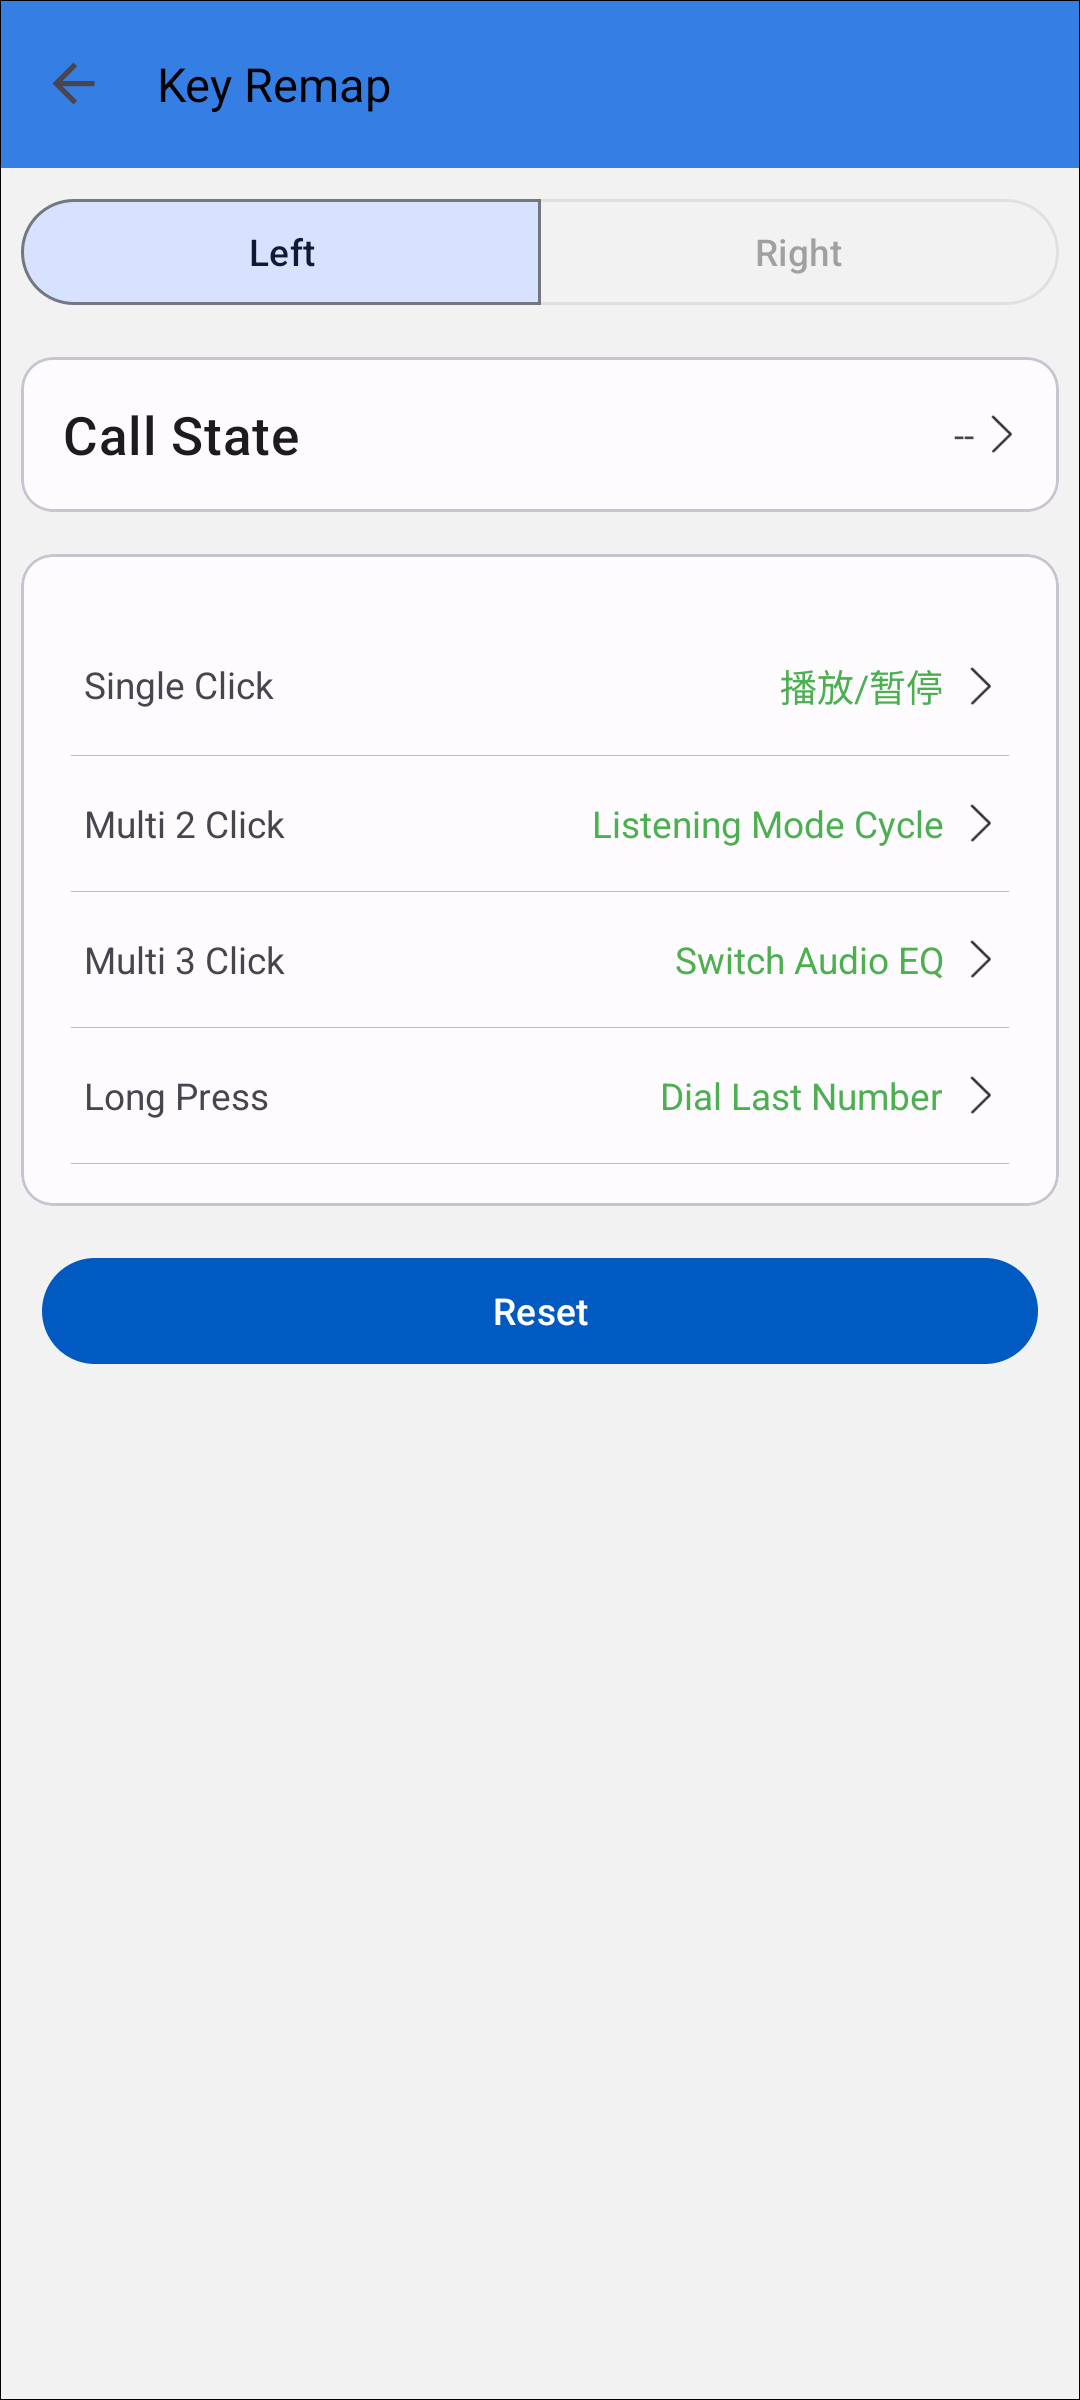
Key Mapping
Call State
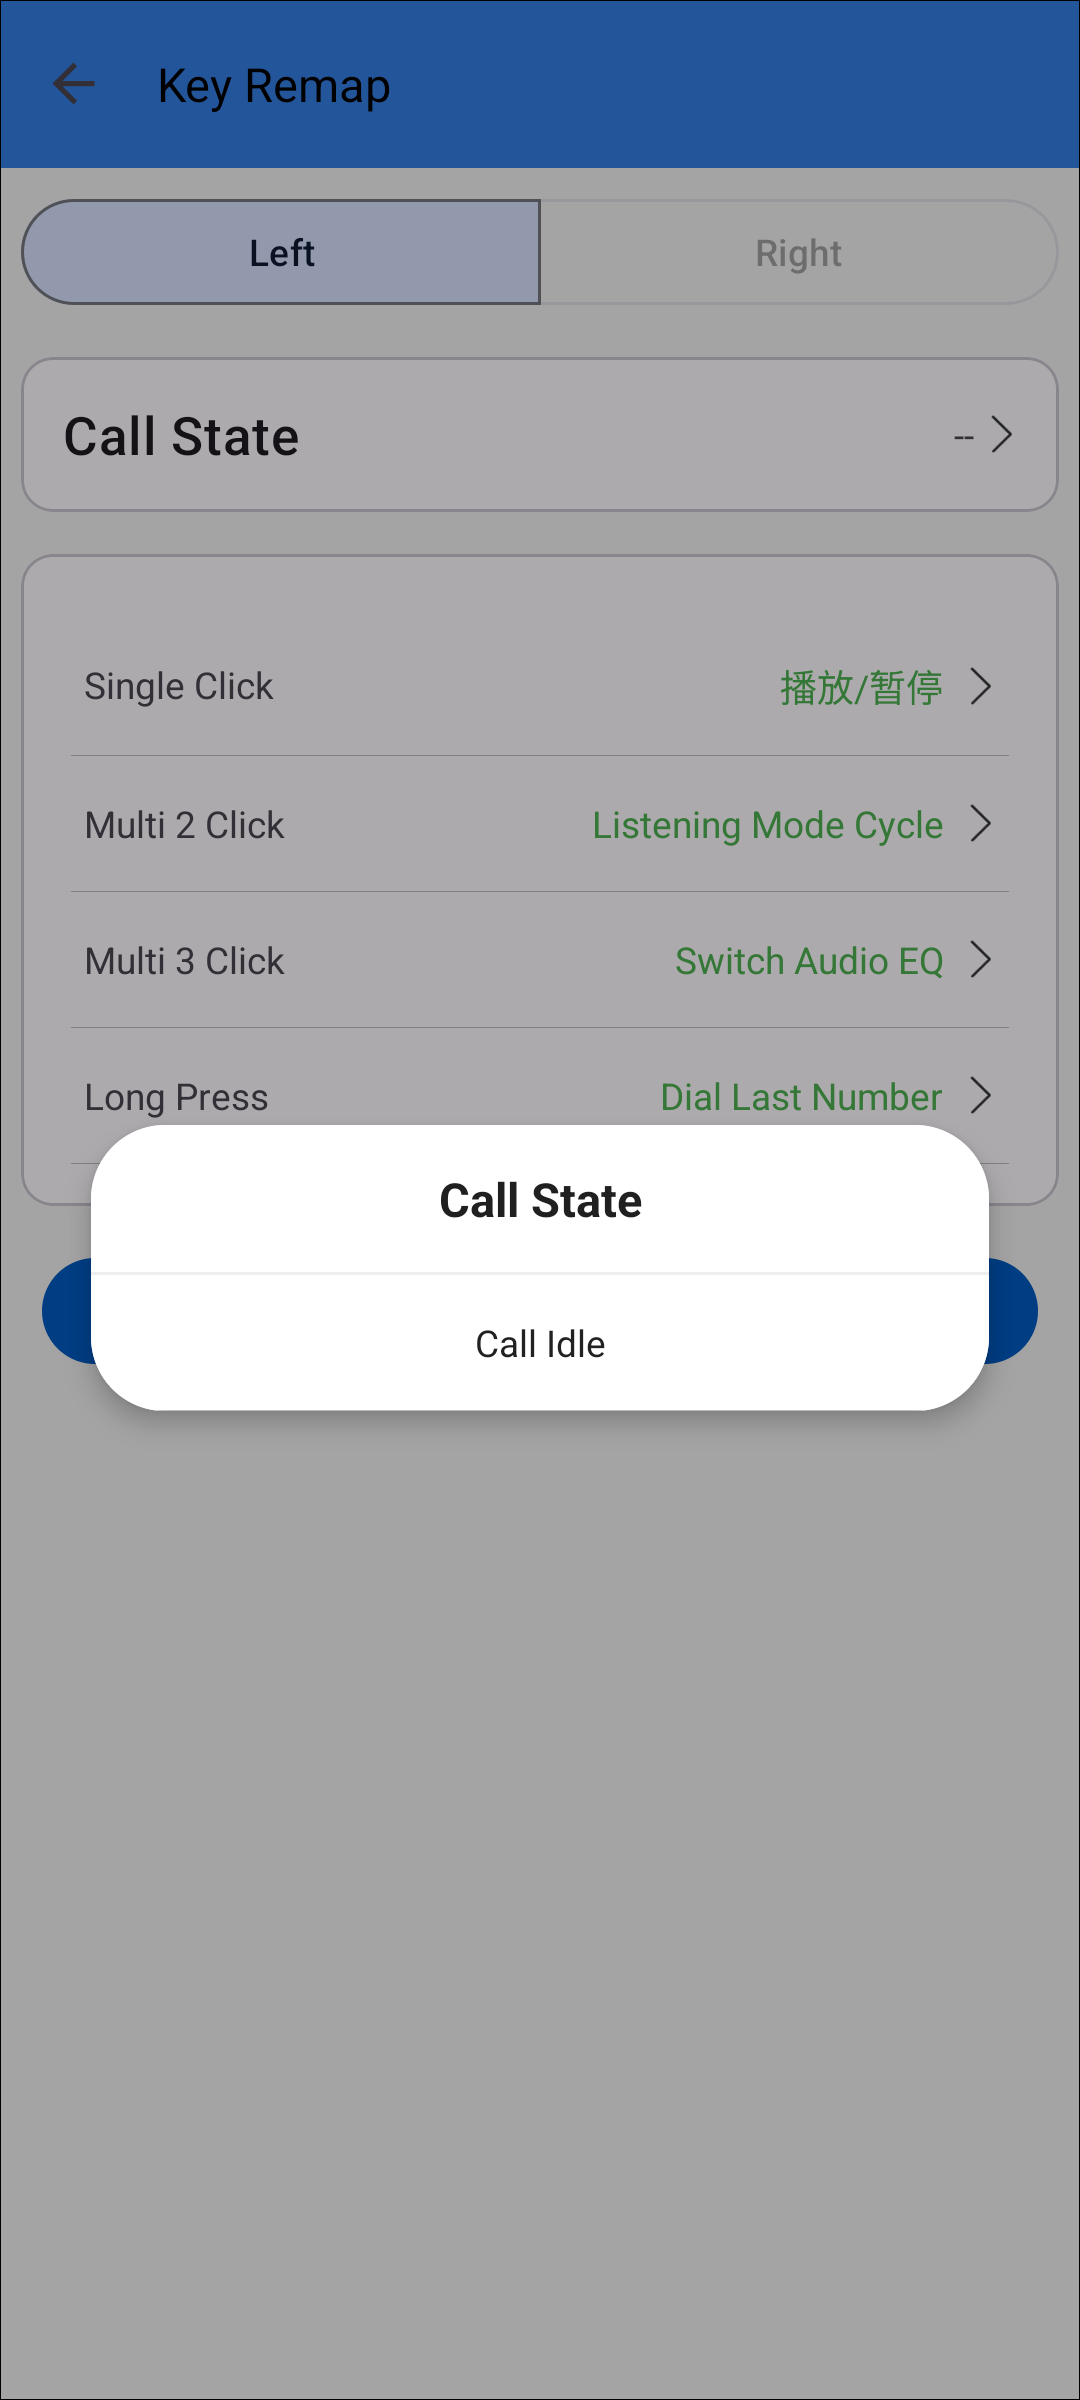
Call State
Key Remapping
Support binaural use scene key remap.
If MCU supports resetting the key map by bud, when resetting the key remap, the user can choose to reset both ears or one ear.
Key Remapping
TTS
The TTS module is designed to assist the end user in getting the caller's information before answering the phone. When the phone receives an incoming call, the RTL87xx device will automatically report the caller's name or number.
Contact Sharing
If the Phone book access request prompt box pops up, please click yes.
Audio
Please note to check in Phone Audio and Media Audio.
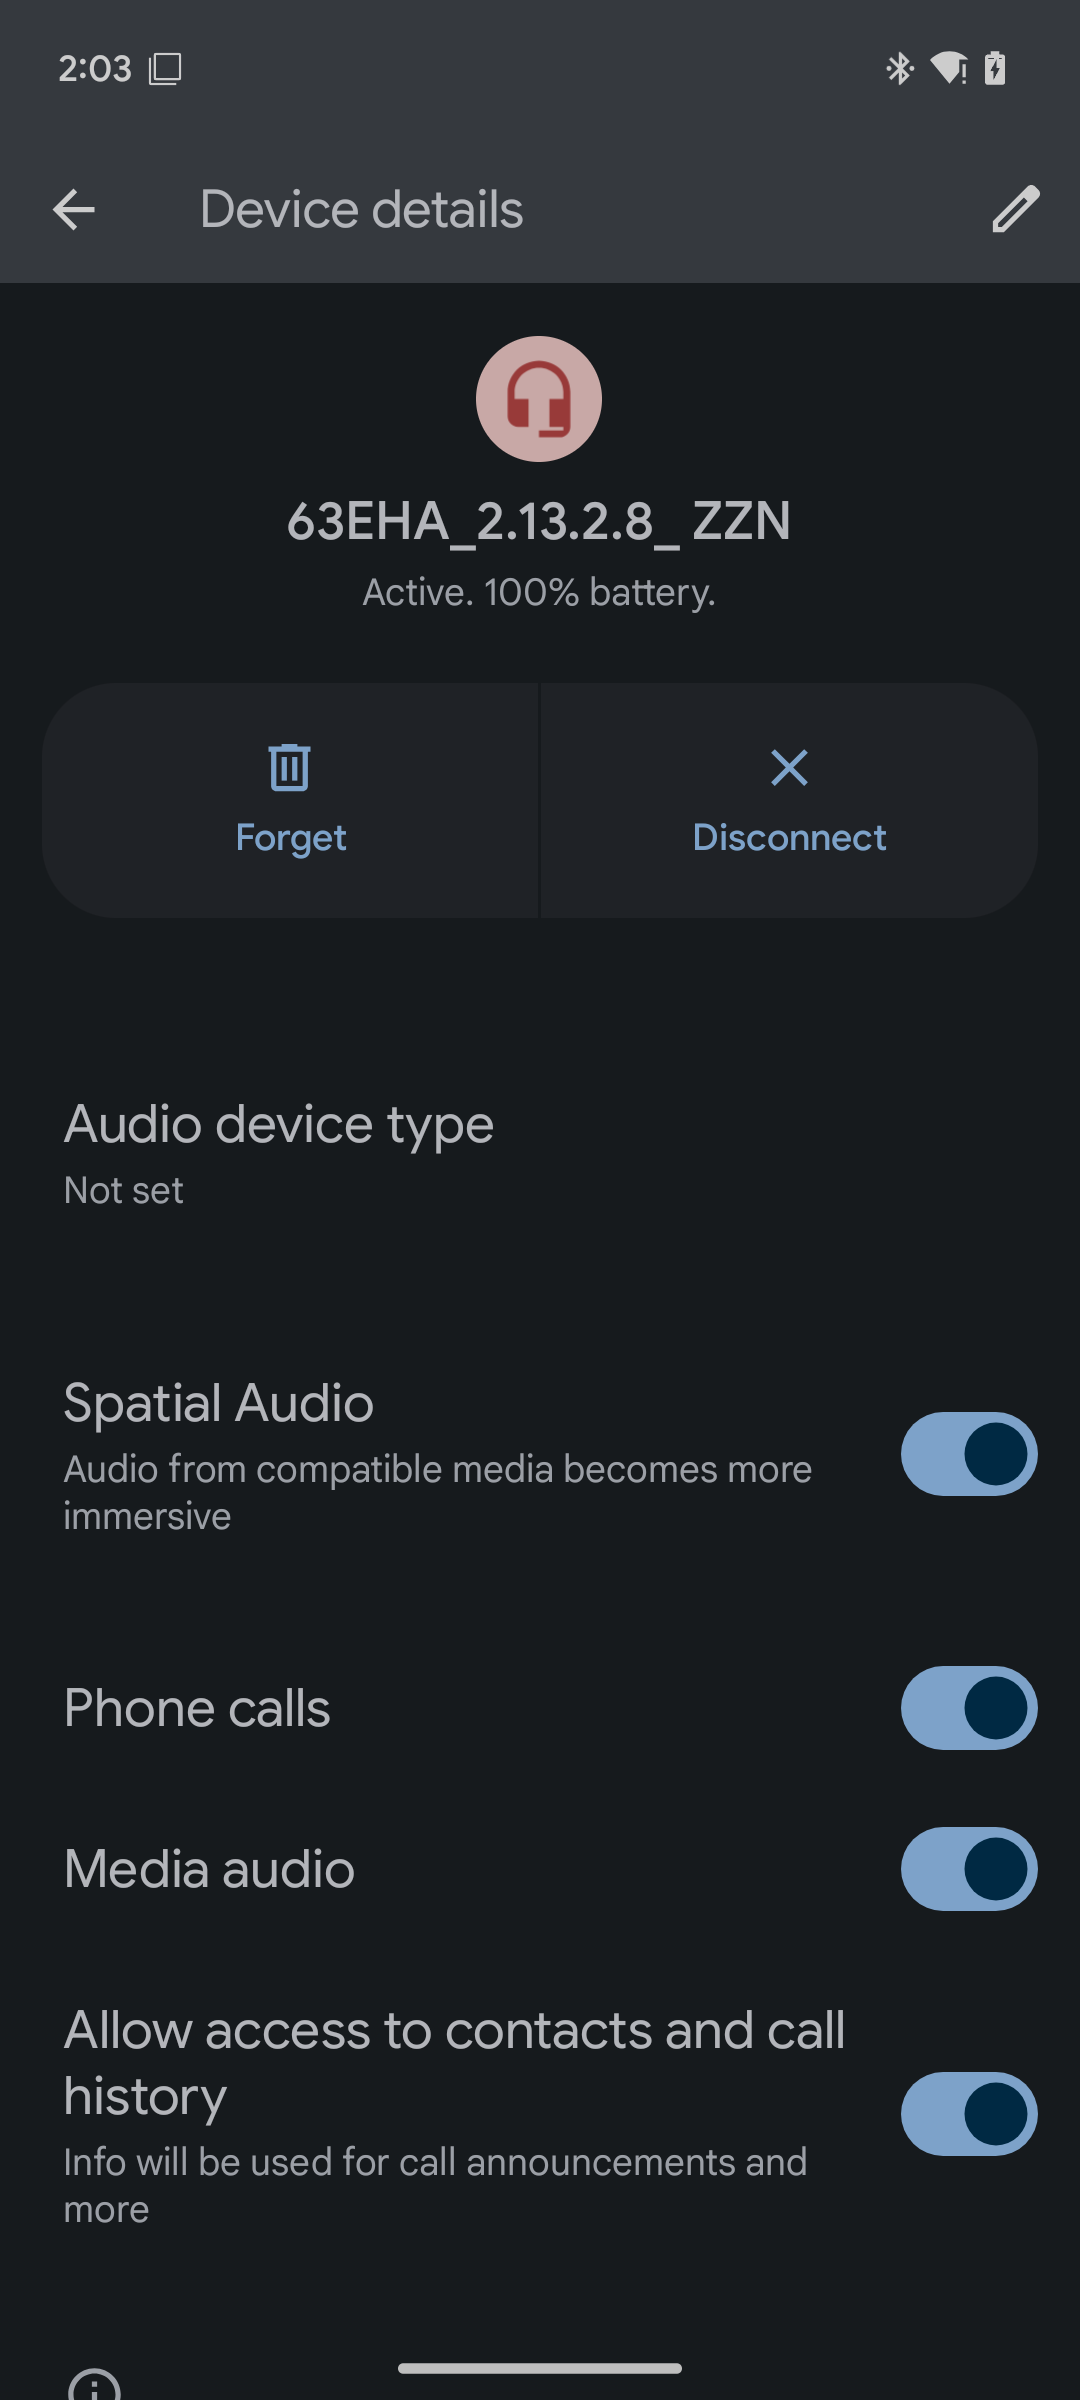
Phone&Media Audio
General
Help
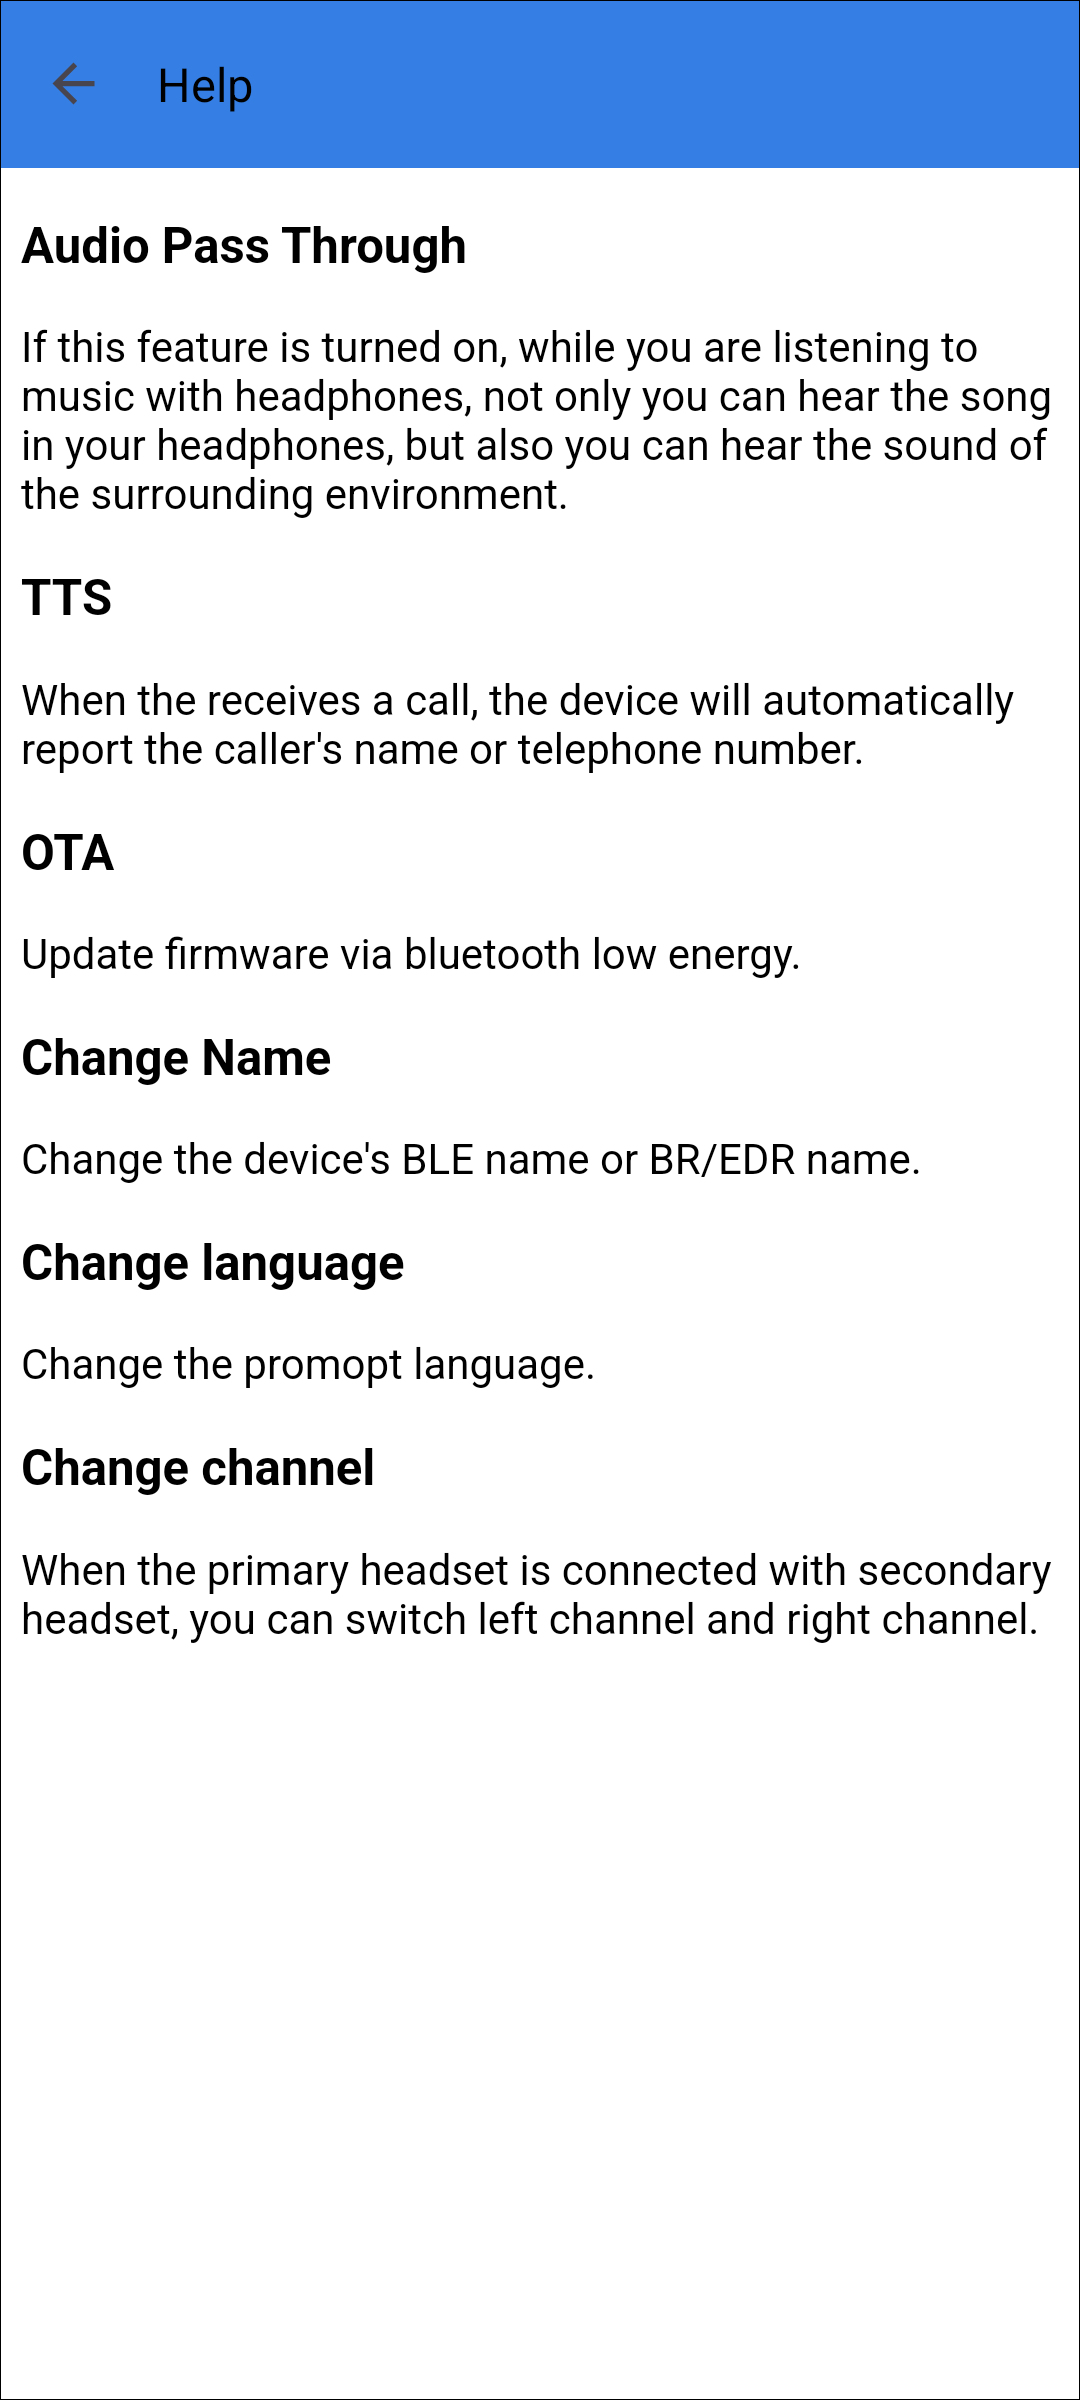
Help
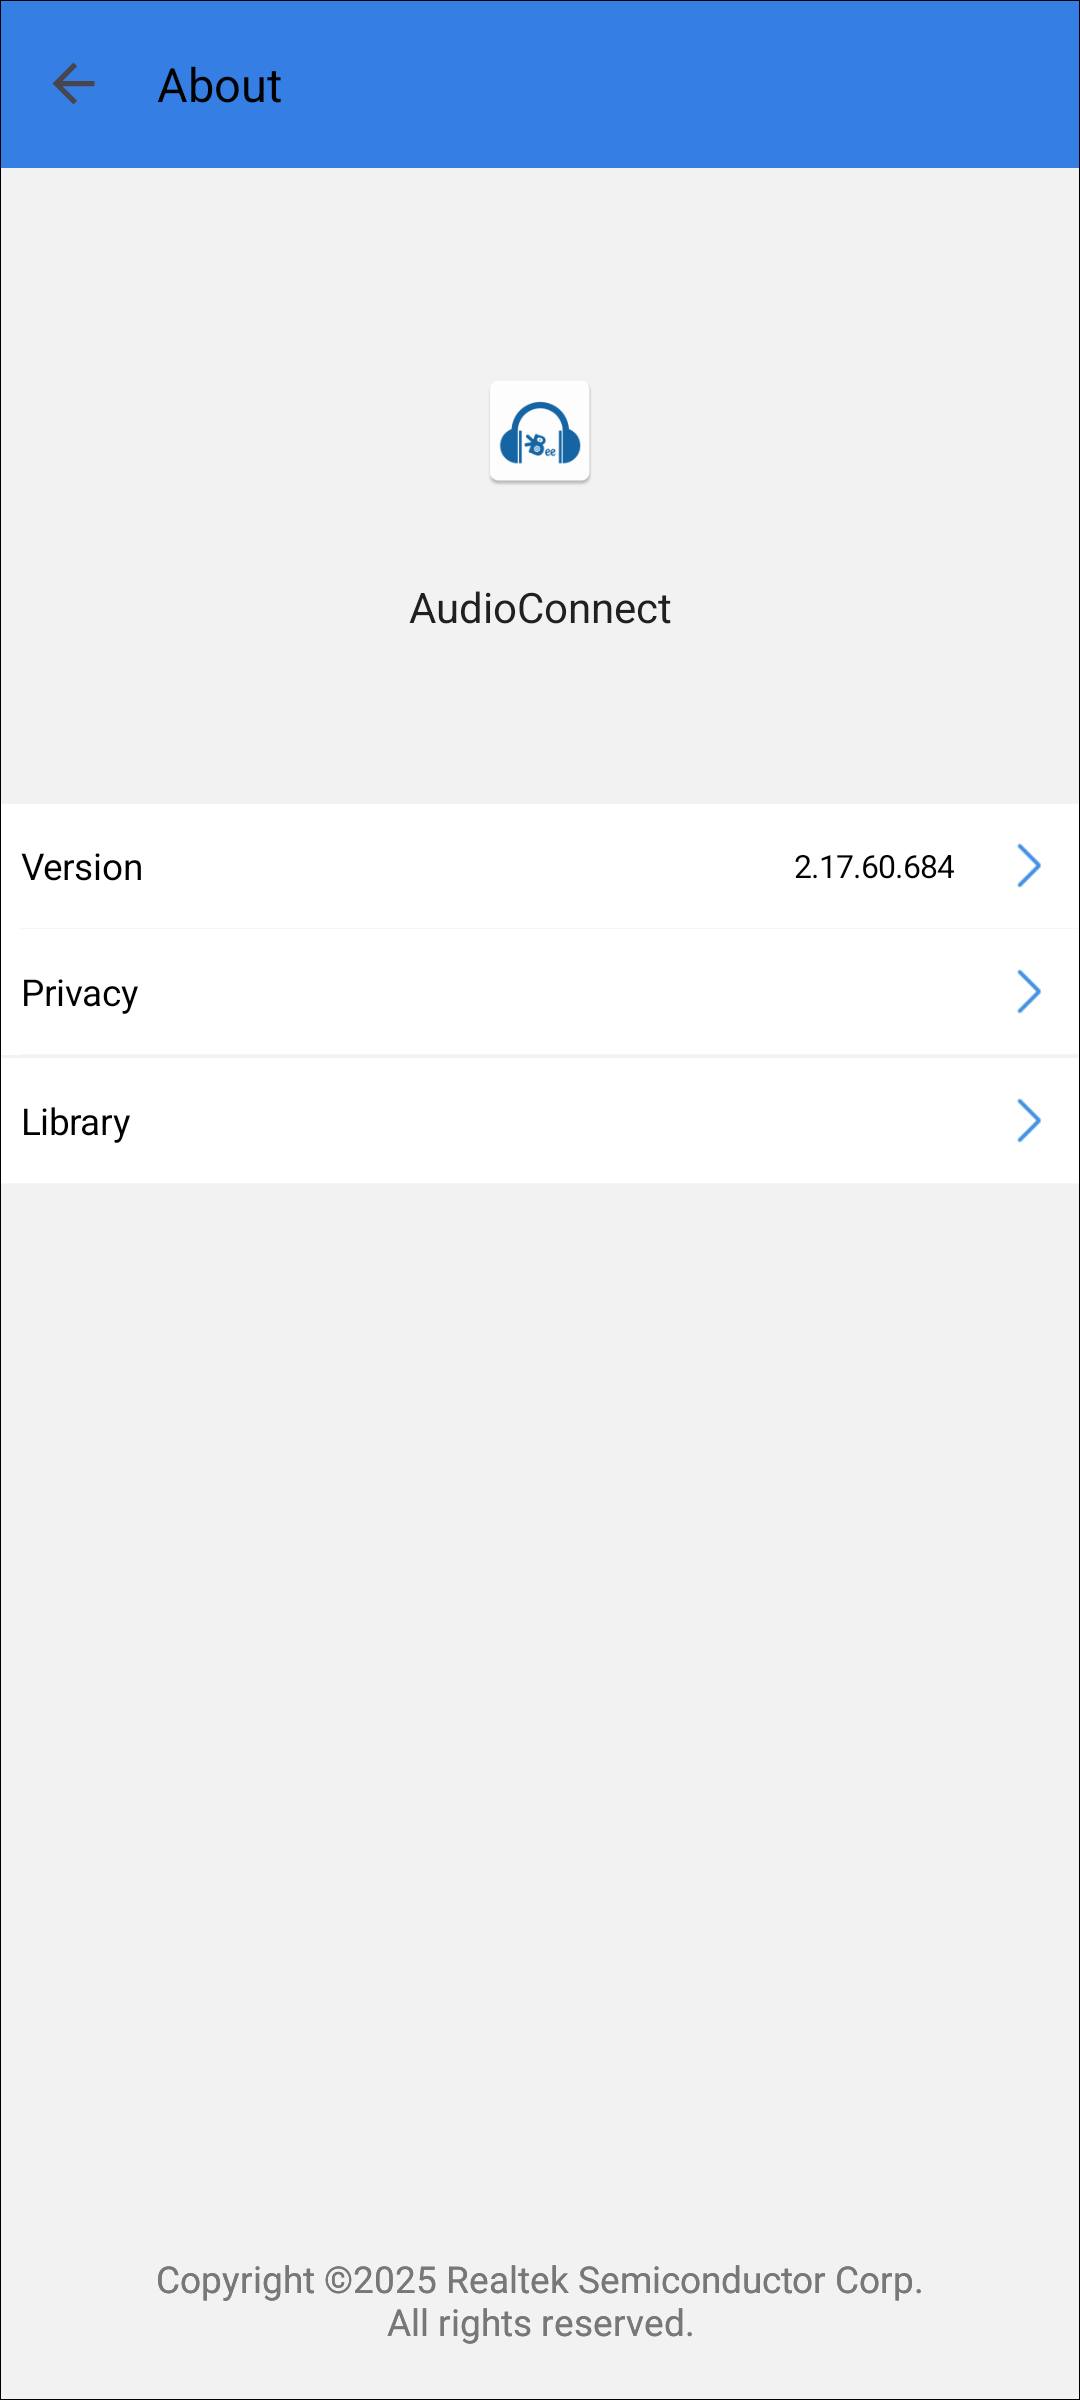
About
Displays the application version number, privacy permissions, dependent libraries, etc.
About