Android OTA APP
The Android OTA APP User Guide provides comprehensive guidance on using the application to update Realtek devices, utilizing Bluetooth Low Energy and Classic Bluetooth to deliver software updates, configuration settings, and patches. Prior to deploying the application, it is crucial to have a phone running Android 5.0 or above, along with the latest upgrade files, to guarantee a smooth and successful update process.
To help users fully grasp the application's functionalities, this manual includes annotated figures for clarity, ensuring users can follow visual aids to complete each step effectively.
The Getting Started section provides an effective step-by-step guide, directing users on how to use this tool.
The FAQ section is a valuable resource for addressing common questions and troubleshooting potential issues.
OTA APP is designed to provide the function of updating the firmware version for Realtek RTL87xx SoC series products.
Getting Started
After connecting with an RTL87xx product, it can support HID, LE, headset device, BR/EDR, dongle device to do OTA update. Among them:
HID function test is mainly for the OTA upgrade of the remote control.
LE function test is to do OTA upgrade for low energy bluetooth devices.
Headset function test is to do OTA upgrade for headset equipment.
BR/EDR function test is to do OTA upgrade for classic bluetooth devices.
Dongle function test is to do OTA upgrade for dongle equipment.

Function Test
Since the upgrade process of different types of devices is roughly the same, this article will take SPP function test as an example to briefly introduce the operation process of OTA upgrade.
Connect Target Device
Select headset (SPP Function Test) on the solution OTA test page.
Update the application or firmware of RTL87xx series IC through bluetooth SPP channel according to the specified process.
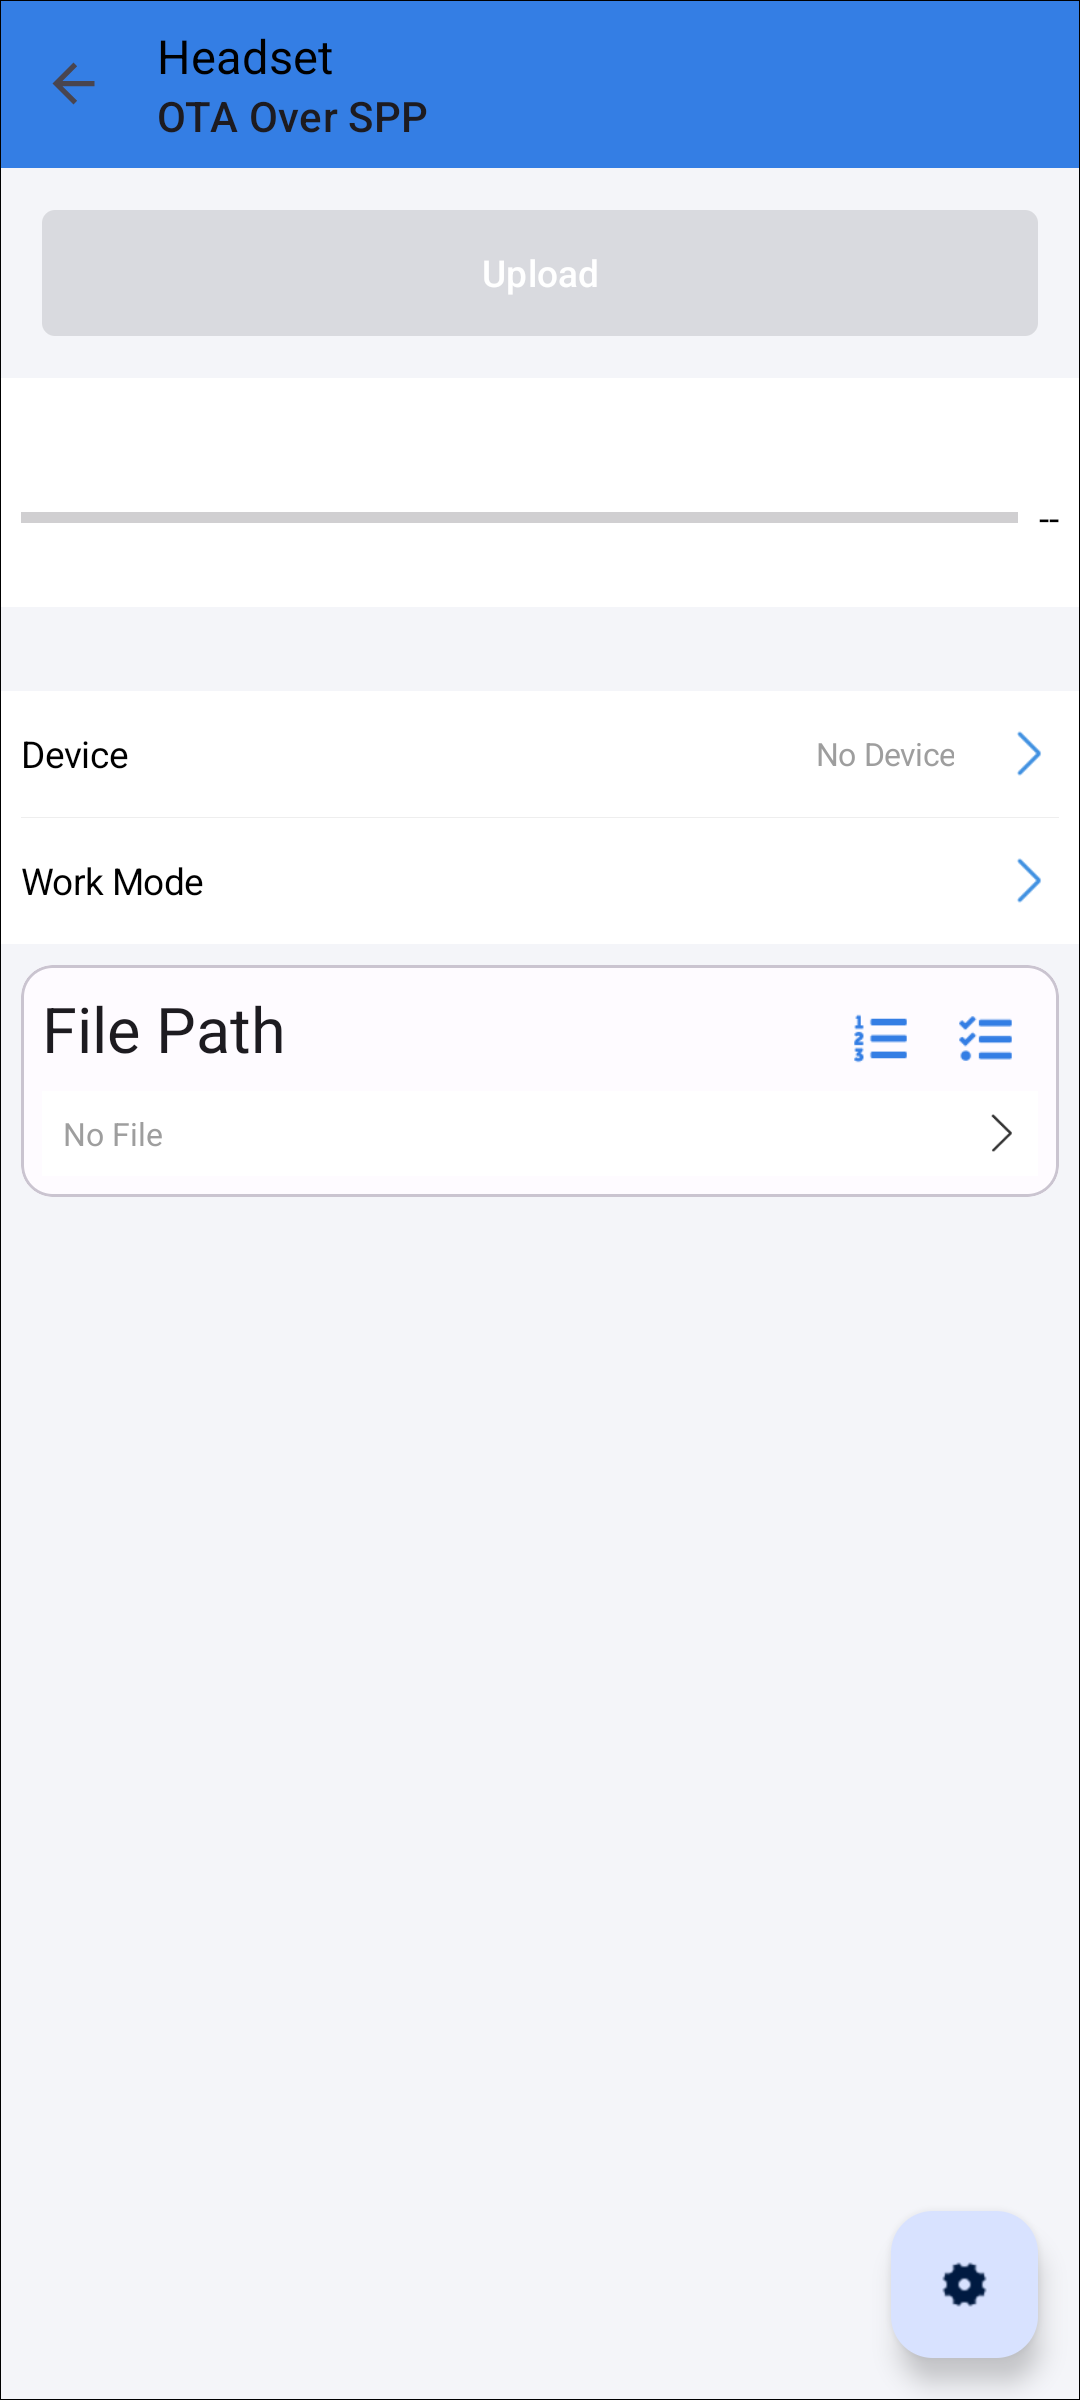
Headset Function Test
Select Target Device
When clicking the device item, the scan device page will be entered, the page will automatically scan and a device list will appear on the page, a device can be selected to connect via SPP. If the list does not appear automatically, then click the SCAN button.
Click the SCAN button to discover devices nearby.
Select the device that needs to be connected via SPP.
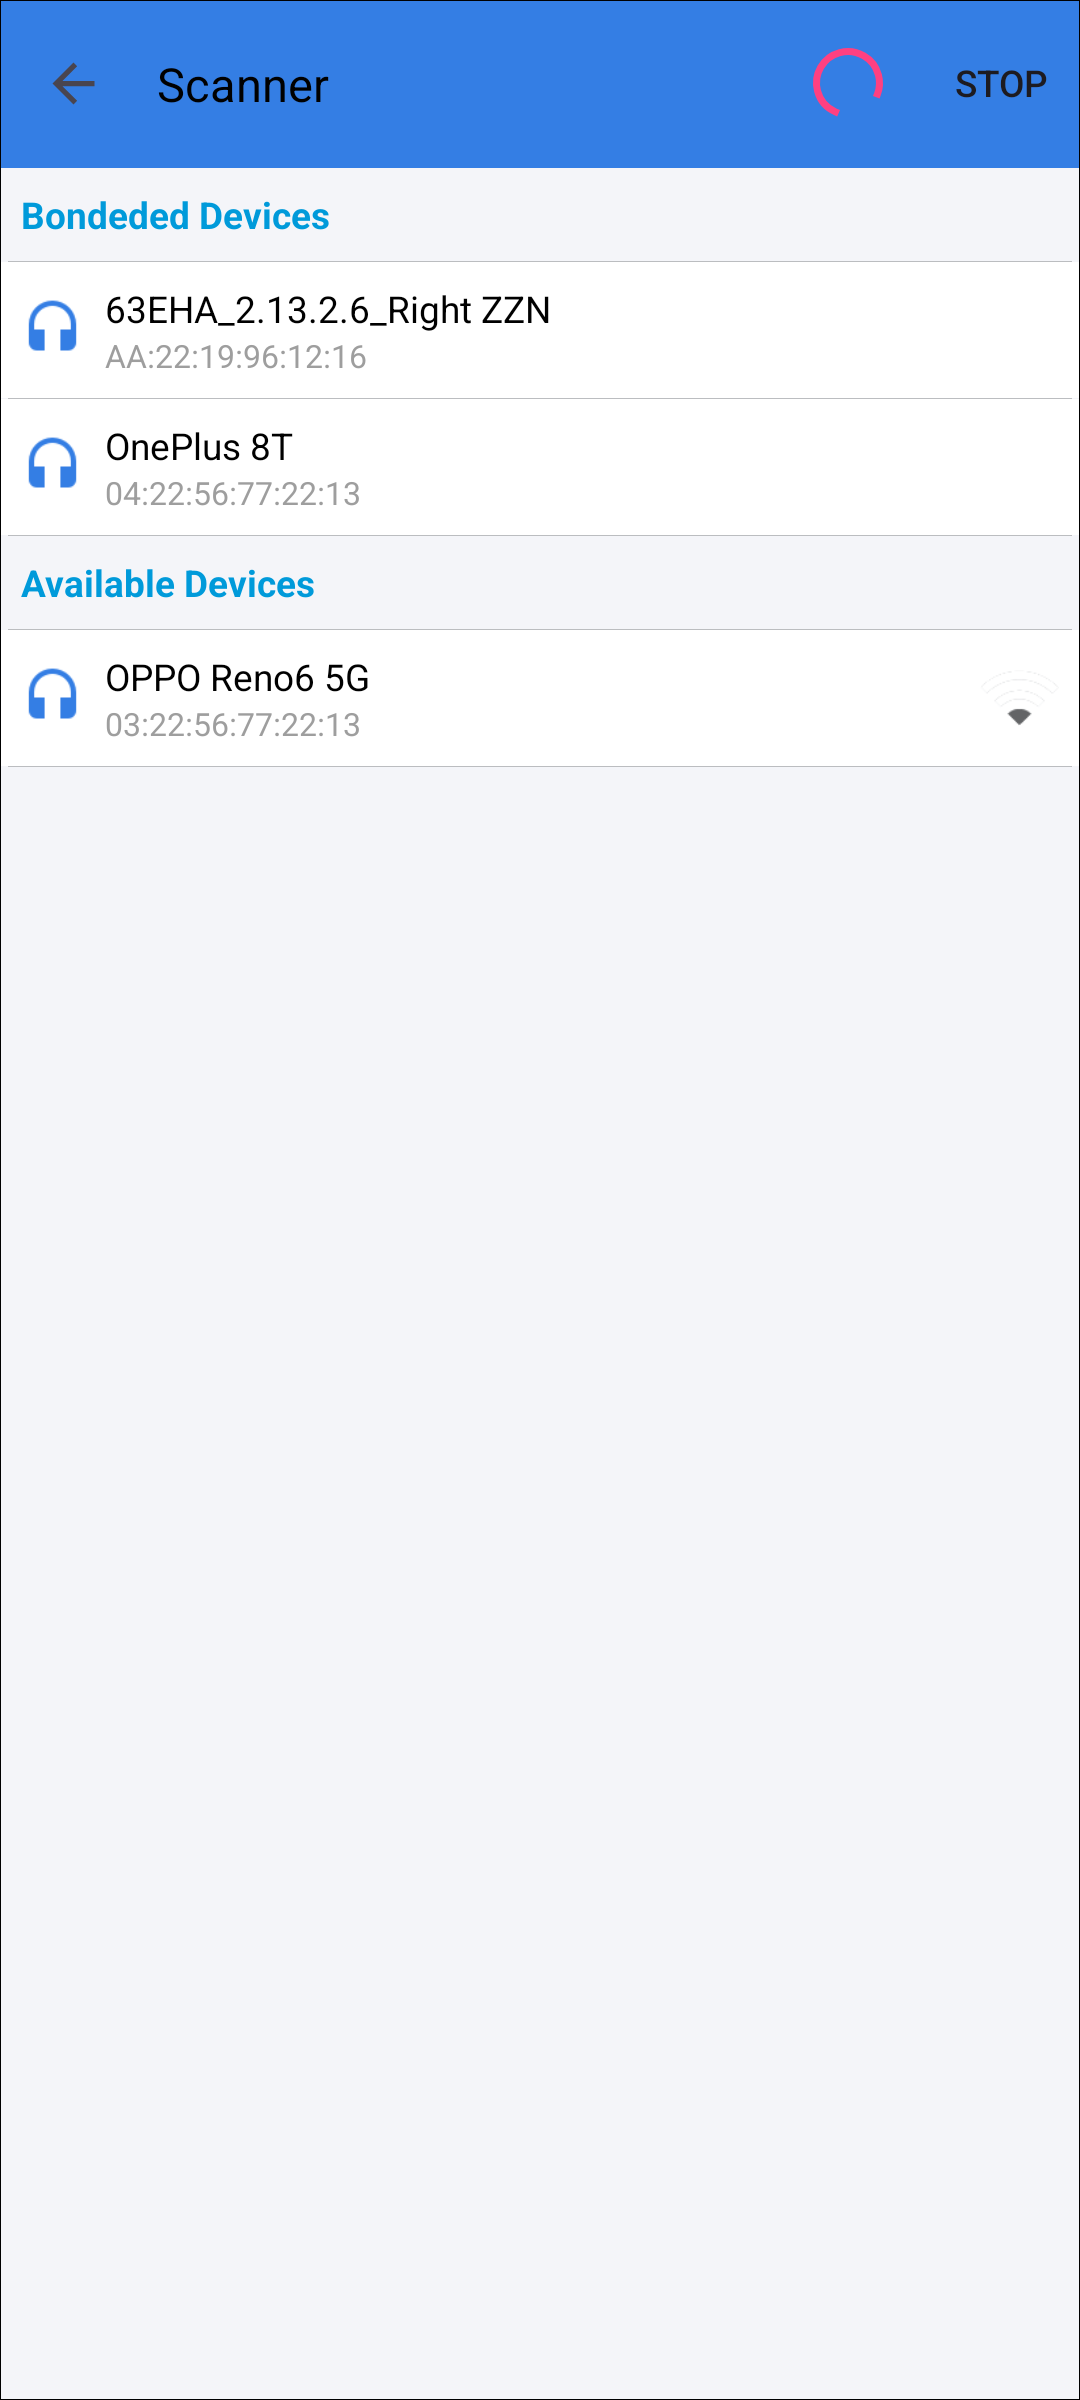
Scan Target Device
Establish Connection
After the connection is established, UI will show the device info including device name and bluetooth address, as shown below:
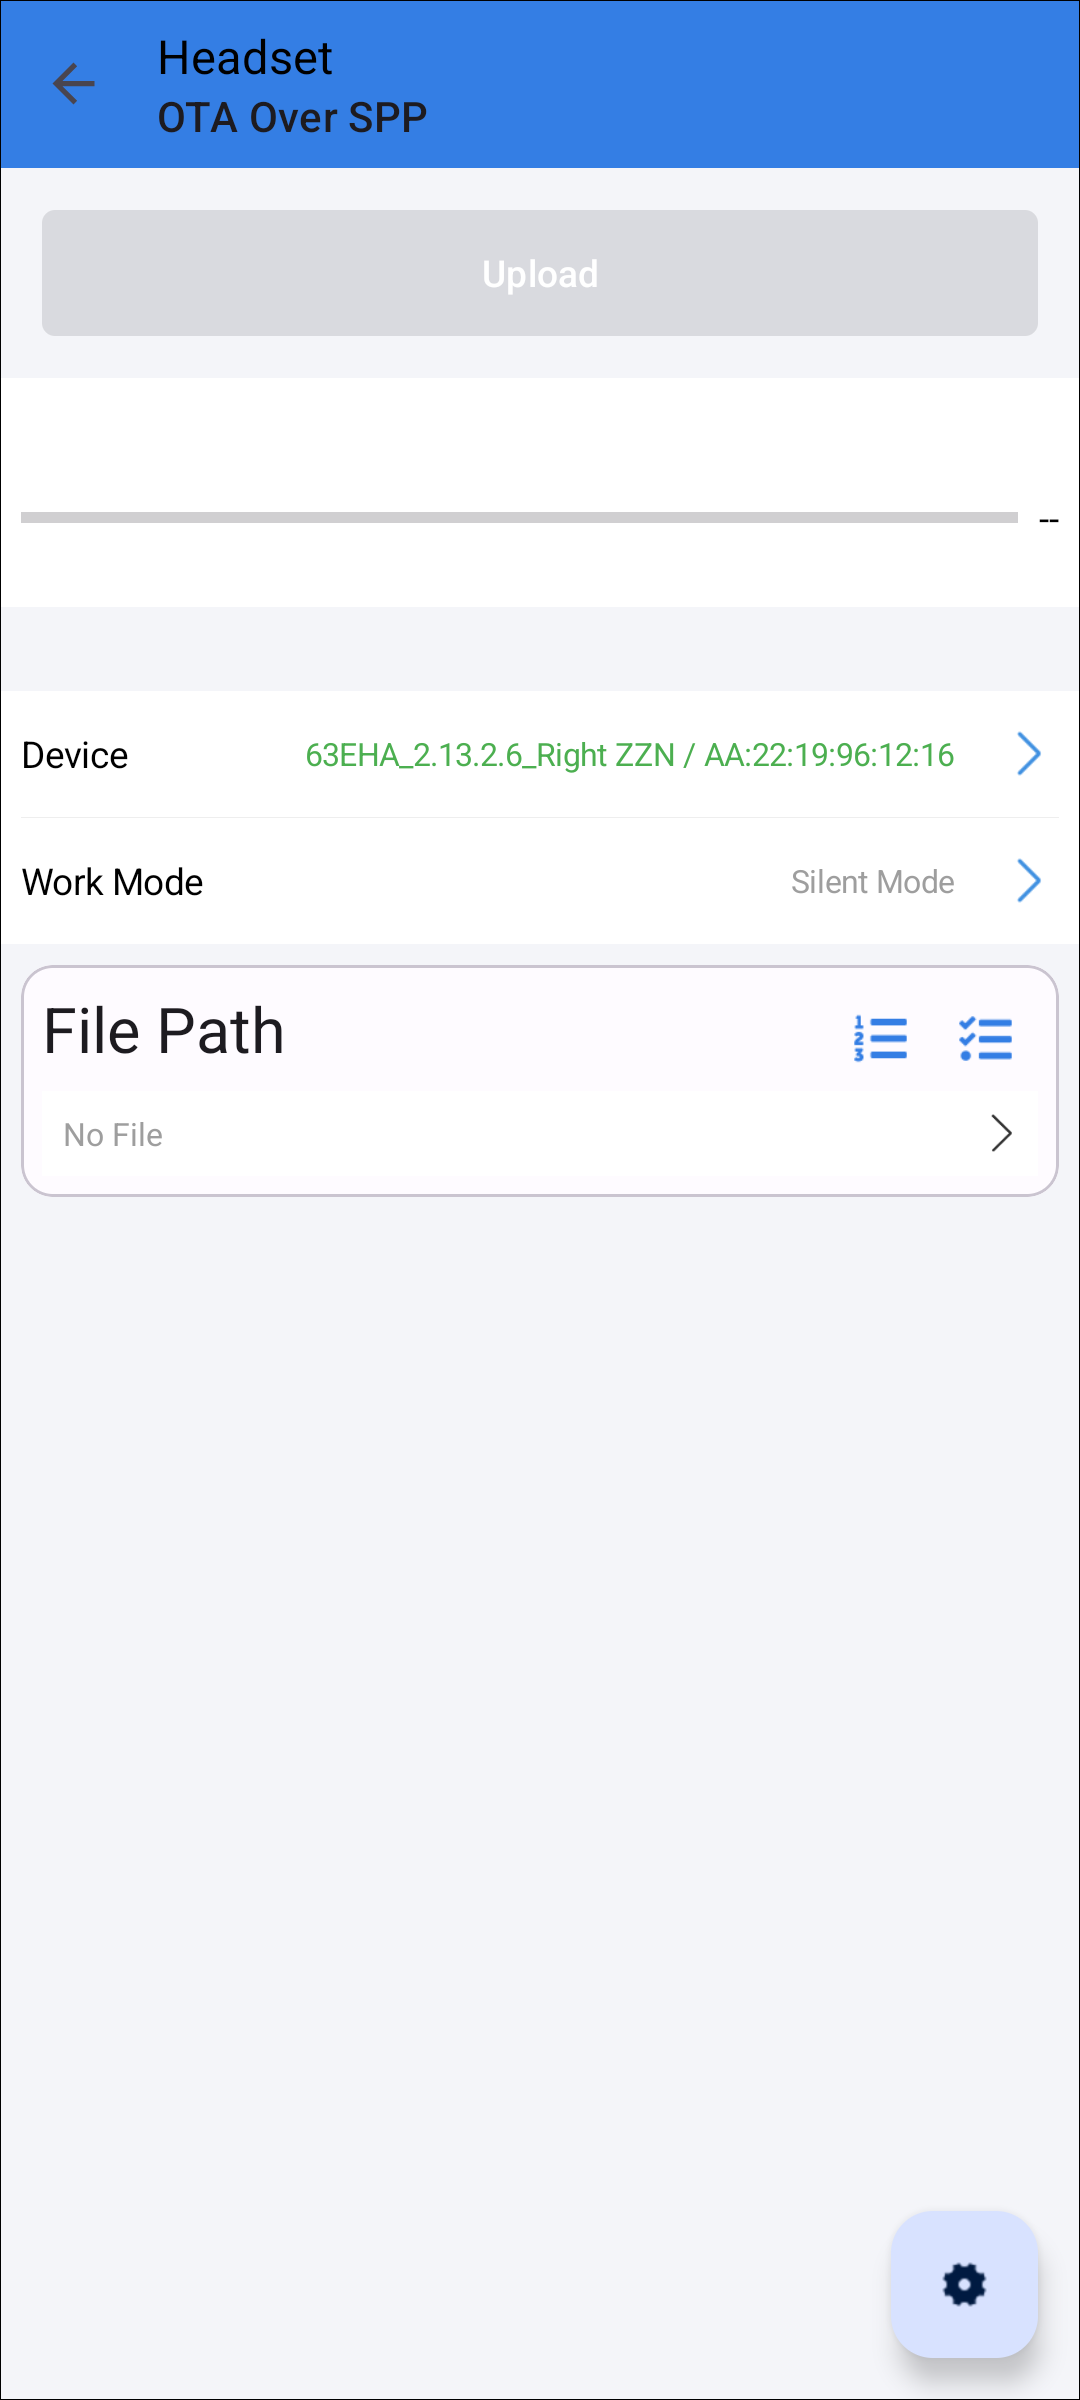
Establish Connection
View Device Information
Click the device name whose color is green, and the dialog will be shown from the bottom, the device info can be checked as shown below:
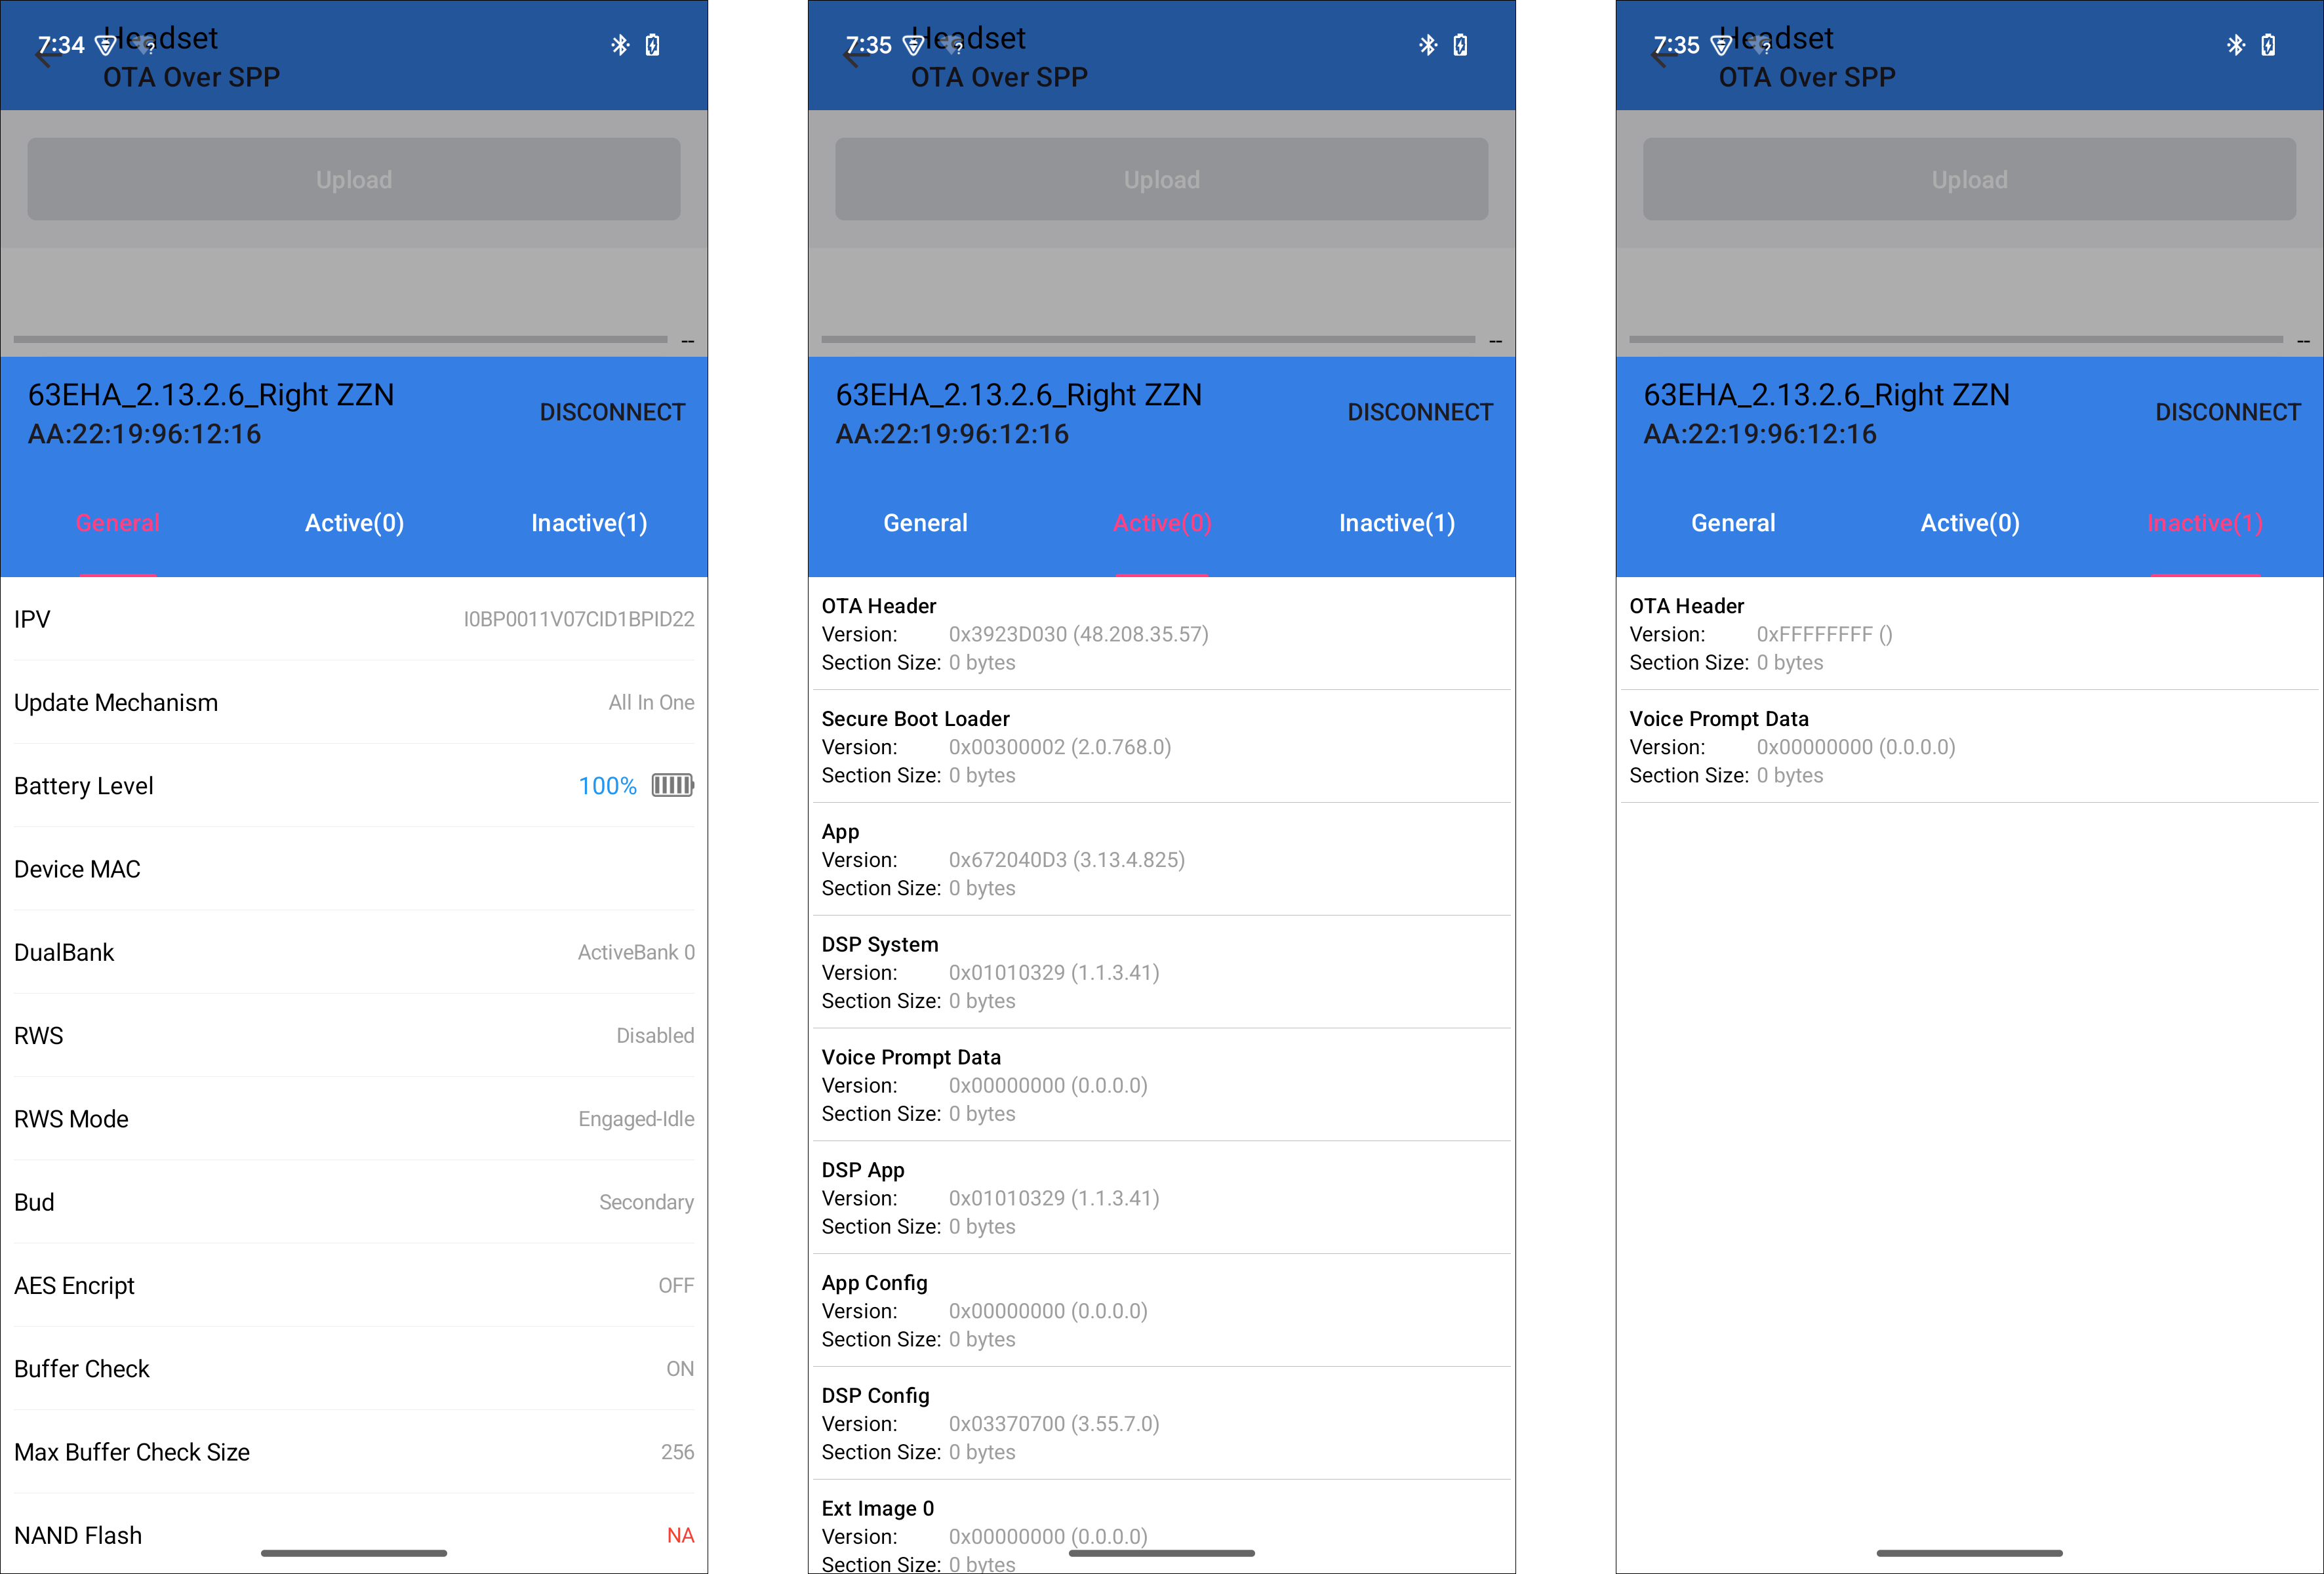
Device Information
General: General information of the device, including version numbers, etc.
Active: The currently running bank, including version number information, etc.
Inactive: The bank pending upgrade, including version number information, etc.
Load File
Click File Path item to open file explorer.
Select the image file to upload.
Note
The bin file needs to be searched for starting from the root directory of the storage device.
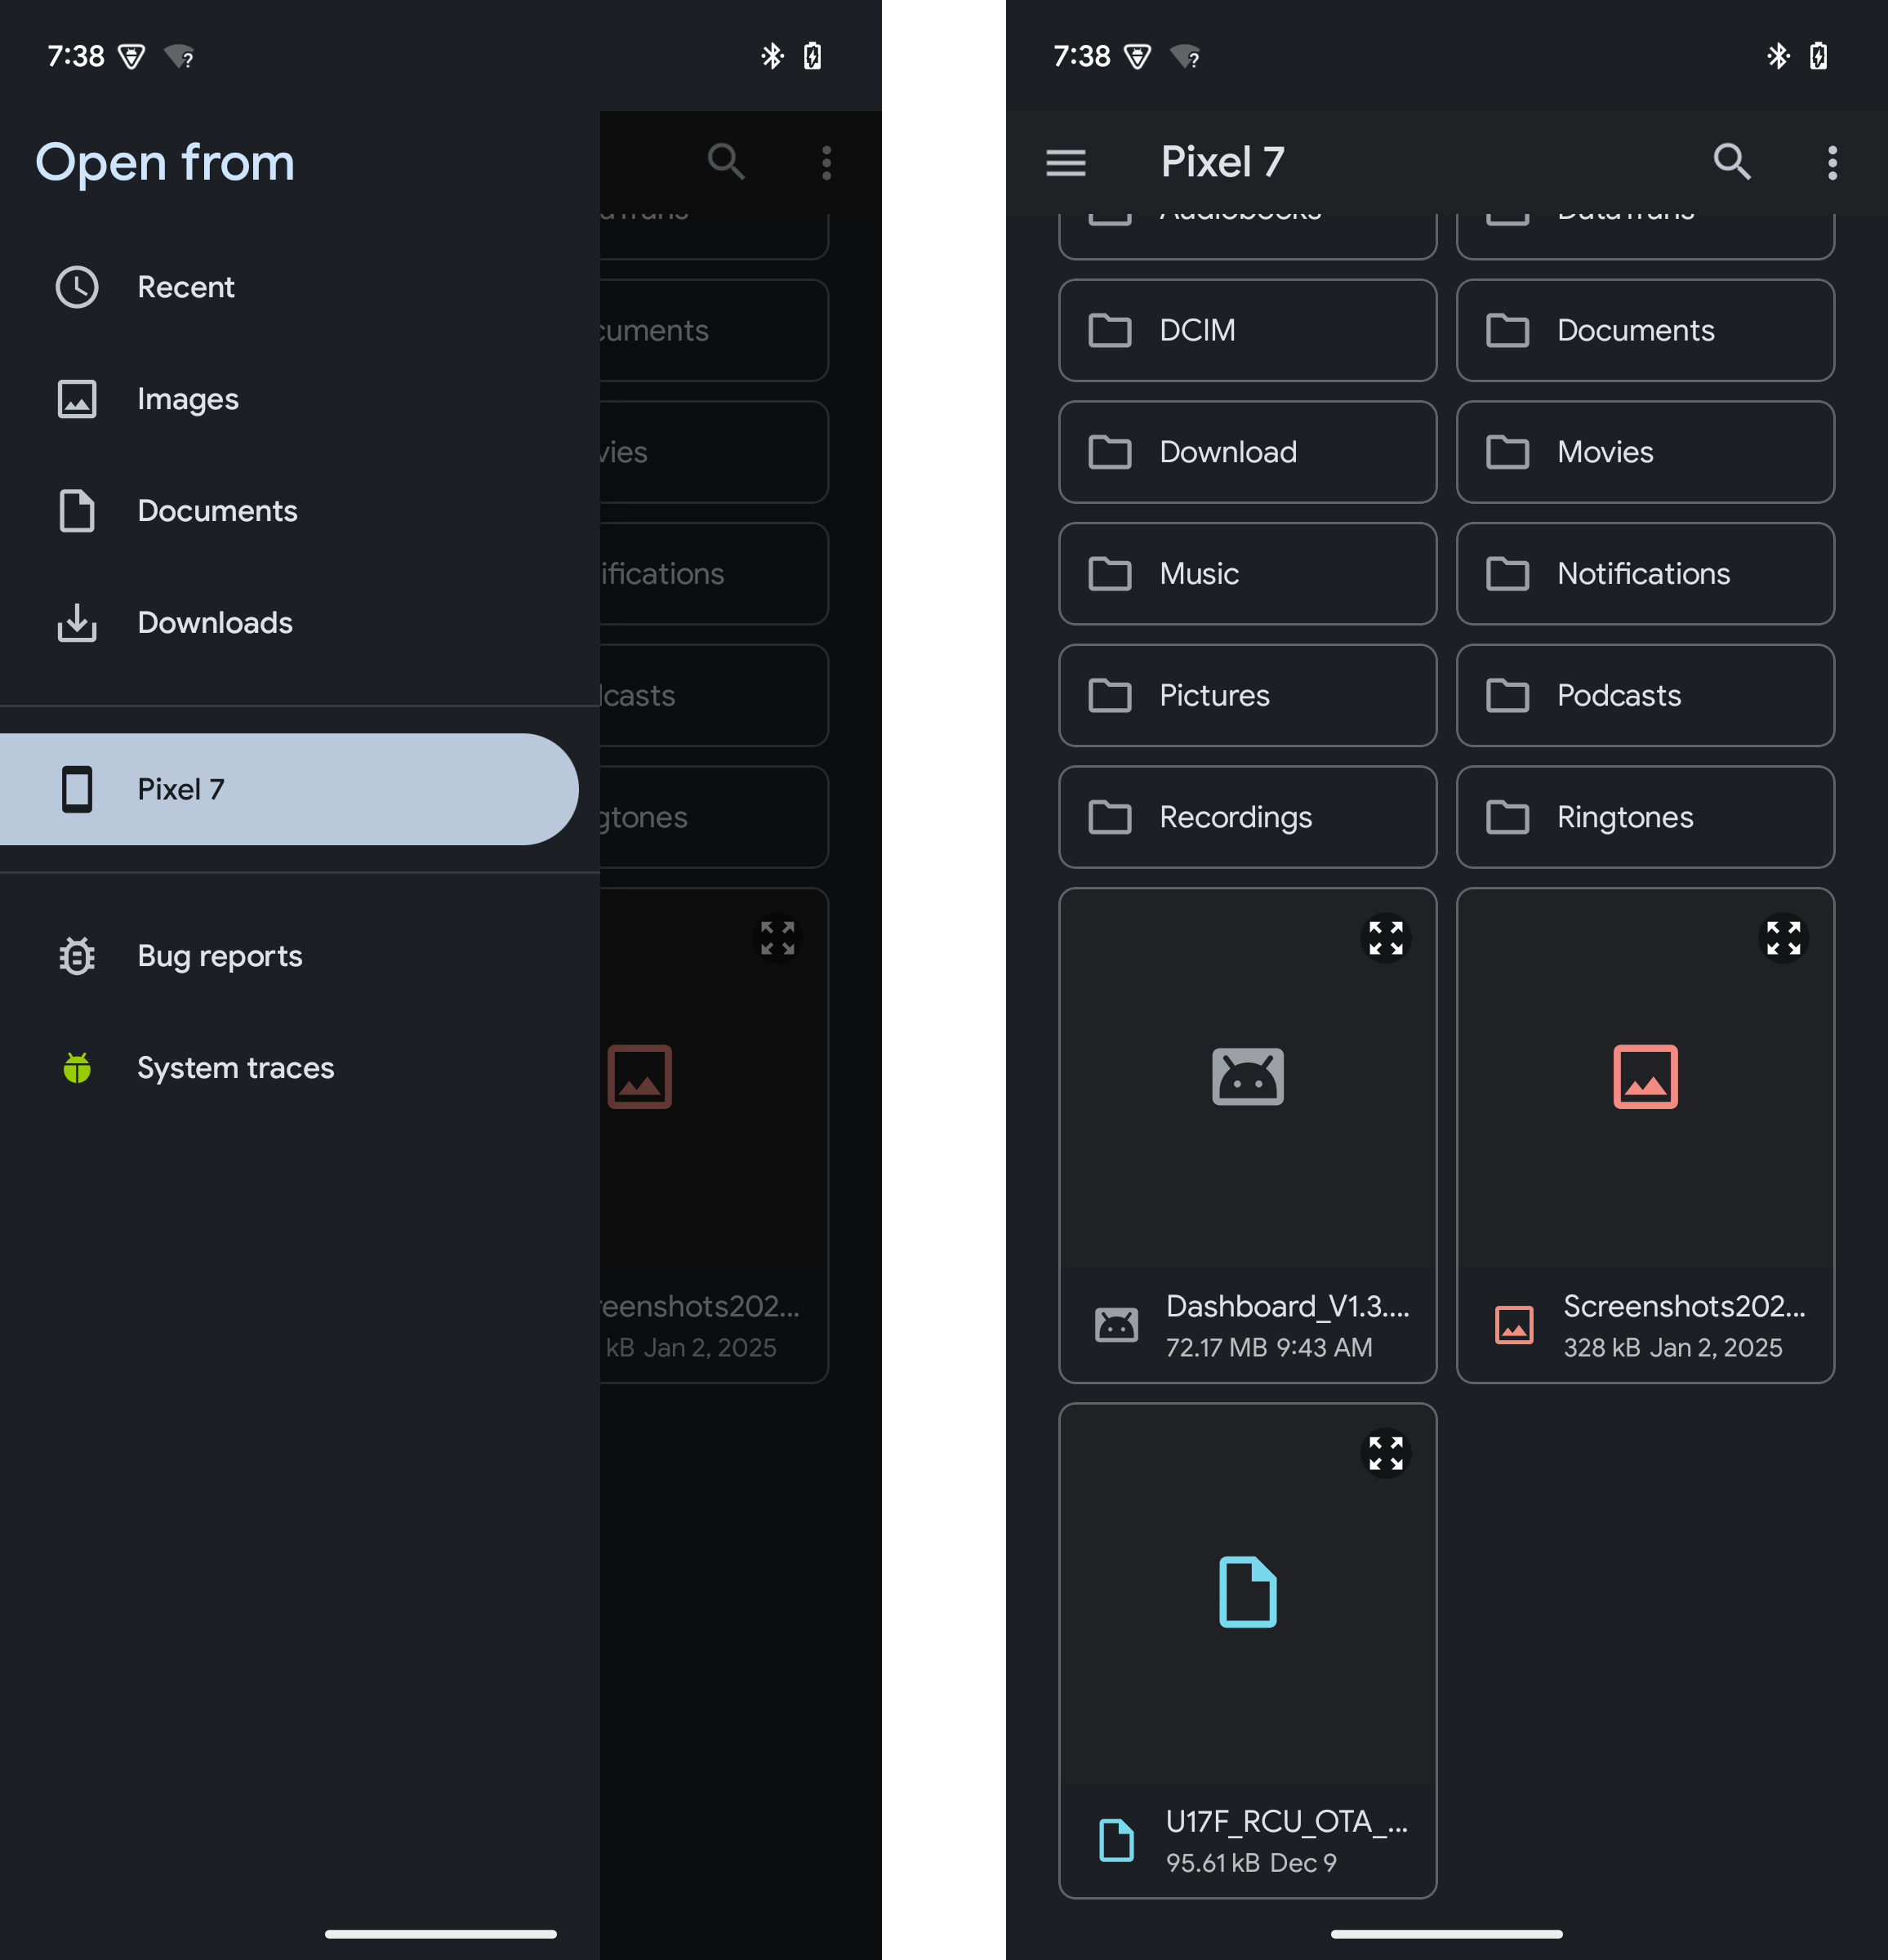
Select Bin File
After the file load success, the file name's color will change to green.
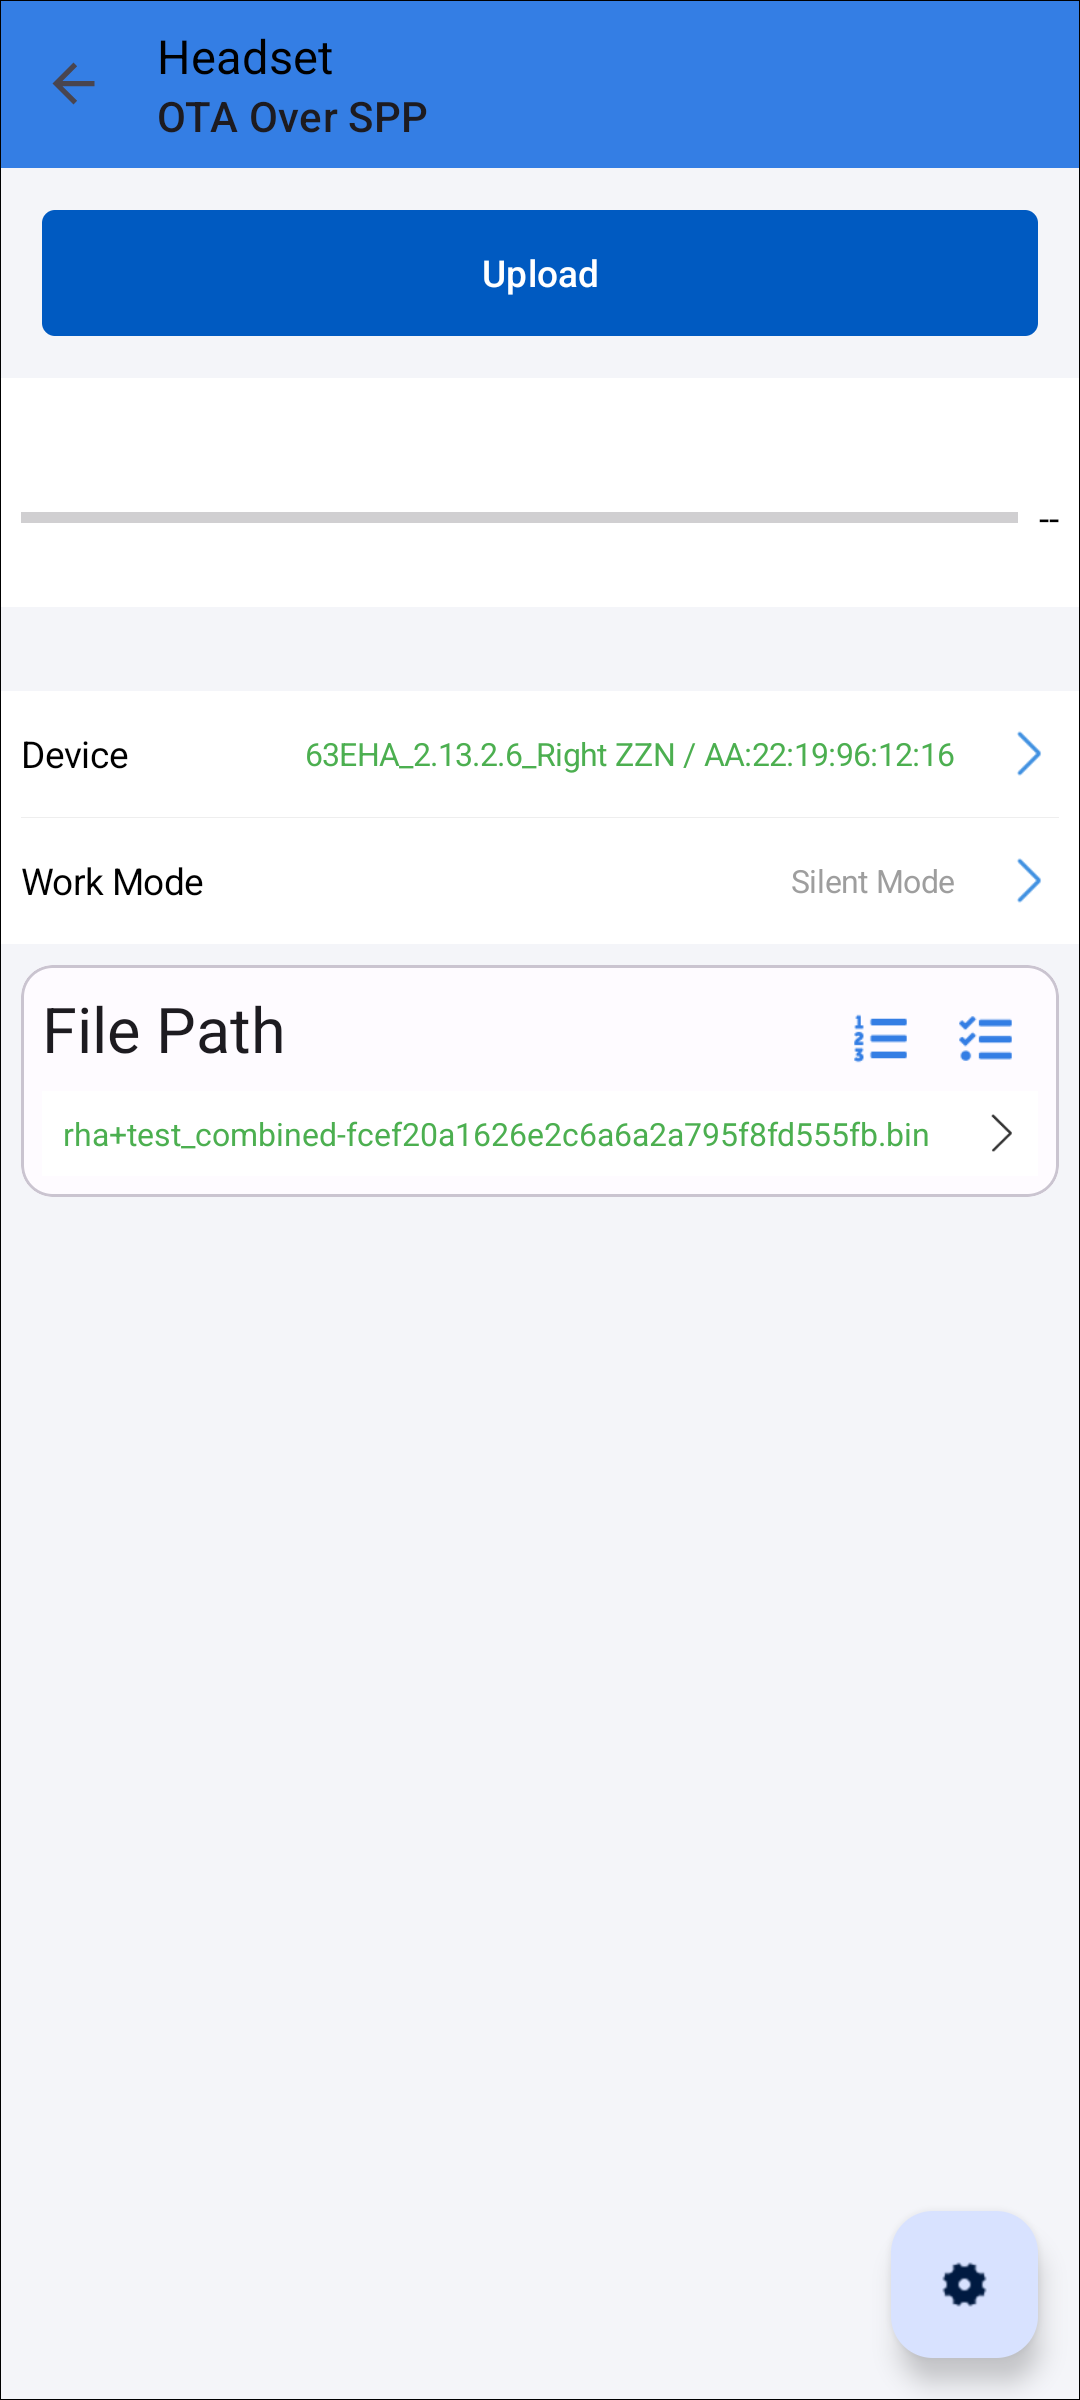
Load File Complete
Click the file name item, a new dialog will be shown from the bottom.
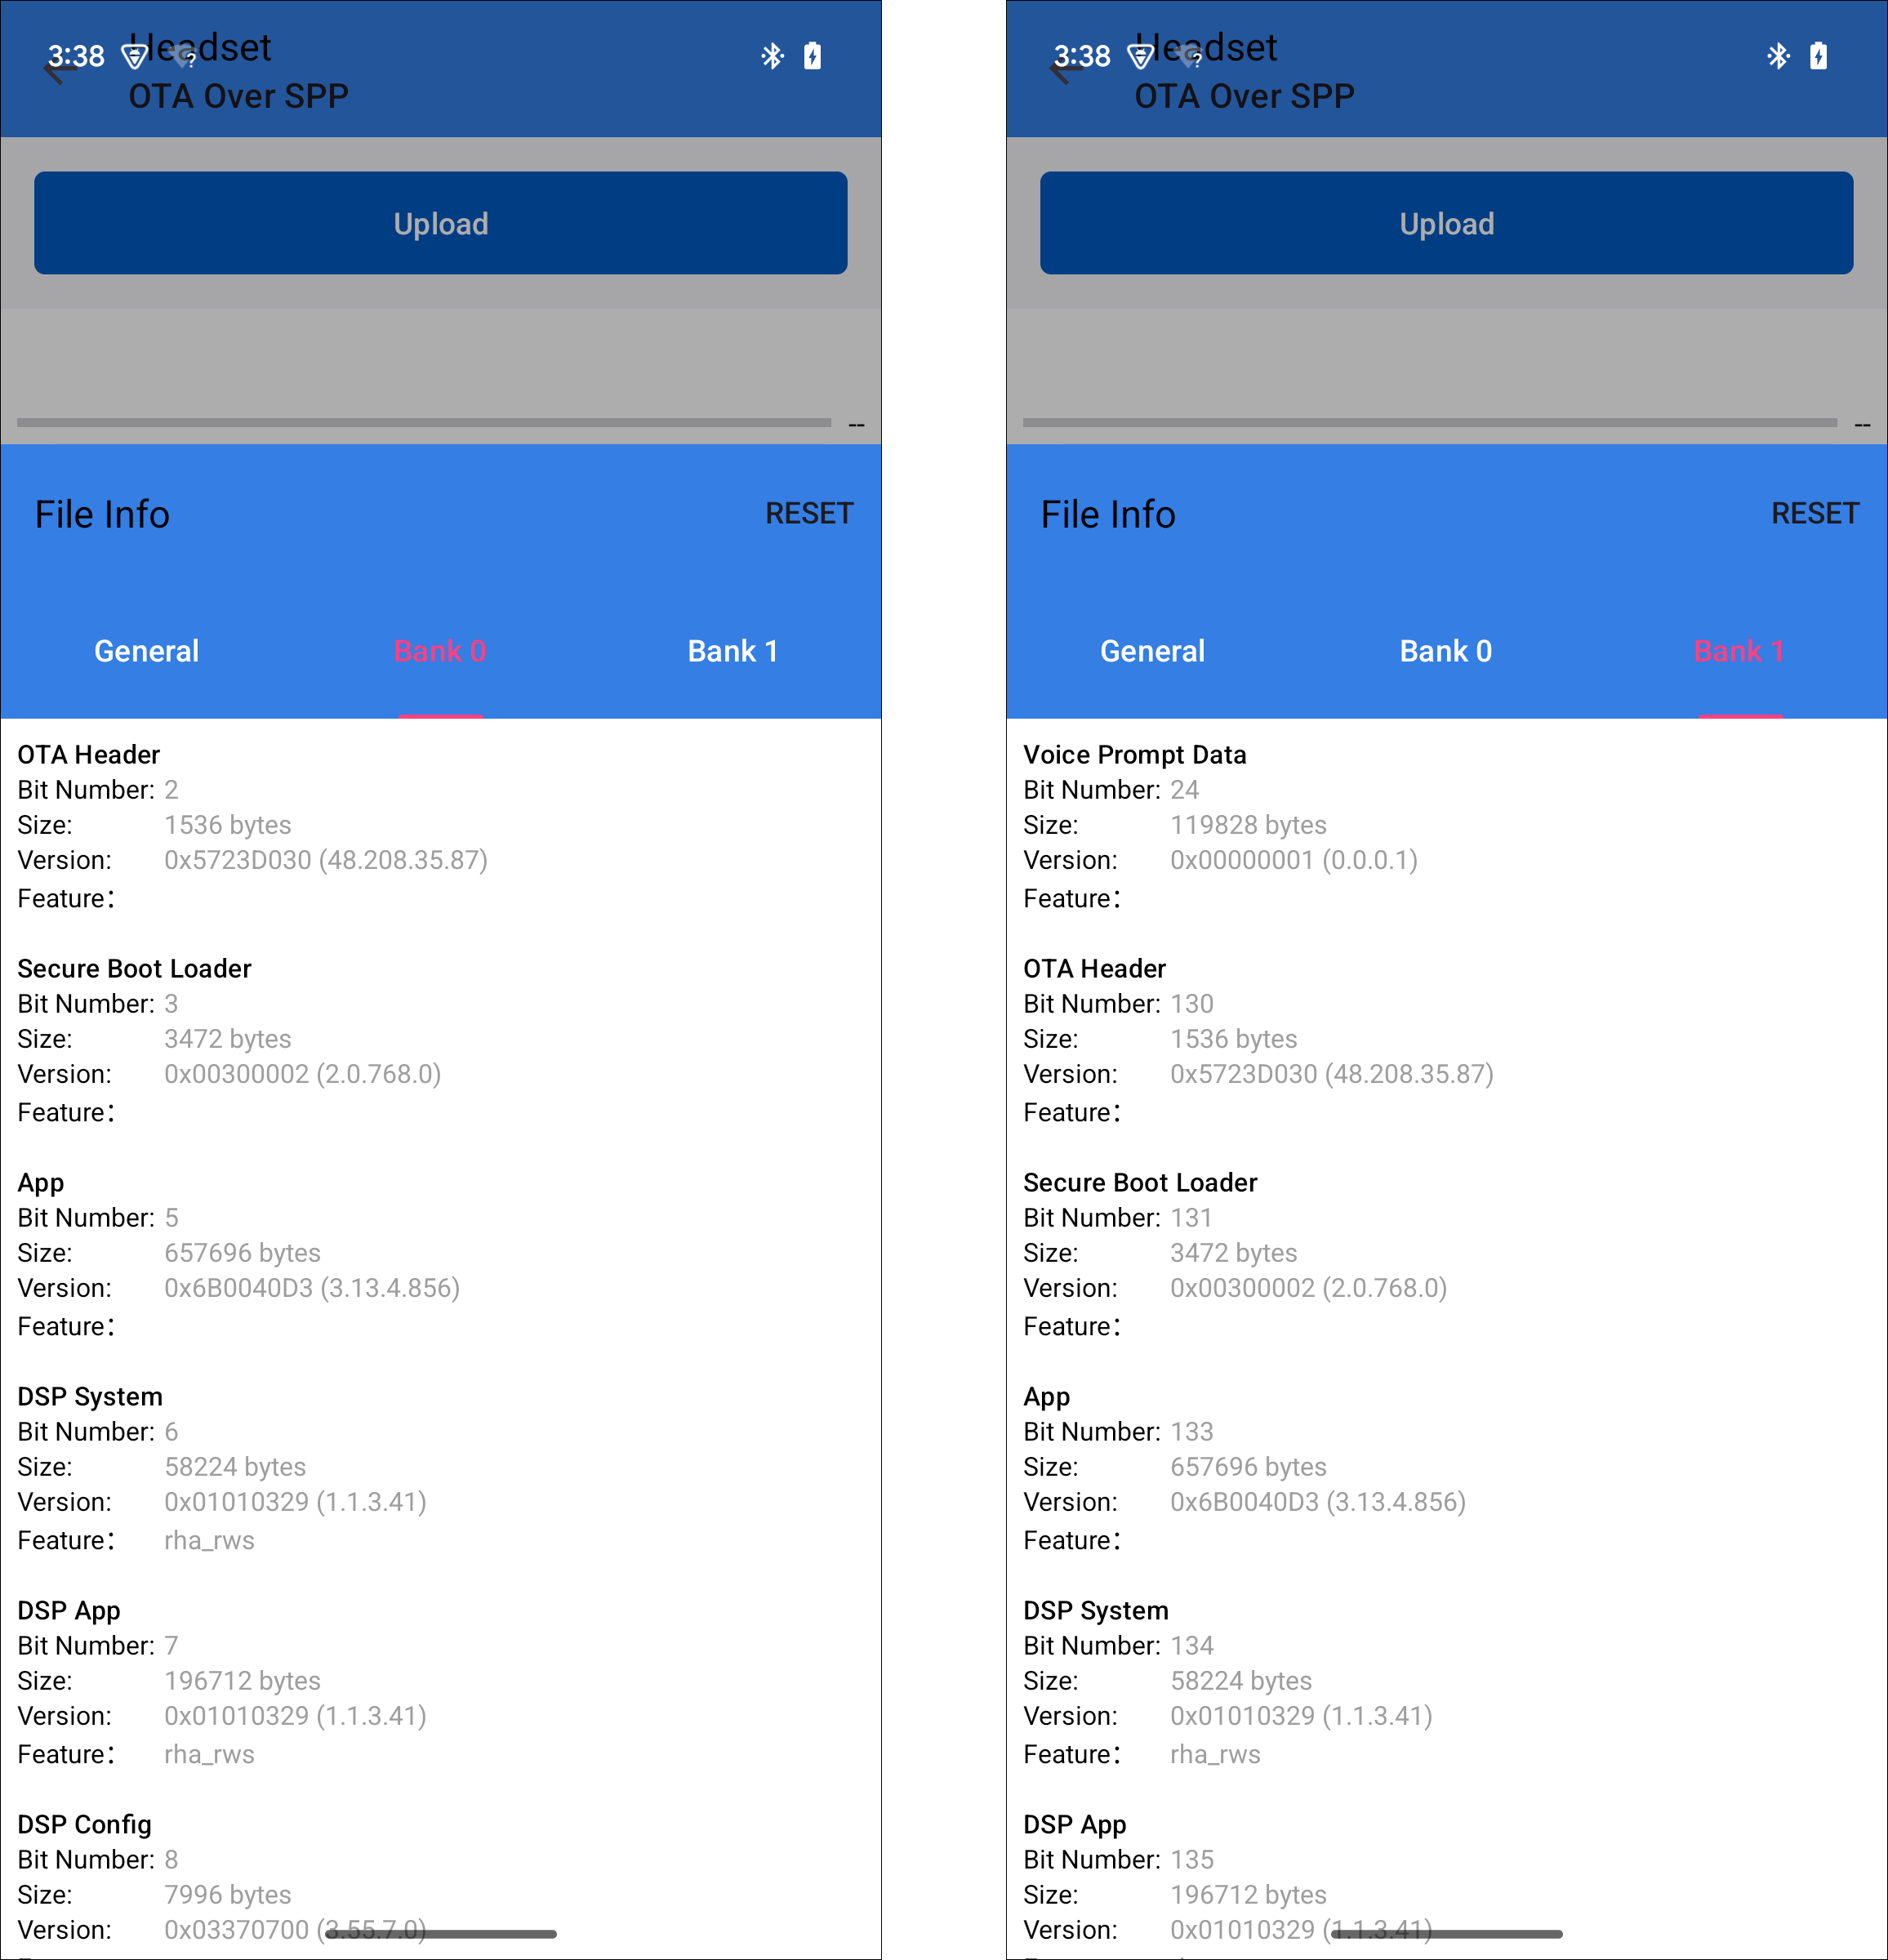
File Detail Information
Update
After connecting the device, click the Upload button to start the upgrade.
During the upgrade process, the current upgrade progress will be displayed on the UI.
After the upgrade is completed, there will be a result prompt.
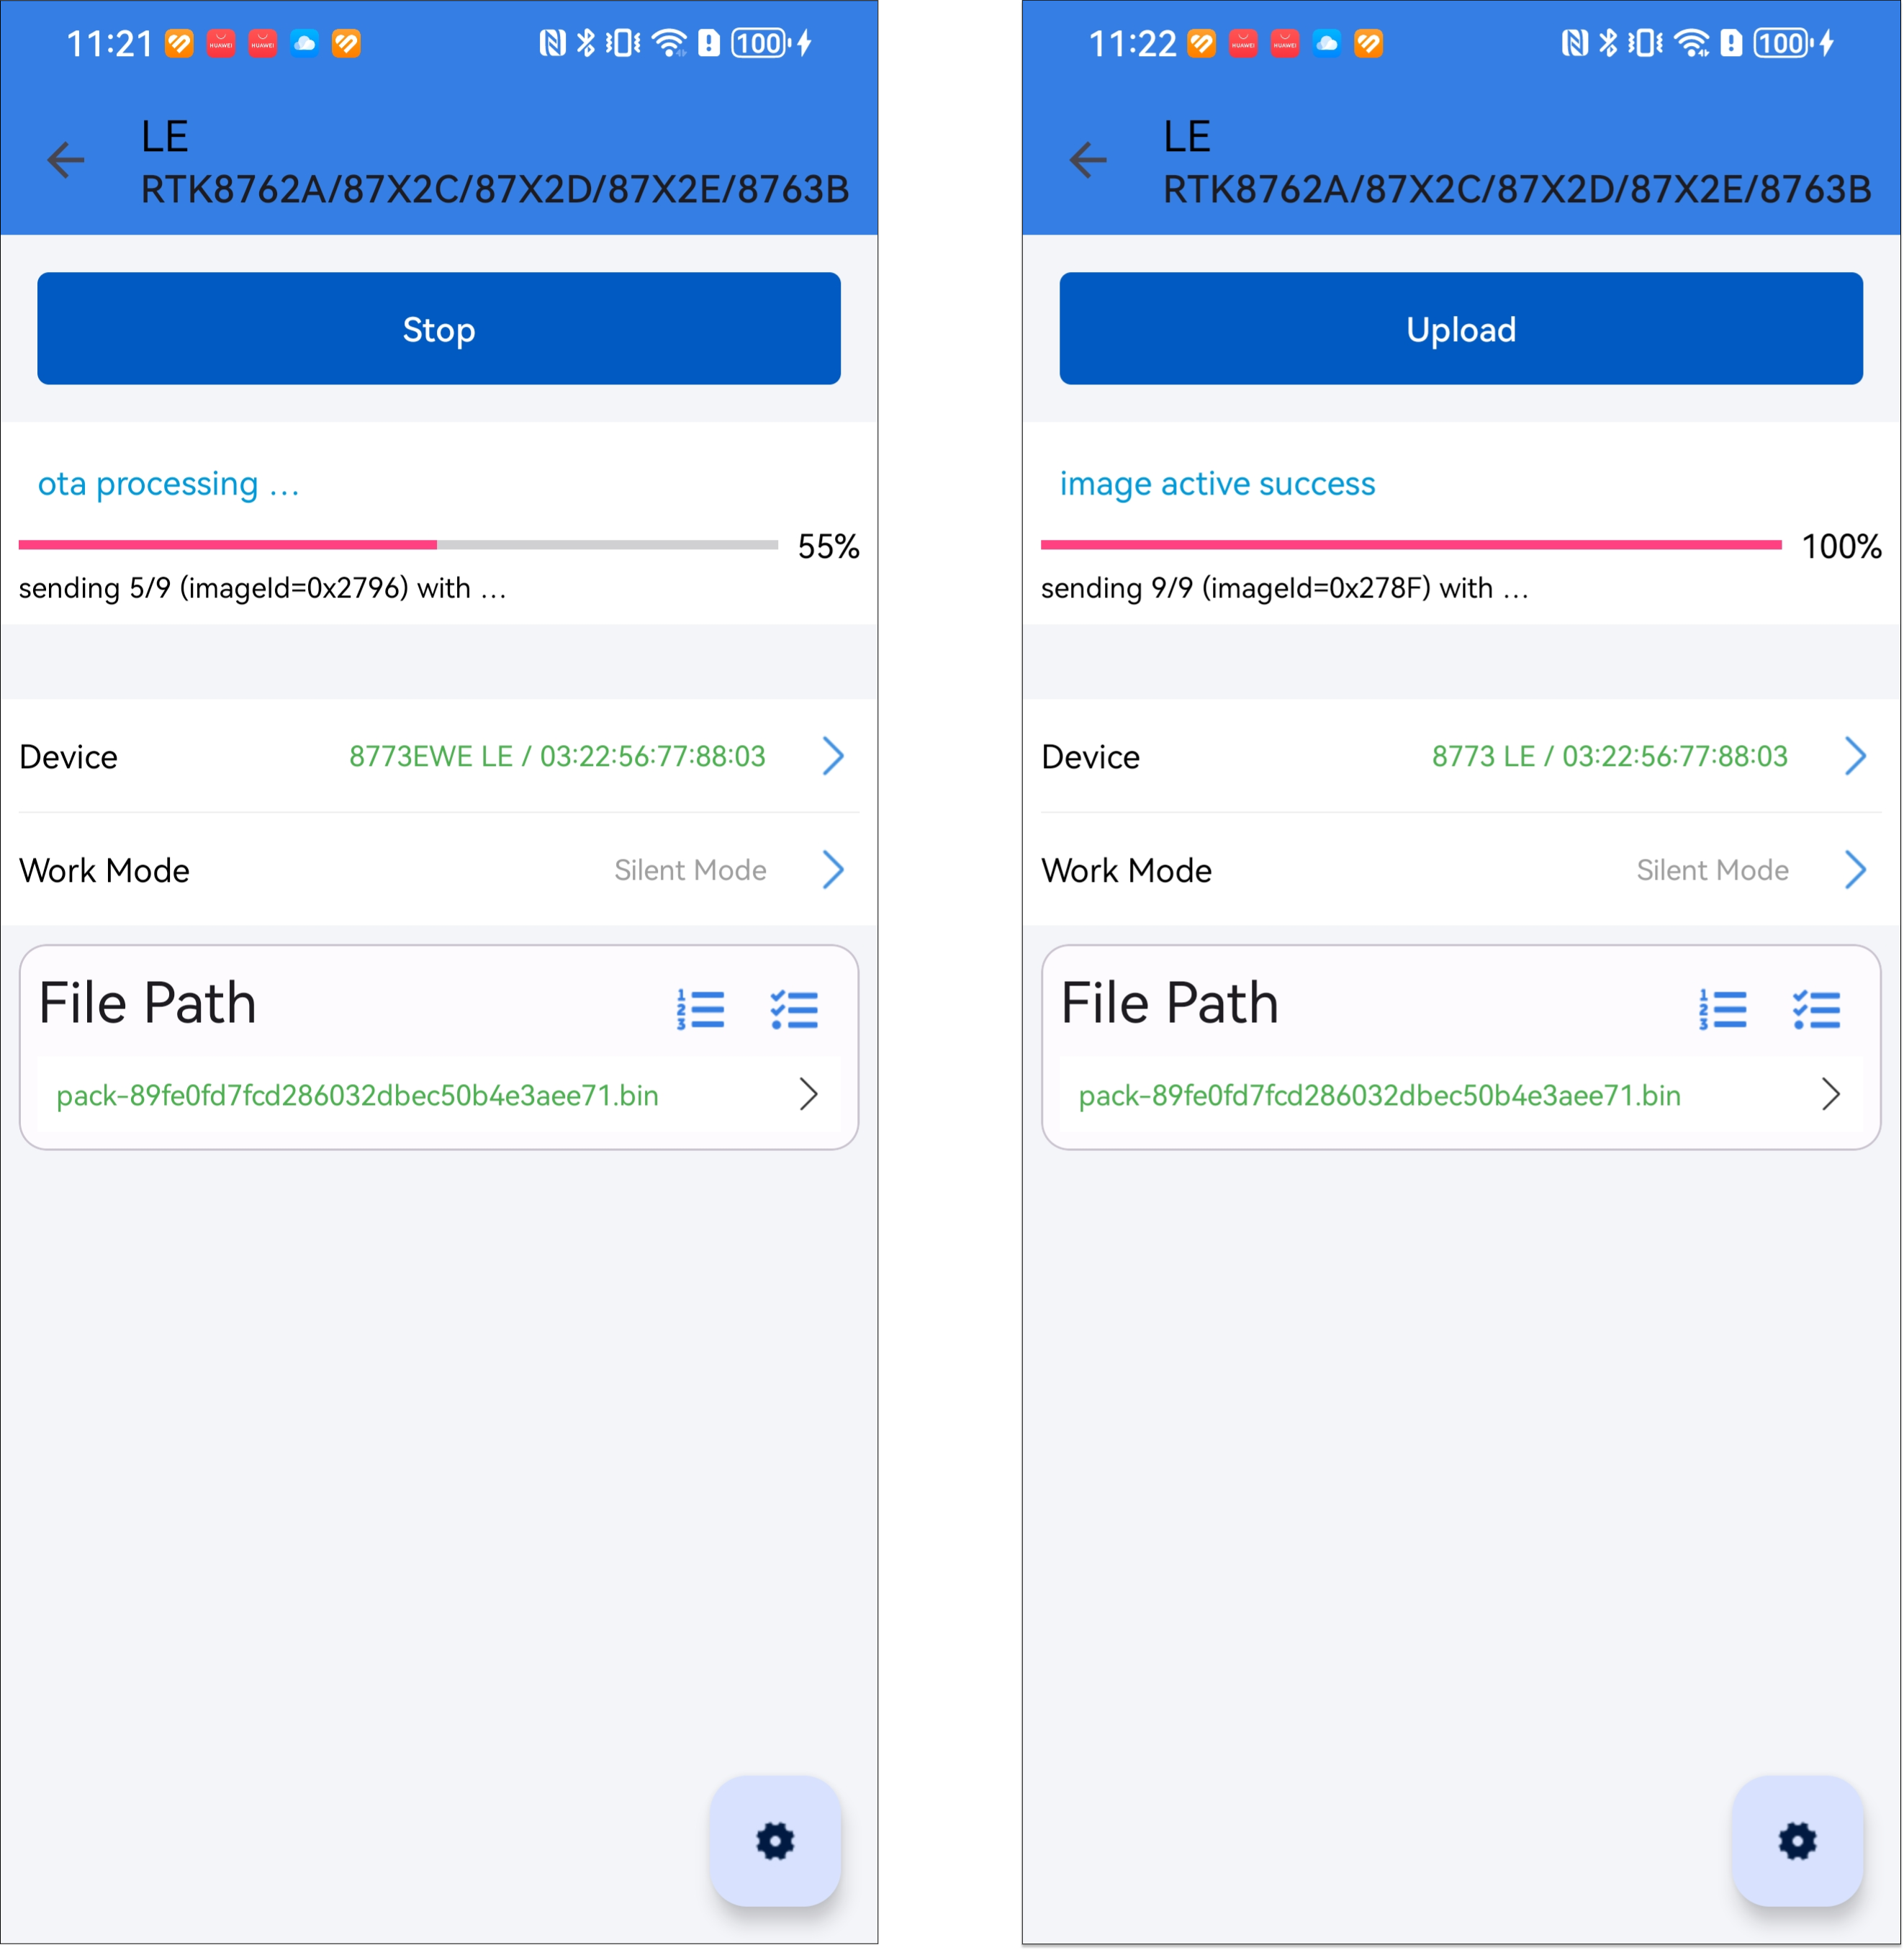
Upload Processing
Settings
Bin Parameters
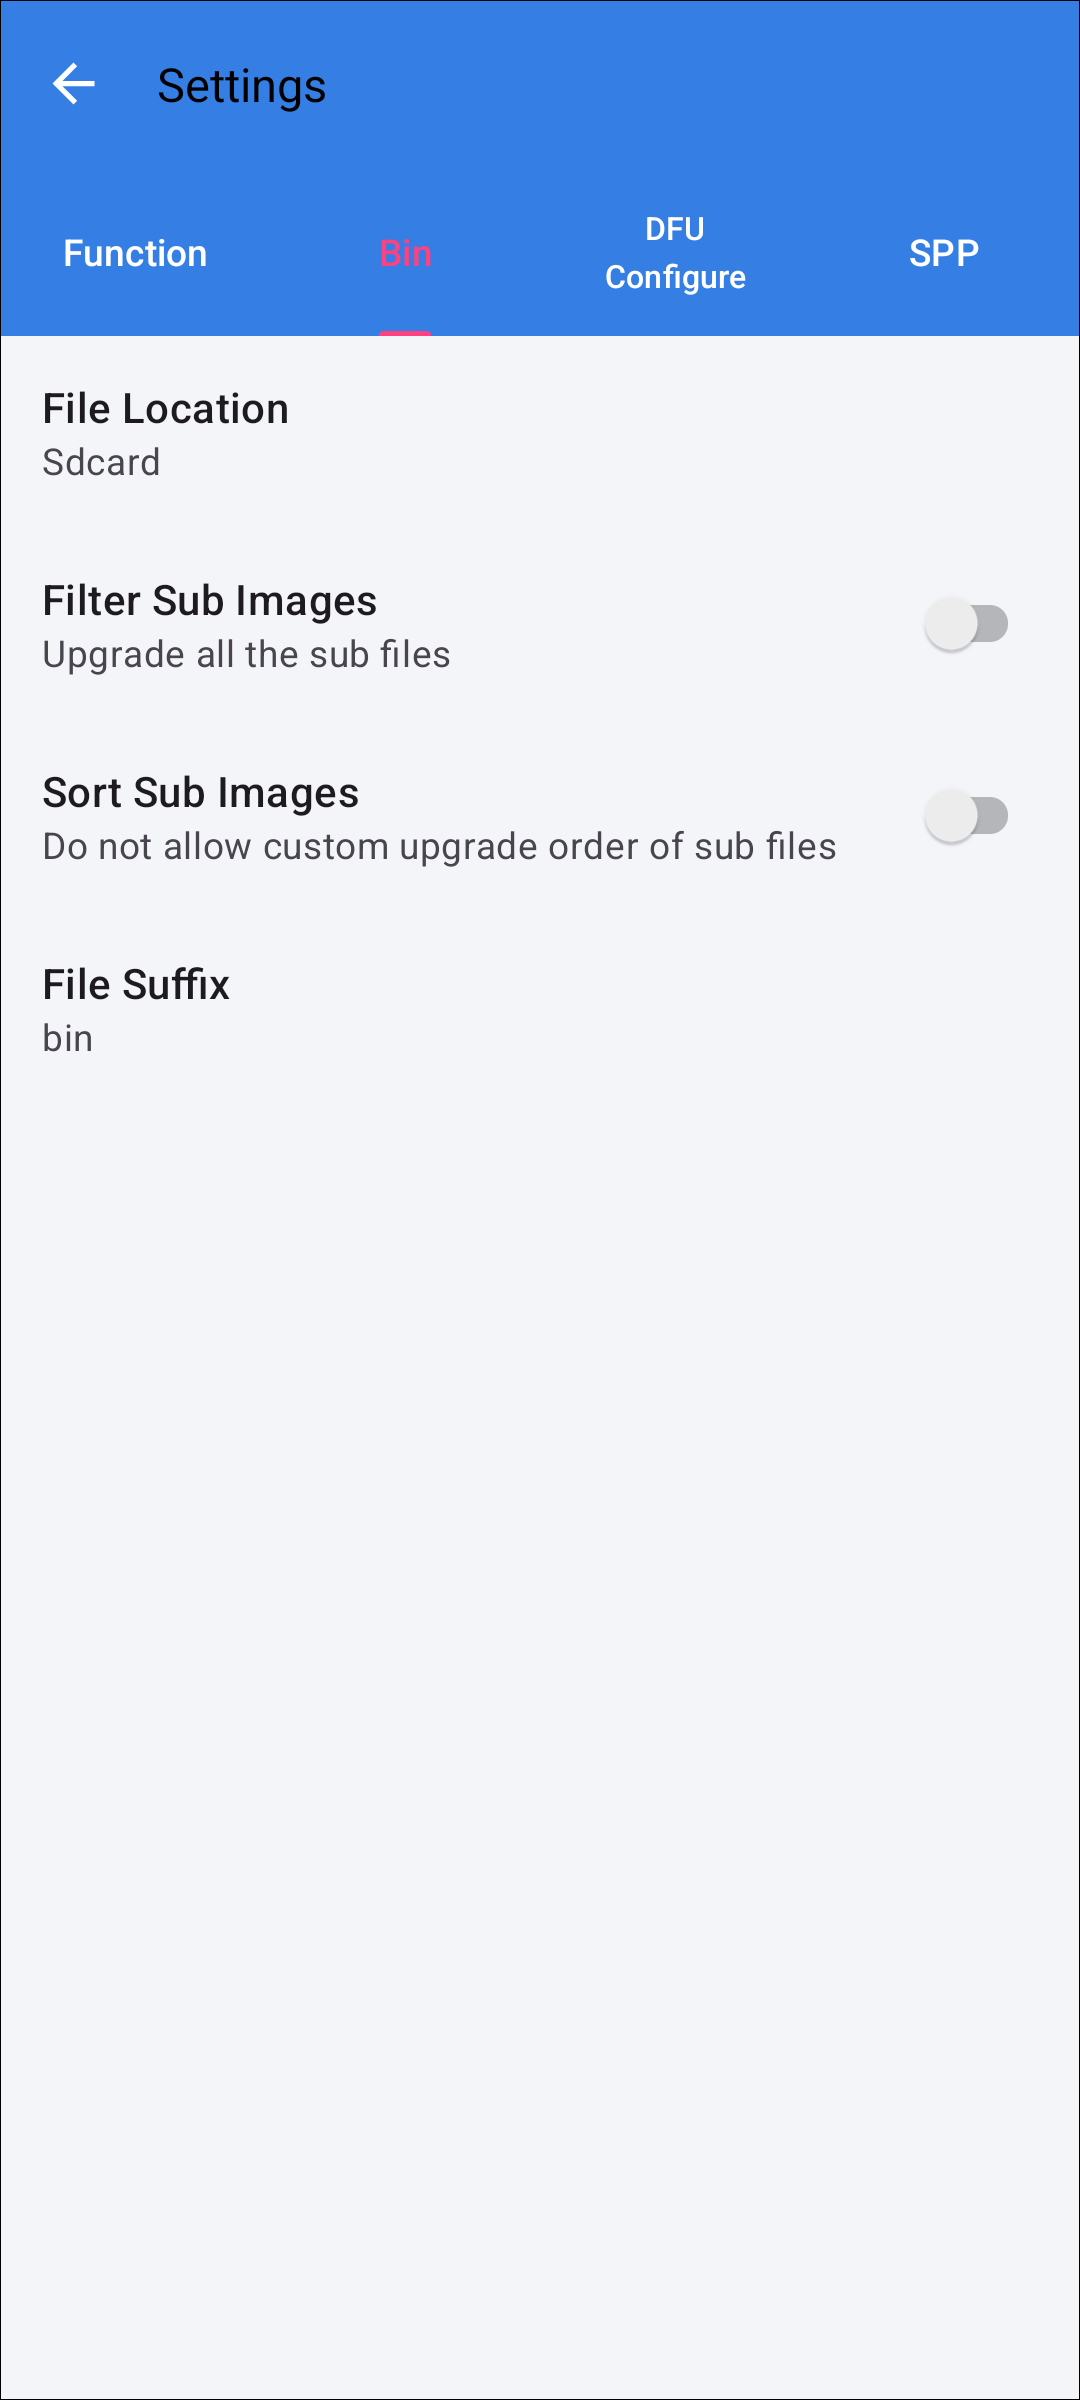
Bin Parameters Images
Filter Sub Images
Turn on the Filter Sub Image switch.
Click the Filter button.
Select the image to be upgraded and click the Submit button.
Note
If the user does not select any sub-files, all sub-files of the Image file will be upgraded by default.
Sort Sub Images
Turn on the Sort Sub Image switch.
Click the Sort button.
Drag and drop image to sort and click the Submit button.
DFU Configure
Battery Check
The purpose of the battery power check is to ensure that the current phone has enough power to complete the OTA upgrade. The threshold is set to 30% by default.
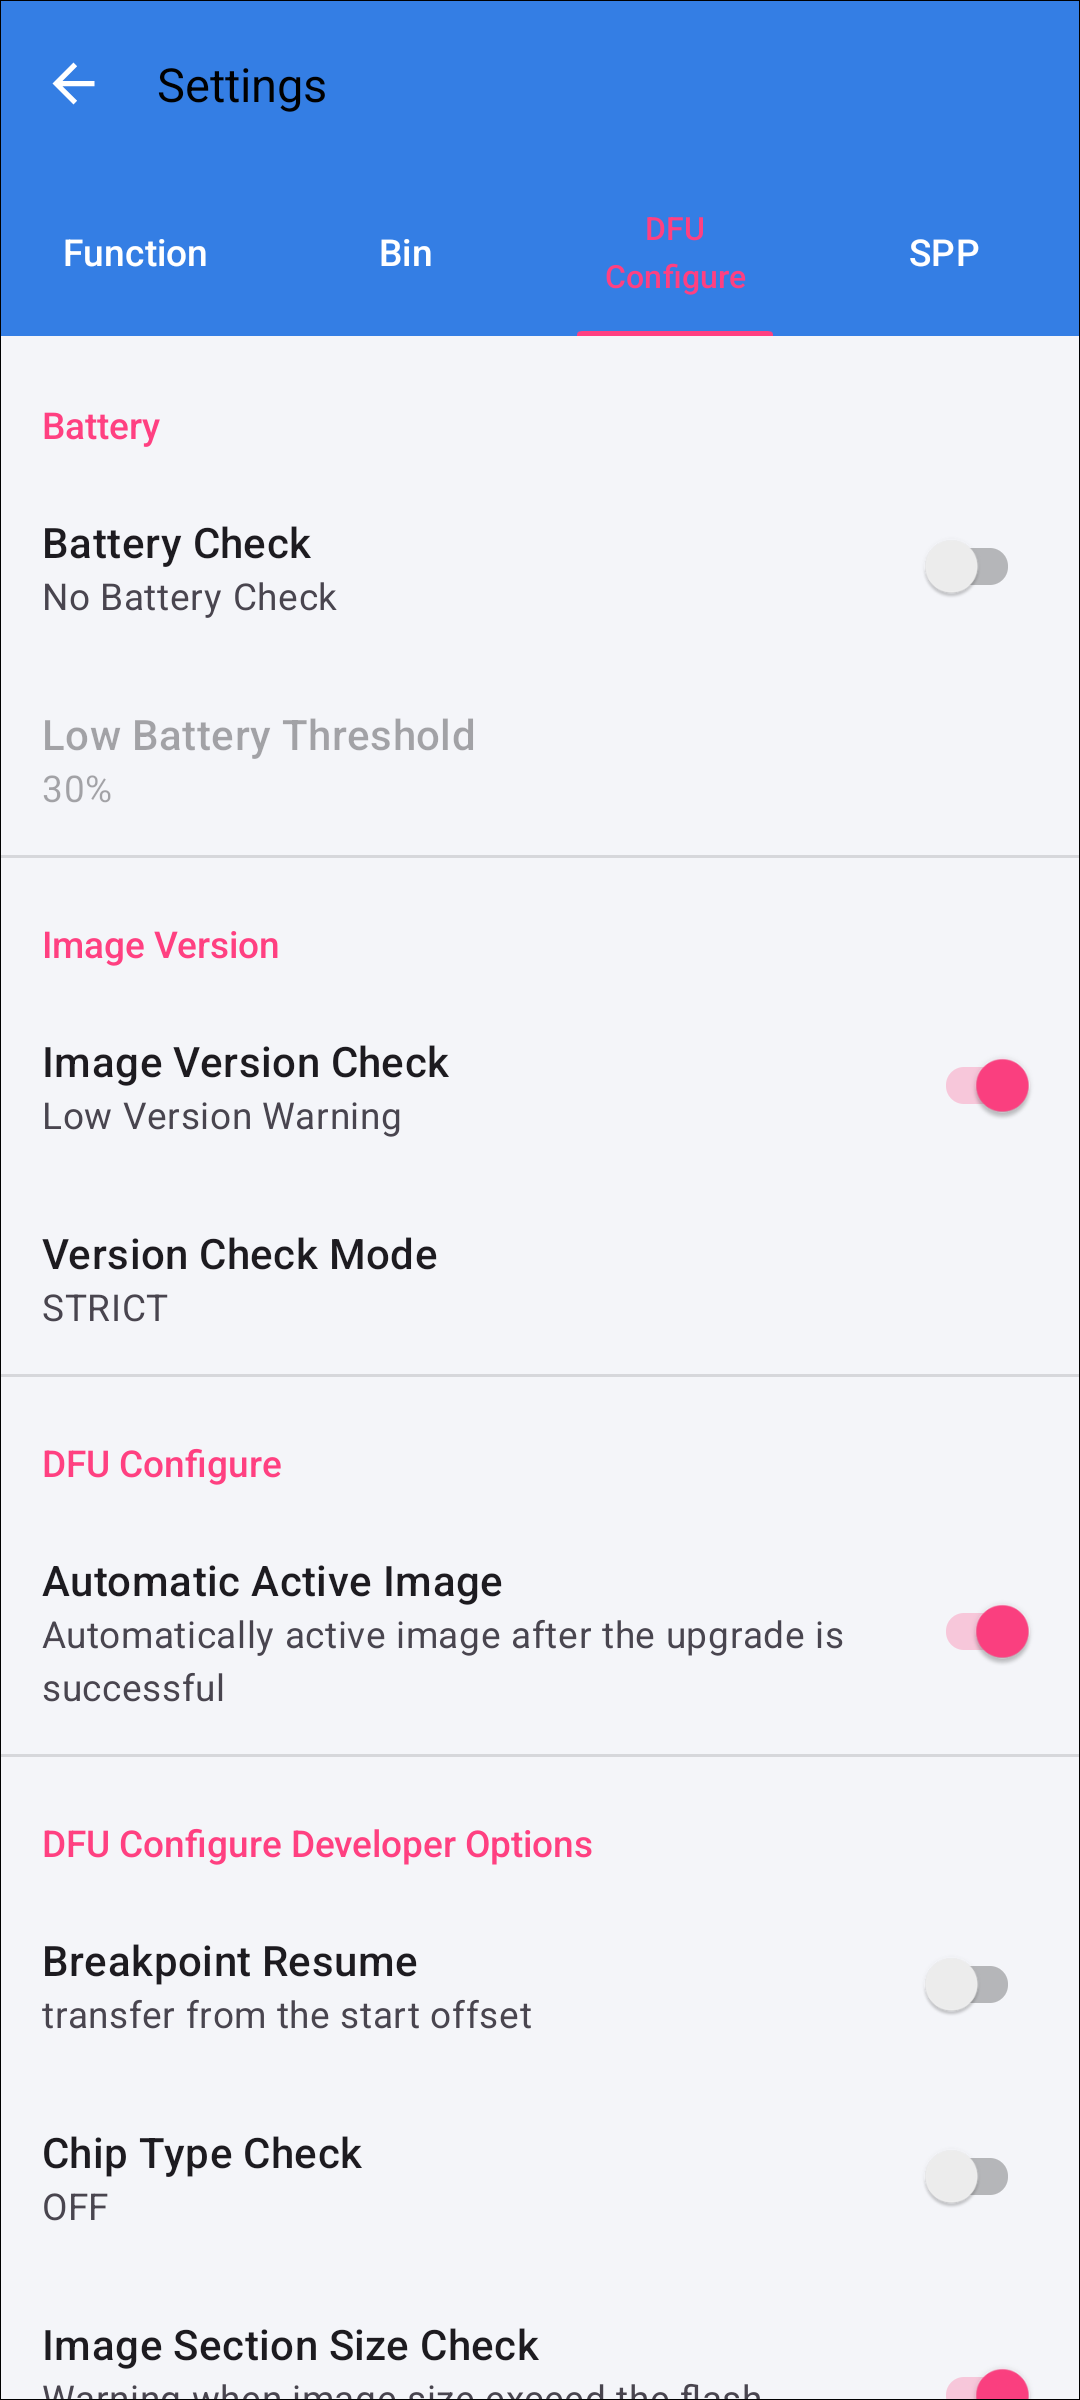
Battery Check
State |
Description |
|---|---|
ON |
When the switch is turned on, the threshold can be selected. |
OFF |
No battery check, can update anyway. During the upgrade process, the phone may automatically shut down due to insufficient power, which will cause the OTA upgrade to fail. |
Image Version Check
Users can turn on or off version checking as needed.
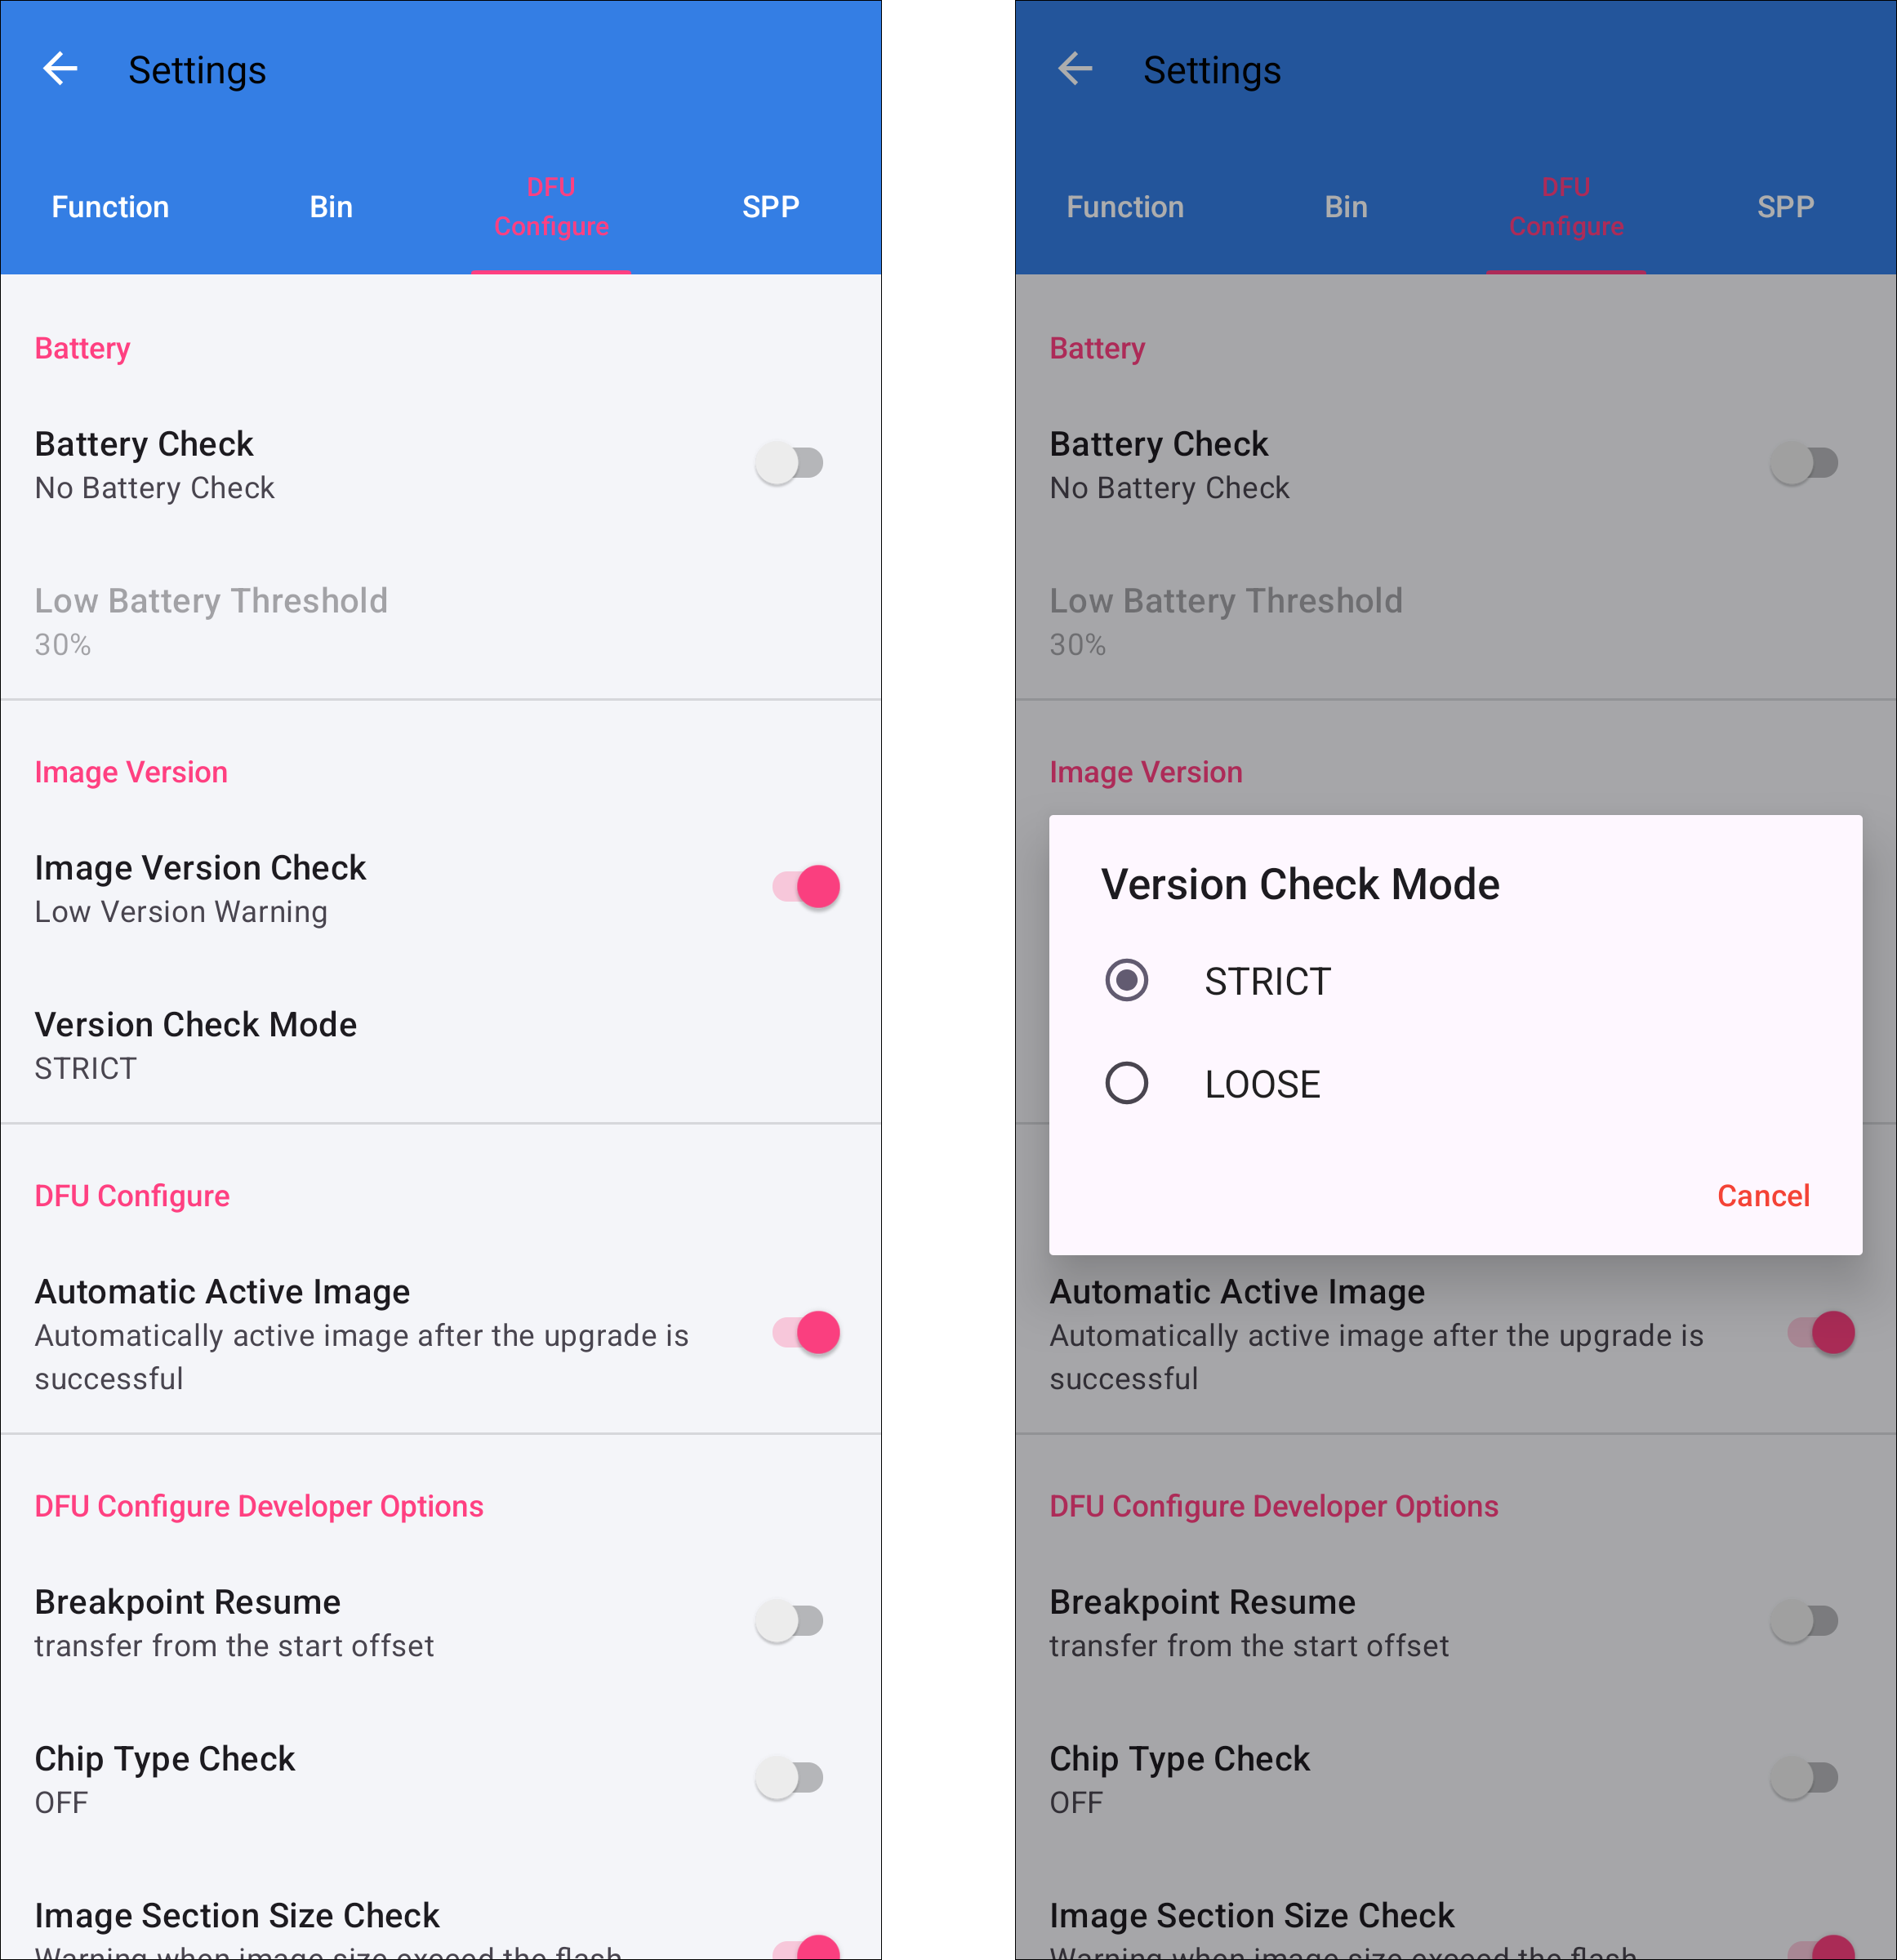
Image Version Check
State |
Description |
|---|---|
ON |
Have version check, can only update high version image files. If the selected image file is a low version, the low image version will be prompted after the file is loaded. You can choose a version checking strategy, strict checking or loose checking.
|
OFF |
No version check, can update all image files. But it does not mean that you can upgrade the version at will, it mainly depends on whether the SoC has the version checking function. |
The current SoC version generally opens the version check, so if you upgrade to a lower version, only the phone APP can send the upgrade command normally, but the SoC will check the lower version and refuse to upgrade, and the phone APP will also show that the upgrade is successful, but in fact it cannot really upgrade the lower version.
Chip Type Check
Users can turn on or off chip type checking as needed.

Chip Type Check
State |
Description |
|---|---|
ON |
The chip type check switch is on by default. When loading an image file, if the bin file does not match the IC type of the device, it will prompt IC type conflict, and cannot be upgraded. |
OFF |
Turn off the chip type check switch. When loading an image file, if the bin file does not match the IC type of the device, it will not prompt IC type conflict and can be upgraded. |
Automatic Active Image
After the upgrade is complete, the user can choose whether to automatically activate the firmware.

Automatic Active Image
State |
Description |
|---|---|
ON |
Automatically active image after the upgrade is successful. |
OFF |
Prompt to active image after the upgrade is successful. When the file transmission has been done, you may choose whether to validate the OTA Update. If you choose yes, activate the firmware and the OTA upgrade is complete. If you choose no, the device will be reset, the OTA upgrade process will be terminated, and the upgrade will fail. |
SPP
Customize SPP UUID
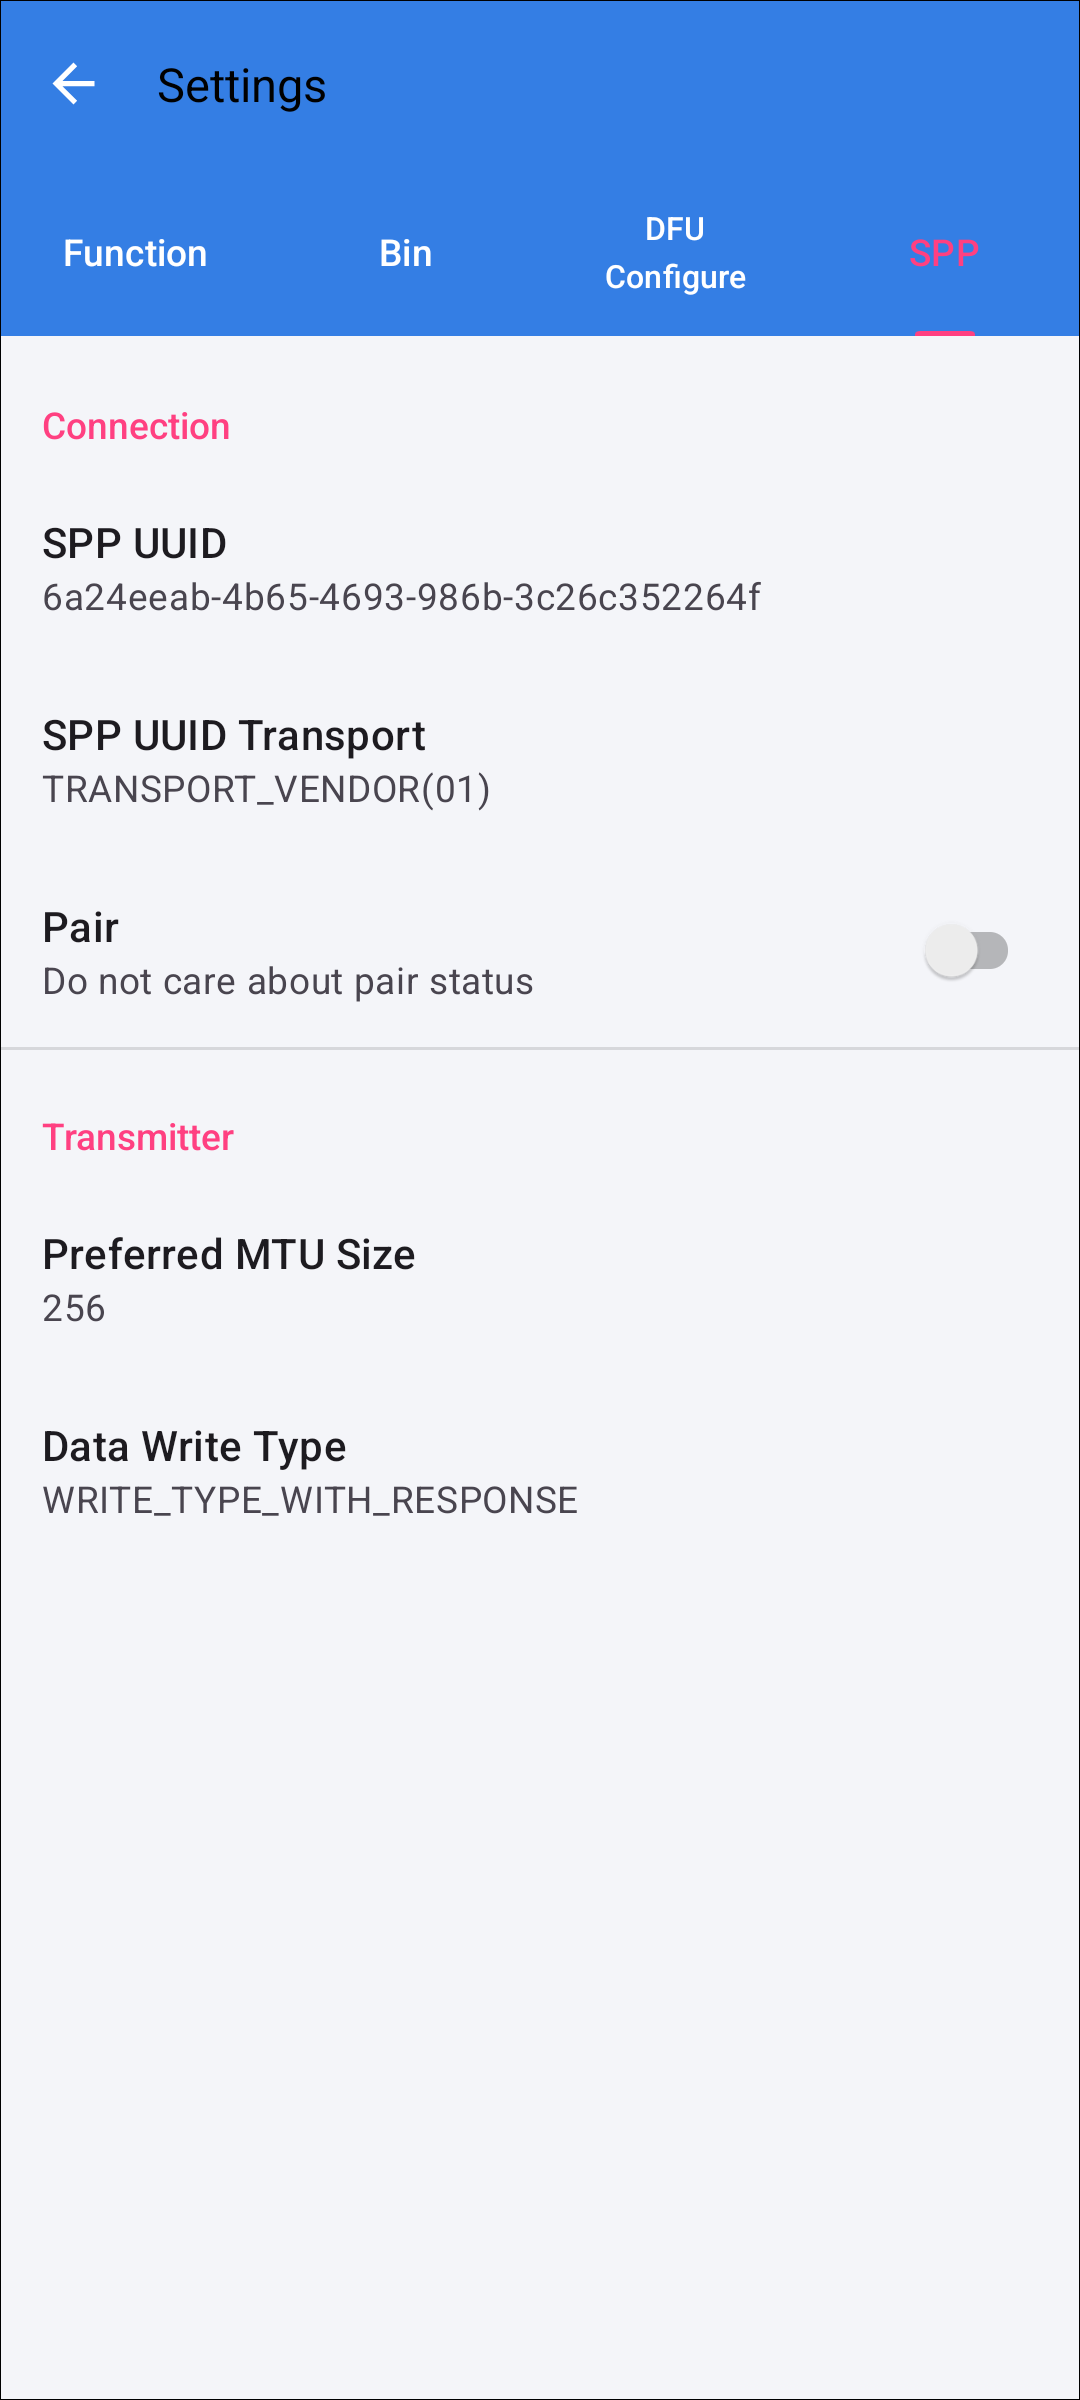
Customize SPP UUID
The table for custom SPP UUID parameters is as follows:
Fields |
Description |
|---|---|
|
AUTO: If no UUID is matched, it will automatically connect to the well-known SPP UUID (00001101-0000-1000-8000-00805F9B34FB). VENDOR: Only use the specified UUID to connect. |
FAQ
Export Logcat
Connect your phone to the computer, then find this directory (sdcard\Android\data\com.realtek.apps.ota\files\saveLog\) on the phone and export the log at the corresponding time point.
Error Code
Error Code |
Description |
|---|---|
0x0100 |
Can Not Connect Device |
0x0105 |
Send Command Without Callback |
0x0108 |
Establish Connection Failed |
0x0109 |
Can Not Scan Target Device |
0x010B |
Send Data Failed |
0x011B |
Role Swap Failed |
0x011F |
Already Latest Version |
0x0205 |
|
0x0208 |
Flash Erase Error |
0x02FE |
Command Not Support |
0x0800 |
Connection Disconnected |