86Box Matter Switch
Now the 86box project directly includes matter-related libs,we provide a set of related libs that support 11 endponits. If you want build matter lib for 86box, you have to follow the steps below.
Building & Using 86box lib
Modify zap file
The file is located at: ./subsys/matter/connectedhomeip/examples/light-switch-app/realtek/common/chip_main.cmake
chip_configure_data_model(chip_main
INCLUDE_SERVER
ZAP_FILE ${matter_example_path}/../data_model/light-switch-app-1_to_11.zap
Disable DLPS
The 86 box does not support DLPS, so disable DLPS when building the lib.
The file is located at: ./subsys/matter/CMakePresets.json
"ENABLE_DLPS": "OFF"
Build command as follows
./build.py evb light-switch
After building, find lib files at the following location
./subsys/matter/samples/build
Copy these libs to
subsys/matter/lib/switch. They will be linked to 86box APP image.
Light Bulb-OTBR Switch User scenarios on 86box
RTL87X2G-Bcut-SDK-MATTER mainly provide the matter switch function on 86box.
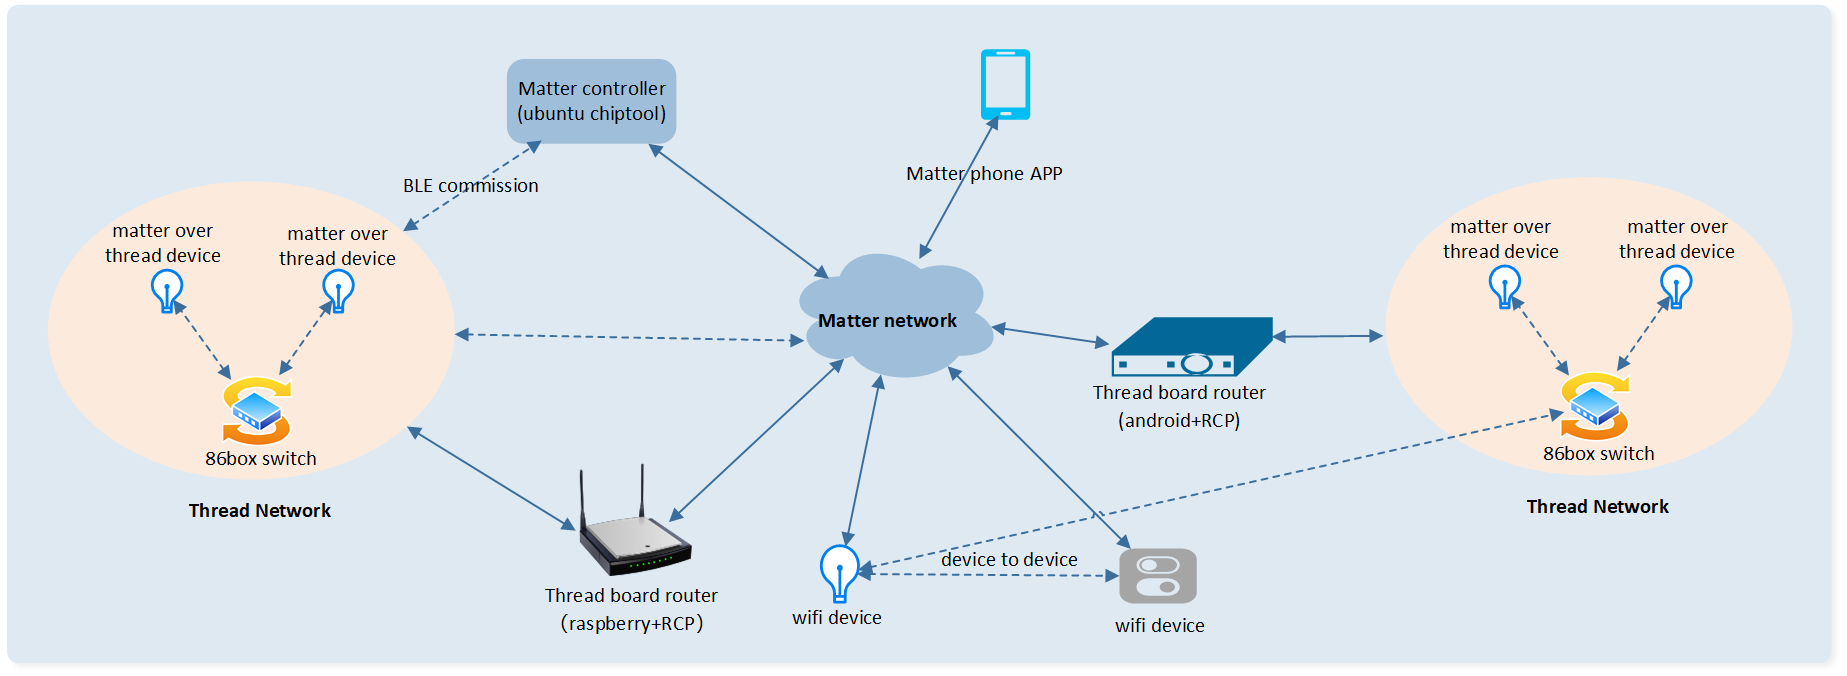
If you want to set up a complete environment of switch controlling Matter light bulb, you need to purchase the following devices:
Matter lighting
Please purchase it yourself or build lighting
OTBR
Currently, Google Nest Home, Amazon Echo4 (tested), and Apple Homepod all support OTBR. You can use their APPs to control the light bulb with switch.
You can also use the RTL8771HTV we provide to do so, in this case, you will need to:
Set up OTBR through Raspberry Pi (purchase required) and RTL8771HTV.
Use chiptool on ubuntu to complete the binding.
Control Light Bulb Using 86box Switch
Build 86box Switch
Users need to first enable the macro "CONFIG_REALTEK_BUILD_MATTER_SWITCH" in menu_config.h. Then run the command "scons matter=1". After the compilation is completed, the App image will be generated in the default project path.
Please refer to 86box
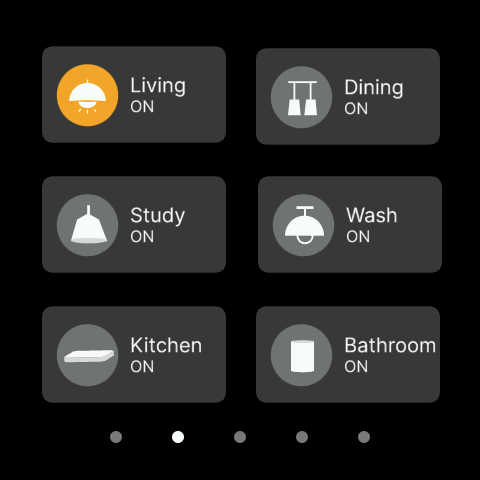
Switch endpoint usage
Users need to prepare 8 lights (You can also use 2 lights) & 1 86box switch. Every endpoint on switch is corresponding to a usage of lighting switch.
Device |
switch onoff endpoint number |
|---|---|
control endpoint |
0 |
group multicast |
1 |
node 1(lighting 1) |
2 |
node 2(lighting 2) |
3 |
node 3(lighting 3) |
4 |
node 4(lighting 4) |
5 |
node 5(lighting 5) |
6 |
node 6(lighting 6) |
7 |
node 7(lighting 7) |
8 |
node 8(lighting 8) |
9 |
To determine corresponding endpoint of lighting for 86box switch, users need follow 2 steps:
Following commands return endpoints number as 1.
./chip-tool descriptor read parts-list <node_id> 0
CHIP:TOO: Endpoint: 0 Cluster: 0x0000_001D Attribute 0x0000_0003 DataVersion: 618585211
[1714376633.690399][622920:622922] CHIP:TOO:   PartsList: 1 entries
[1714376633.690405][622920:622922] CHIP:TOO:     [1]: 1
2. When geting the entries, users can read the device type for all endpoints one by one. Endpoint is start from 1. 269 means it is an Extended Color Light. Therefore 86box should control the lighting by endpoint 1.
./chip-tool descriptor read device-type-list <node_id> <endpoint>
CHIP:TOO: Endpoint: 1 Cluster: 0x0000_001D Attribute 0x0000_0000 DataVersion: 2886212486
CHIP:TOO:   DeviceTypeList: 1 entries
CHIP:TOO:     [1]: {
CHIP:TOO:       DeviceType: 269
CHIP:TOO:       Revision: 1
CHIP:TOO:      }
Commissioning for All Devices
Follow the openthread guide to form a thread network. Users can follow the steps below to add 8 lights (node-id 1-8) and 86box (noide-id 9) switch to a fabric on thread network. OperationalDataset can be got by "sudo ot-ctl dataset active -x". Pin_code and discriminator can be obtained by scaning qrcode on surface of lightings.
Lighting1: ./chip-tool pairing ble-thread 1 hex:<operationalDataset> <pin_code> <discriminator>
Lighting2: ./chip-tool pairing ble-thread 2 hex:<operationalDataset> <pin_code> <discriminator>
Lighting3: ./chip-tool pairing ble-thread 3 hex:<operationalDataset> <pin_code> <discriminator>
Lighting4: ./chip-tool pairing ble-thread 4 hex:<operationalDataset> <pin_code> <discriminator>
Lighting5: ./chip-tool pairing ble-thread 5 hex:<operationalDataset> <pin_code> <discriminator>
Lighting6: ./chip-tool pairing ble-thread 6 hex:<operationalDataset> <pin_code> <discriminator>
Lighting7: ./chip-tool pairing ble-thread 7 hex:<operationalDataset> <pin_code> <discriminator>
Lighting8: ./chip-tool pairing ble-thread 8 hex:<operationalDataset> <pin_code> <discriminator>
86box: ./chip-tool pairing ble-thread 9 hex:<operationalDataset> <pin_code> <discriminator>
Create Unicast Binding
Users can follow the steps below to establish unicast binding. After unicast binding, users can control lighting one at a time by 86box switch.
Rewrite New ACL List
All Interaction Model operations in Matter must be verified by the the Access Control mechanism.
Whenever a client device and a server device want to interact with one another by reading (or subscribing) attributes or events, writing attributes, or invoking commands, the Access Control mechanism must verify that the client has sufficient privileges to perform the operation on the server device. If no sufficient privilege is obtained, the operation cannot take place and it is denied (status 0x7E Access Denied). Users should add ACL entry for 86box to access to all Lightings.
First of all, read the existing ACL entry list by "./chip-tool accesscontrol read acl node_id 0" to retrieve the default entry for administrator. "Targets: null" means rights of administrators
./chip-tool accesscontrol read acl _node_id_ 0
...
[1714291047.397431][504978:504980] CHIP:TOO:   ACL: 1 entries
[1714291047.397456][504978:504980] CHIP:TOO:     [1]: {
[1714291047.397473][504978:504980] CHIP:TOO:       Privilege: 5
[1714291047.397483][504978:504980] CHIP:TOO:       AuthMode: 2
[1714291047.397495][504978:504980] CHIP:TOO:       Subjects: 1 entries
[1714291047.397535][504978:504980] CHIP:TOO:         [1]: 112233
[1714291047.397549][504978:504980] CHIP:TOO:       Targets: null
[1714291047.397559][504978:504980] CHIP:TOO:       FabricIndex: 1
[1714291047.397568][504978:504980] CHIP:TOO:      }
...
It turns out that "Subjects: 112233(0x1B669 in hex)" is the fixed node-id for chip-tool which is corresponding to chip-tool's NOC certificate during CASE establishment as follows. Furthermore, "Targets: null" means rights of administrators.
./chip-cert print-cert chip-noc.chip-b64
Signature Algo  : ECDSAWithSHA256
Issuer          : [[ MatterICACId = 0000000000000002 ]]
Not Before      : 0x27812280  ( 2021/01/01 00:00:00 )
Not After       : 0x3A4D2580  ( 2030/12/30 00:00:00 )
Subject         : [[ MatterFabricId = 0000000000000001,
                     MatterNodeId = 000000000001B669 ]]
Then rewrite the whole acl list including administrator's entry retrieved above. Lighting_node_id is range from 1 to 8 and endpoint is fix to 0(root) for the example.
./chip-tool accesscontrol write acl '[{"fabricIndex": 1, "privilege": 5, "authMode": 2, "subjects": [112233], "targets": null}, {"fabricIndex": 1, "privilege": 3, "authMode": 2, "subjects": [9], "targets": [{"cluster": 6, "endpoint": 1, "deviceType": null}]}]' <lighting_node_id> <endpoint>
NOTE: Matter SDK(chip-tool) does not support list operations "append", "update" and "delete". It is shown in
https://developer.arm.com/downloads/-/arm-gnu-toolchain-downloads
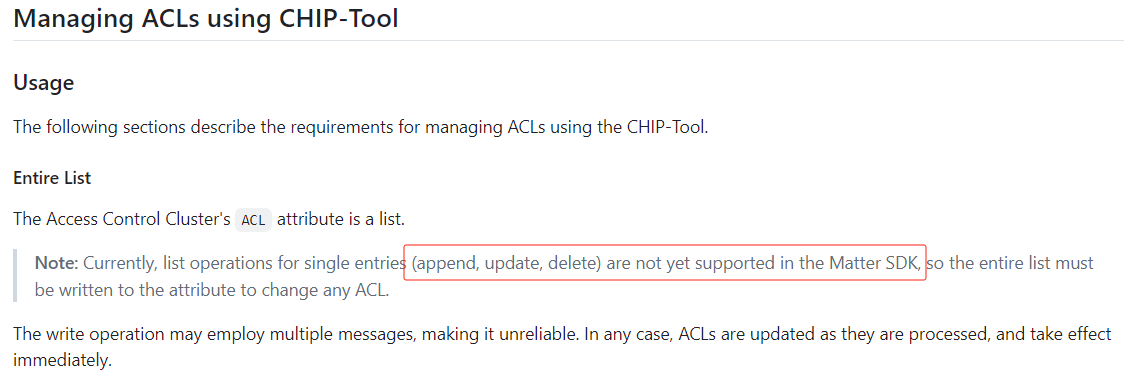
List operations not support by Matter SDK
Binding 86box endpoint to all lightings
Binding the Lighting devices' lighting clusters to 86box endpoints respectively as follows. 86box_node_id is fixed to 9 for the demo and endpoint is range from 2 to 9.
./chip-tool binding write binding '[{"fabricIndex": 1, "node": 1, "endpoint": 1, "cluster": 6}]' <86box_node_id> <endpoint>
Create Group Binding
Users can follow the steps below to establish group binding. After these steps, you can perform group control.
Add Group Key Set
Group key set is used to encrypt message during group communication. Users should add group key set by commands as follows. Node_id is from 1 to 9 including 86box. Endpoint is fixed to 0 for this demo for only endpoint 0 have Group Key Management cluster.
./chip-tool groupkeymanagement key-set-write '{"groupKeySetID": 417, "groupKeySecurityPolicy": 0, "epochKey0":"a0a1a2a3a4a5a6a7a8a9aaabacadaeaf", "epochStartTime0": 1110000, "epochKey1":"b0b1b2b3b4b5b6b7b8b9babbbcbdbebf", "epochStartTime1": 1110001, "epochKey2":"c0c1c2c3c4c5c6c7c8c9cacbcccdcecf", "epochStartTime2": 1110002 }' <node_id> <endpoint>
Add Group Key Map
Add a new group and mapping the group key set to this group. The command below add a new group. Node_id and endpoint are the same as above.
./chip-tool groupkeymanagement write group-key-map '[{"groupId": 257, "groupKeySetID": 417, "fabricIndex": 1}]' <node_id> <endpoint>
Add Endpoint to Group
All lighting devices' endpoint should be added to group as following command which node id is from 1 to 9 and endpoint is fixed to 1.
./chip-tool groups add-group 257 demo <node_id> <endpoint>
Rewrite lighting devices' New ACL List
All lighting's endpoint should add access to group. Lighting_node_id is from 1 to 8 and light_endpoint is fixed to 0.
./chip-tool accesscontrol write acl '[{"fabricIndex": 1, "privilege": 5, "authMode": 2, "subjects": null, "targets": null},{"fabricIndex": 1, "privilege": 3, "authMode": 3, "subjects": [257], "targets": null}]' <lighting_node_id> <lighting_ndpoint>
Binding 86box endpoint 1 to the Group
Binding switch to the group for its onoff cluster can send command to group.
./chip-tool binding write binding '[{"fabricIndex": 1, "group": 257}]' 9 1
Button Control
AllTurnon->Turn on all lightings:
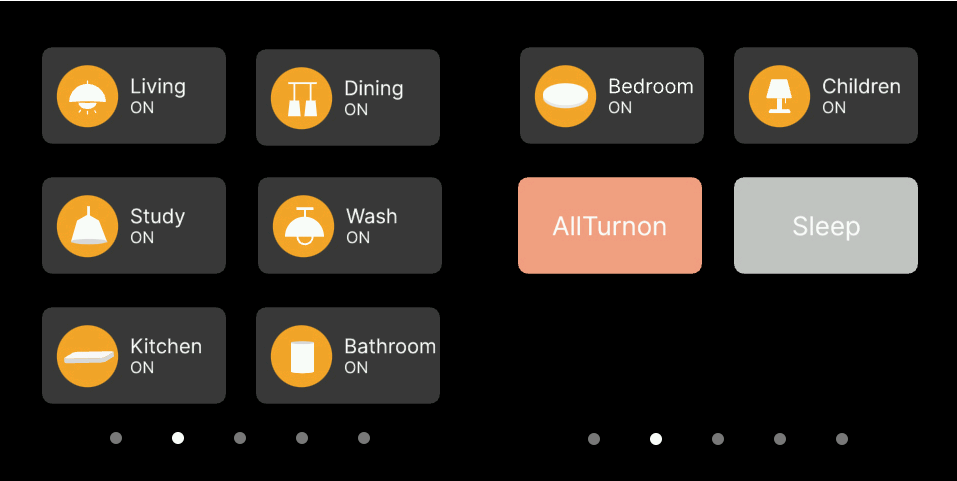
Sleep->Turn off all lightings:
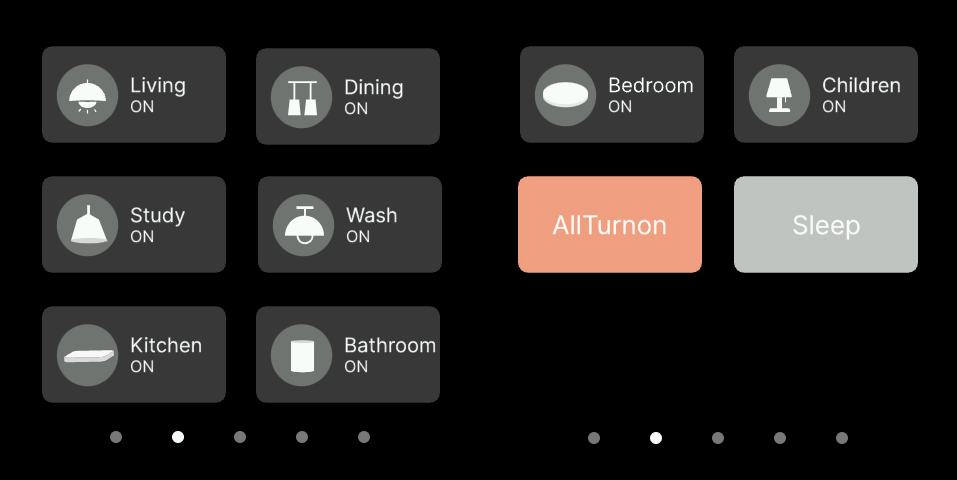
Each light can be controlled individually: