Current Measure
This document is intended to introduce the current power consumption measurement scenario for RTK RTL87x3 solution. The following topics are included to help users establish the power consumption environment.
The settings of hardware environment.
The configuration in MCUConfig Tool and DSPConfig Tool.
The settings of application.
EVB Hardware Environment
This section describes the hardware environment for testing.
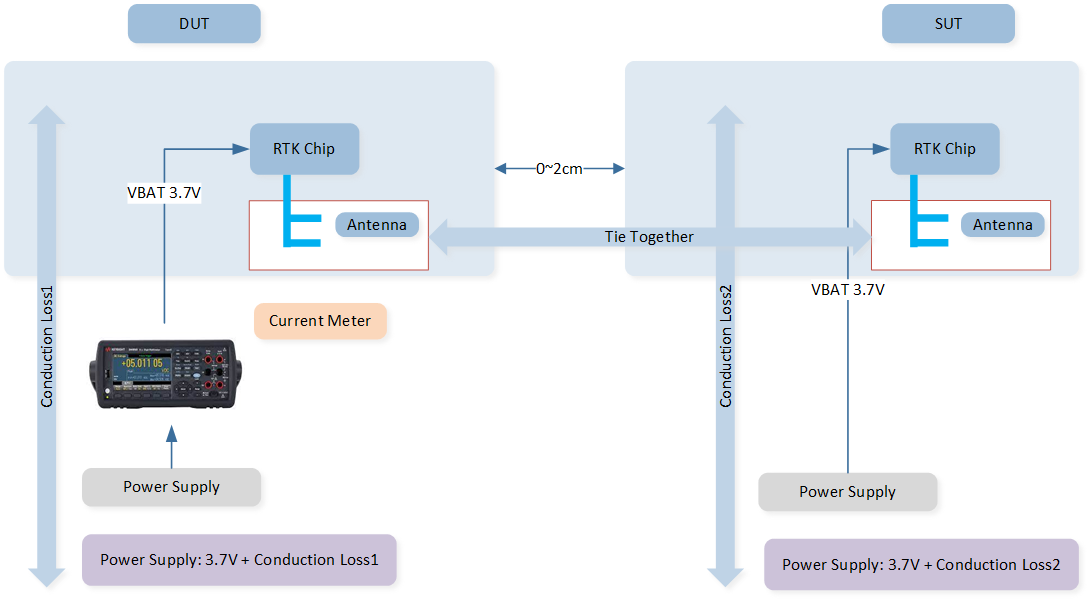
EVB Environment
The above figure shows RTK’s tested situation, which is without LED, MIC and Speaker.
RTK provides general results, the Bluetooth chip is connected to iPhone series.
The power supply is set to 3.7V.
The power supply used by RTK is KA3003P.
The current meter used by RTK is DMM6500.
The current meter is configured as follows:
The current range is 100mA.
The sample rate is 60000 samples/s.
The sample time is 30s.
The iPhone used by RTK is iPhone 6 Plus, the system version is 12.4.8.
Note
EVB Setup for RTL87x3D in DSP1 Only Mode
The jumpers of EVB for the RTL87x3D when testing in DSP1 only mode.
Name |
Condition |
|---|---|
DEV_1 |
Floating |
VDEV2 |
Floating |
KEY |
Floating |
LED |
Floating |
VIO1 |
Floating |
VIO2 |
VEXT |
VIO3 |
Floating |
VIO4 |
Floating |
VIO5 |
Floating |
VIO_FLASH |
VEXT |
TXD |
M3_0 |
RXD |
M3_1 |
FT_VIO |
Floating |
Note
VIO1 needs to be connected to VEXT and FT_VIO needs to be connected to VIO1 when burning image.
EVB Setup for RTL87x3D when DSP1 and DSP2 Both Enabled
The difference with DSP1 only.
Connect jumper according to the external buck enable pin, for example, if using P5_1, connect VIO3; if using P6_1, connect VIO4.
Remove R15 to remove unused flash on EVB.
VDDIO1=VEXT.
EVB Setup for RTL87x3E
The jumpers of EVB for the RTL87x3E when testing power consumption.
Name |
Condition |
|---|---|
V_DEV1 |
Floating |
V_DEV2 |
Floating |
KEY |
Floating |
LED |
Floating |
R62 |
Remove |
TX |
M3_0 |
RX |
M3_1 |
FT_VIO |
Floating |
Configuration
The configuration in MCUConfig Tool and DSPConfig Tool.
Peripherals
The settings of peripherals.
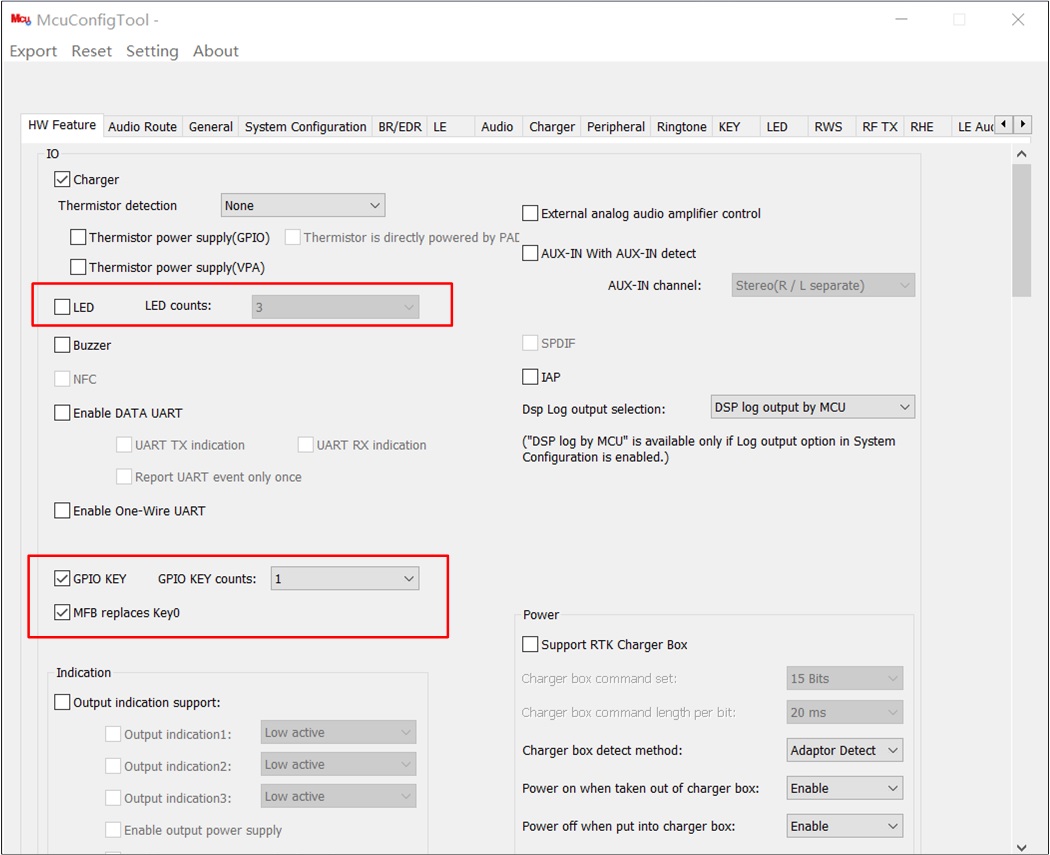
Part One Peripheral Configuration

Part Two Peripheral Configuration
Turn off power-independent peripherals.
Turn off LED.
Turn off key, only use MFB.
Turn off sensor.
Etc.
Log
The settings of log.
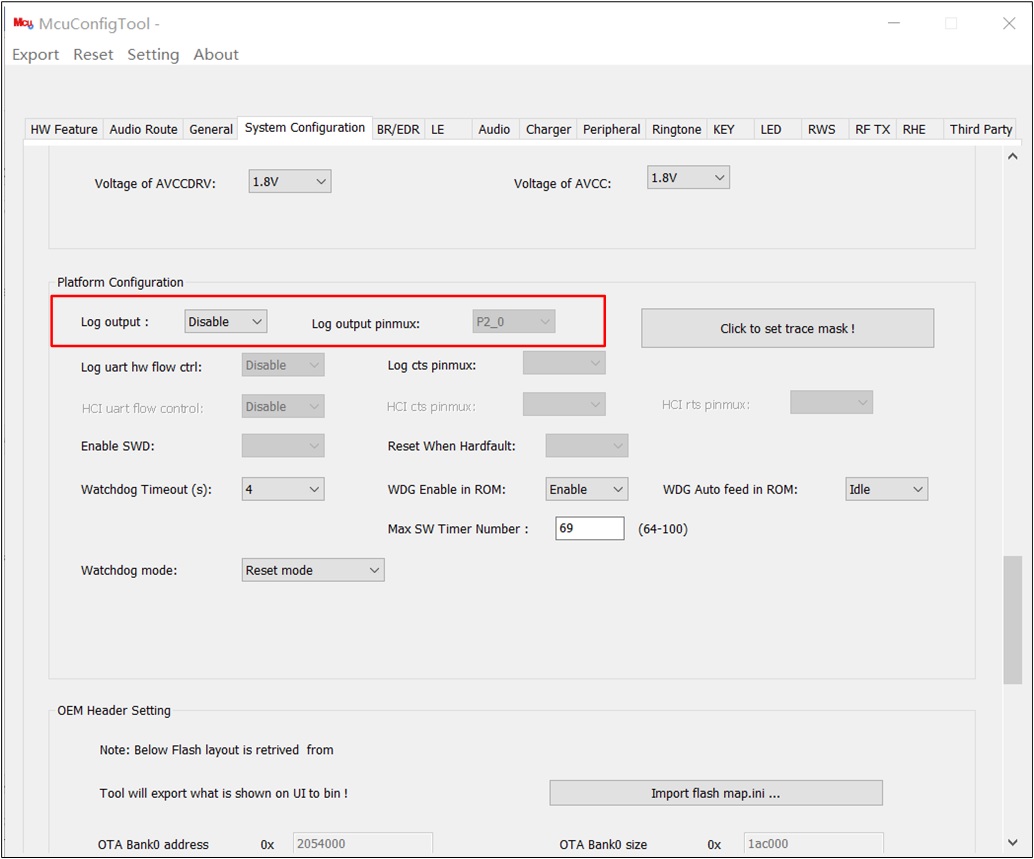
Part One Log Configuration
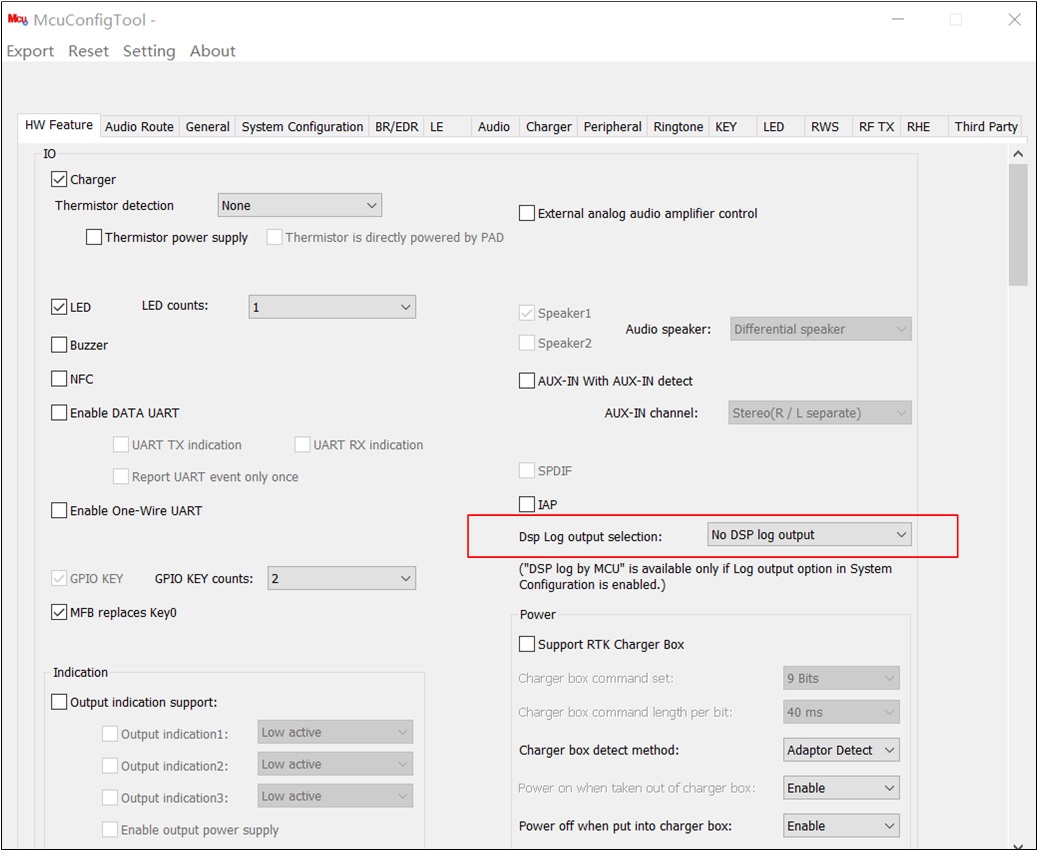
Part Two Log Configuration
Part Three Log Configuration
Audio
The settings of audio.
Part One Audio Configuration

Part Two Audio Configuration
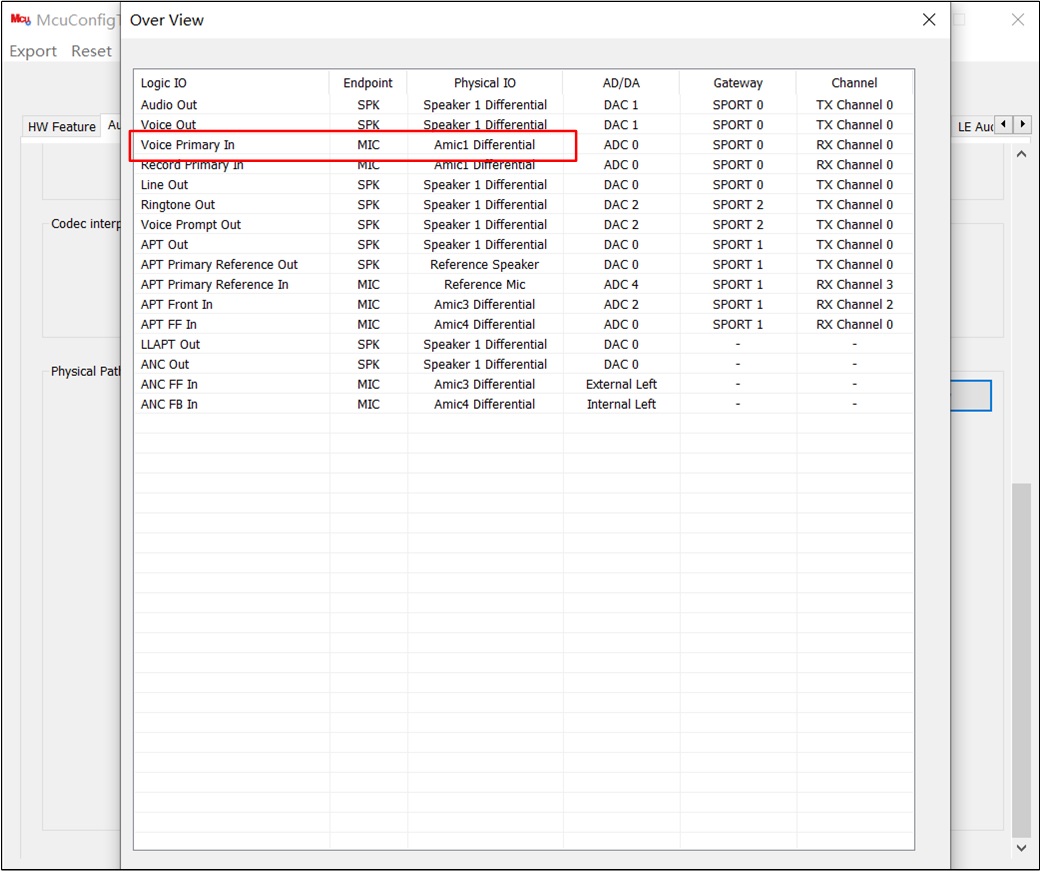
The power data provided by RTK is based on AMIC.
Settings for RTL87x3D.
Speaker uses Class D.
AMIC1 and AMIC2 are low power mode.
AMIC3 and AMIC4 are normal mode.
Speaker uses differential.
Power Off
The settings for power off.
Part One Power off Configuration

Part Two Power off Configuration
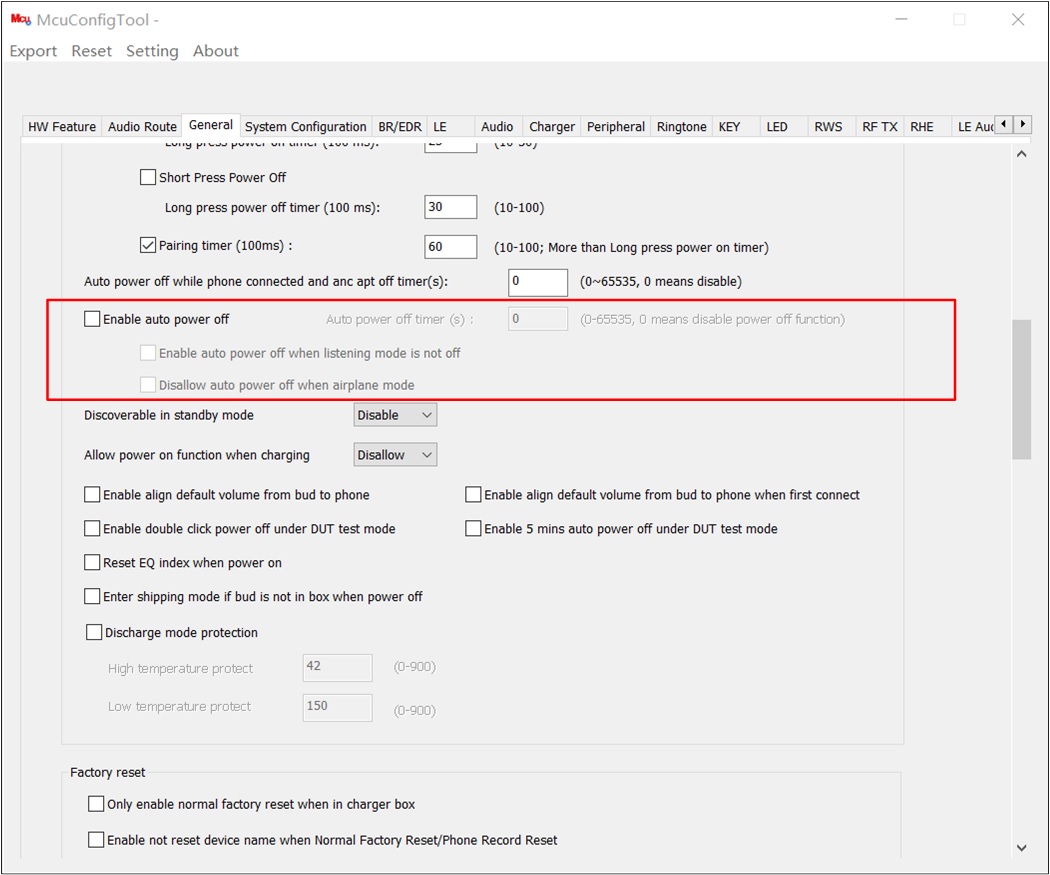
Disable Power off when pairing timeout.
Unnecessary Function
The settings for some unnecessary functions.
Part One Unnecessary Function Configuration

Part Two Unnecessary Function Configuration

Part Three Unnecessary Function Configuration
Part Four Unnecessary Function Configuration
Turn off unnecessary functions.
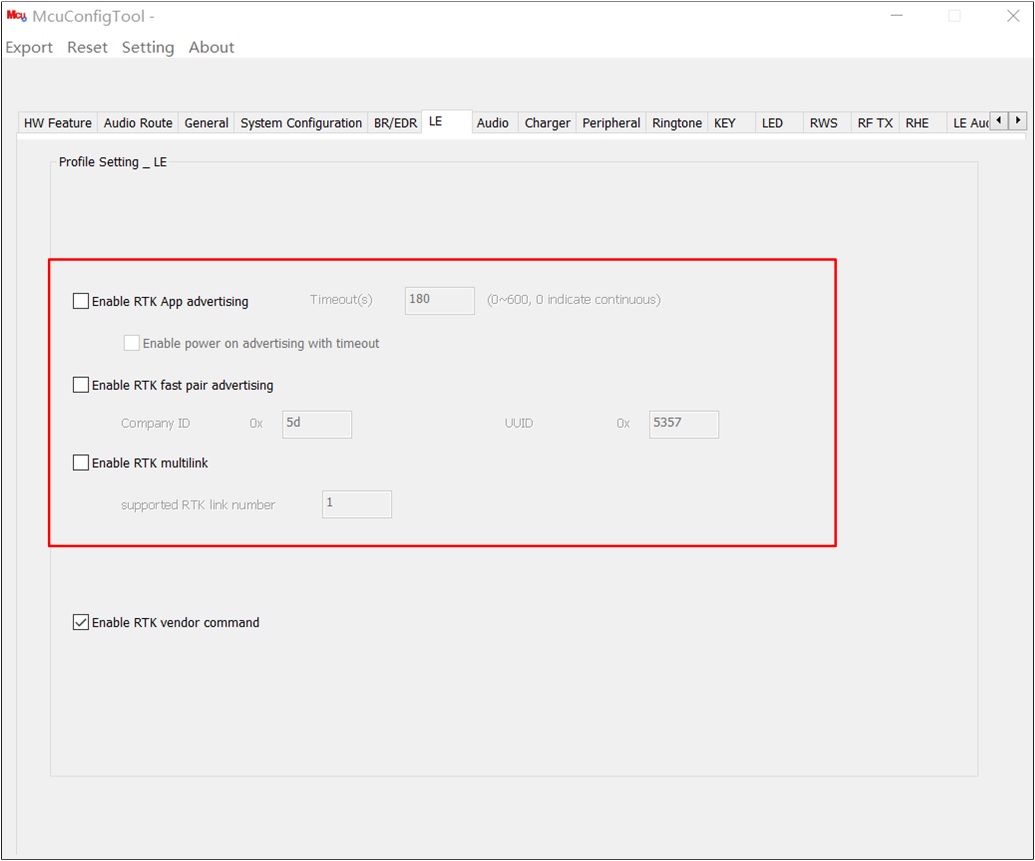
Disable Enable RTK App advertising.
Disable Enable RTK fast pair advertising.
Disable Multi-link support.
Disable Battery detection support.
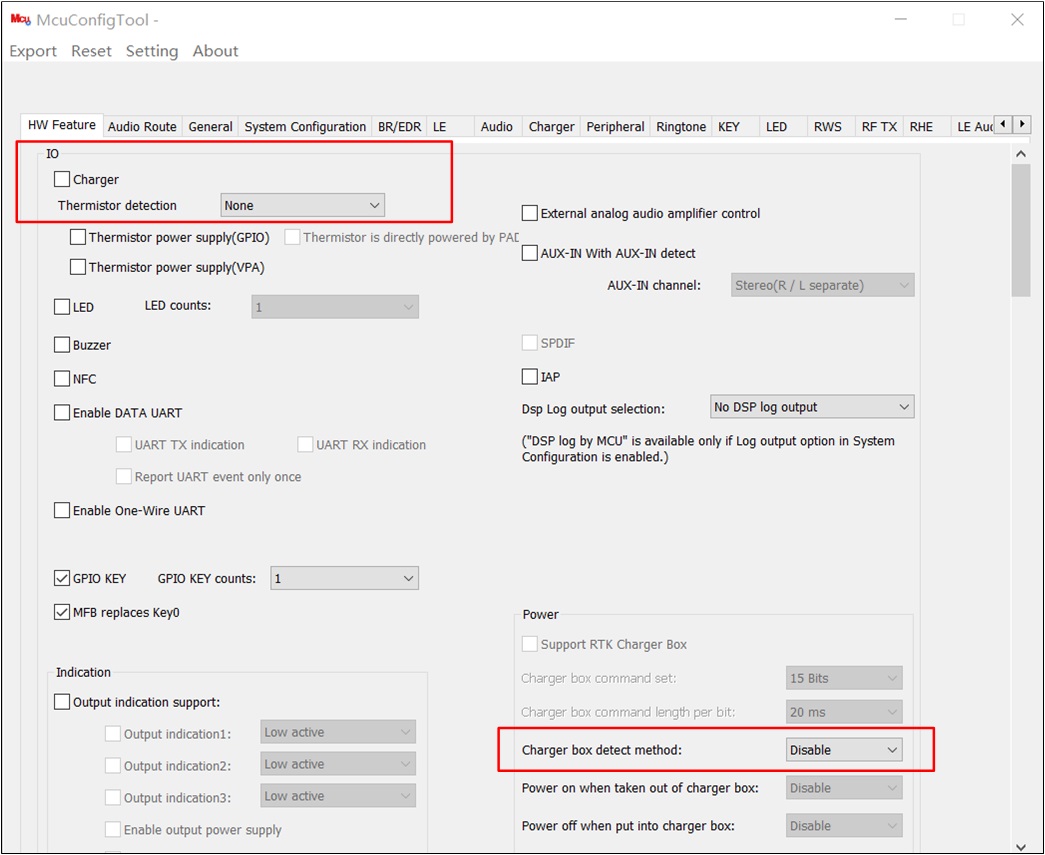
Disable Charger.
Disable Charger box detect method.
Etc.
AAC/SBC
AAC/SBC
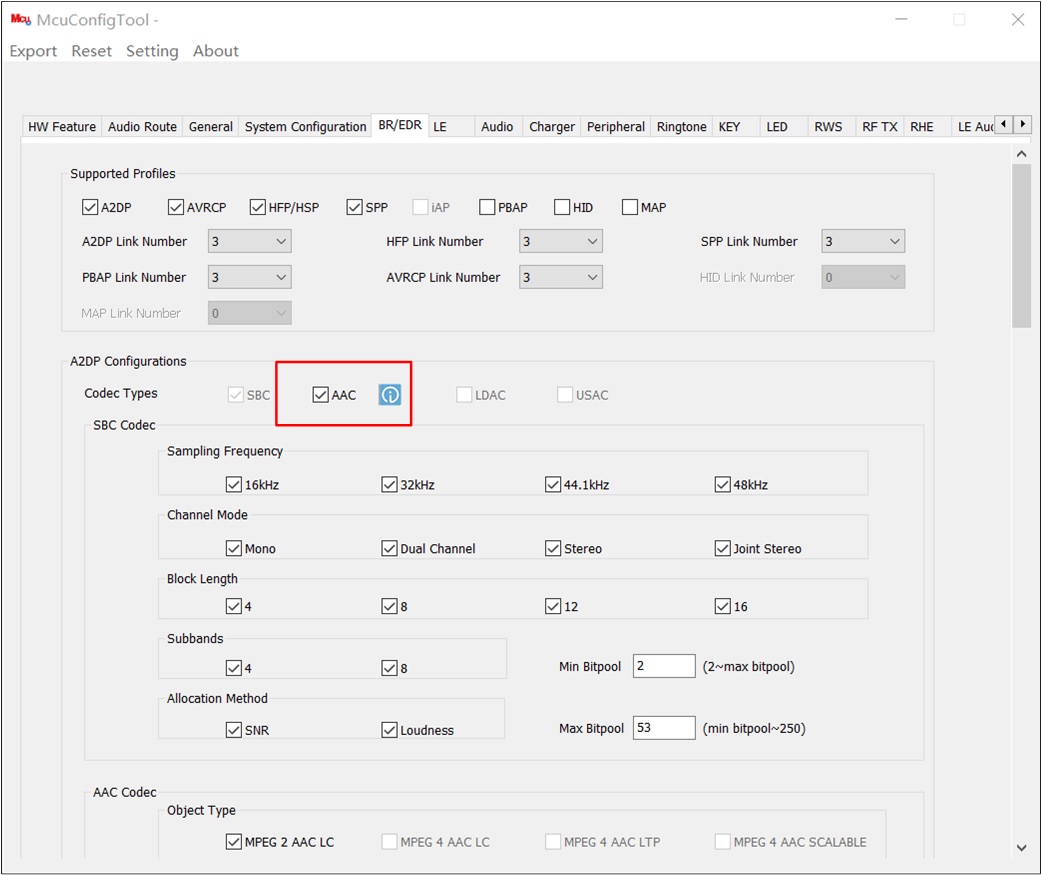
If testing AAC.
Enable AAC.
If testing SBC.
Disable AAC.
ANC On Setup
The settings of ANC.
ANC on
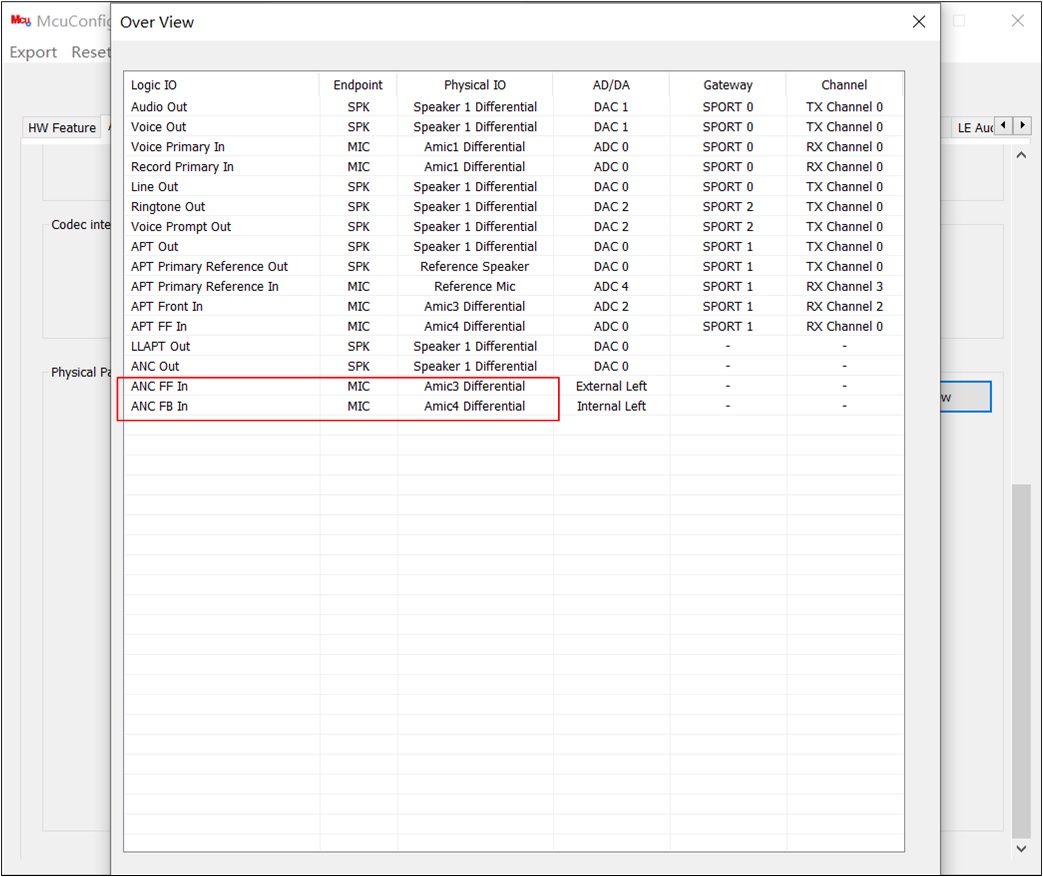
Configure ANC MIC and Speaker.
MIC for RTL87x3D.
ANC FF = AMIC3.
ANC FB = AMIC4.
LE Audio
The settings of LE audio.
Part One LE Audio Configuration
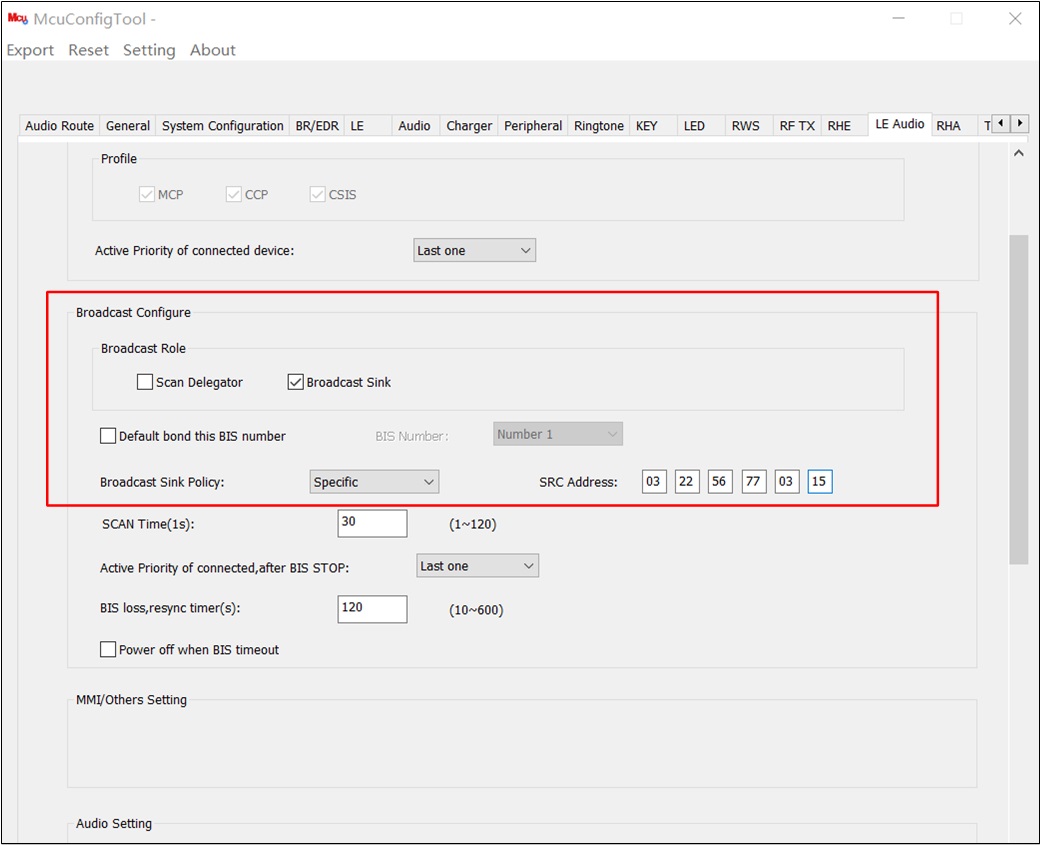
Part Two LE Audio Configuration
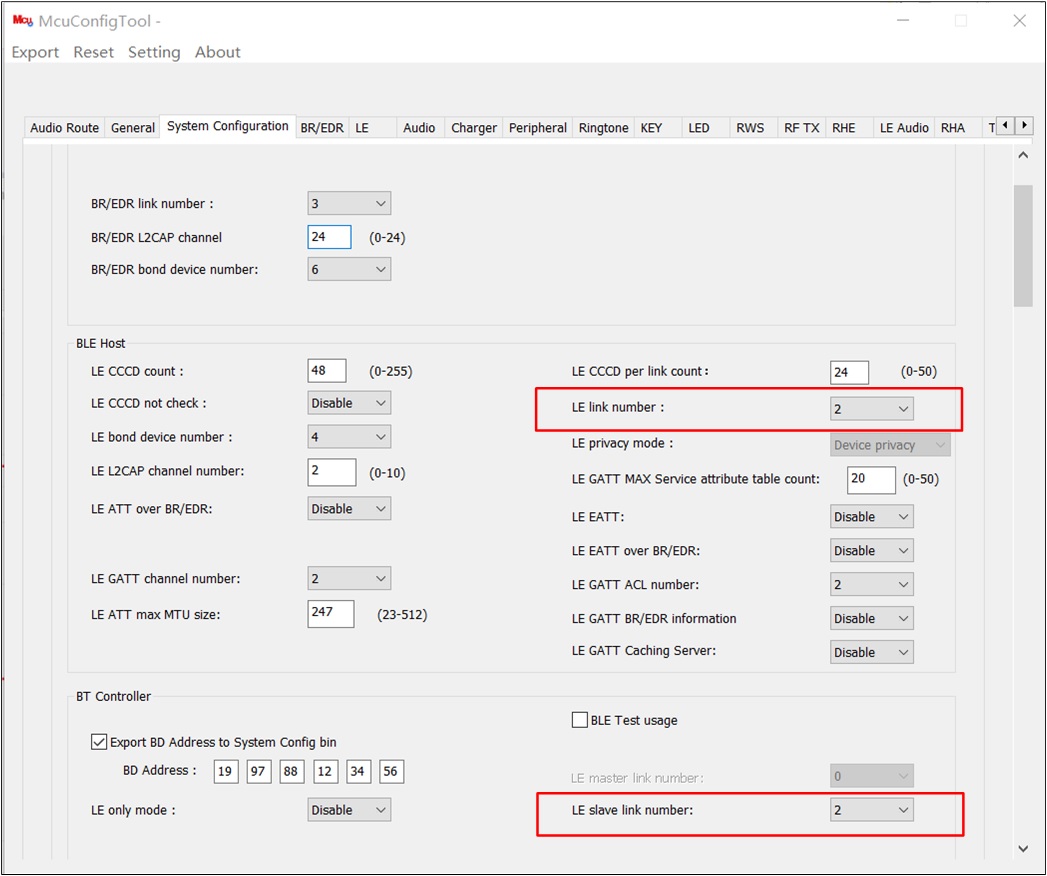
Part Three LE Audio Configuration

Part Four LE Audio Configuration
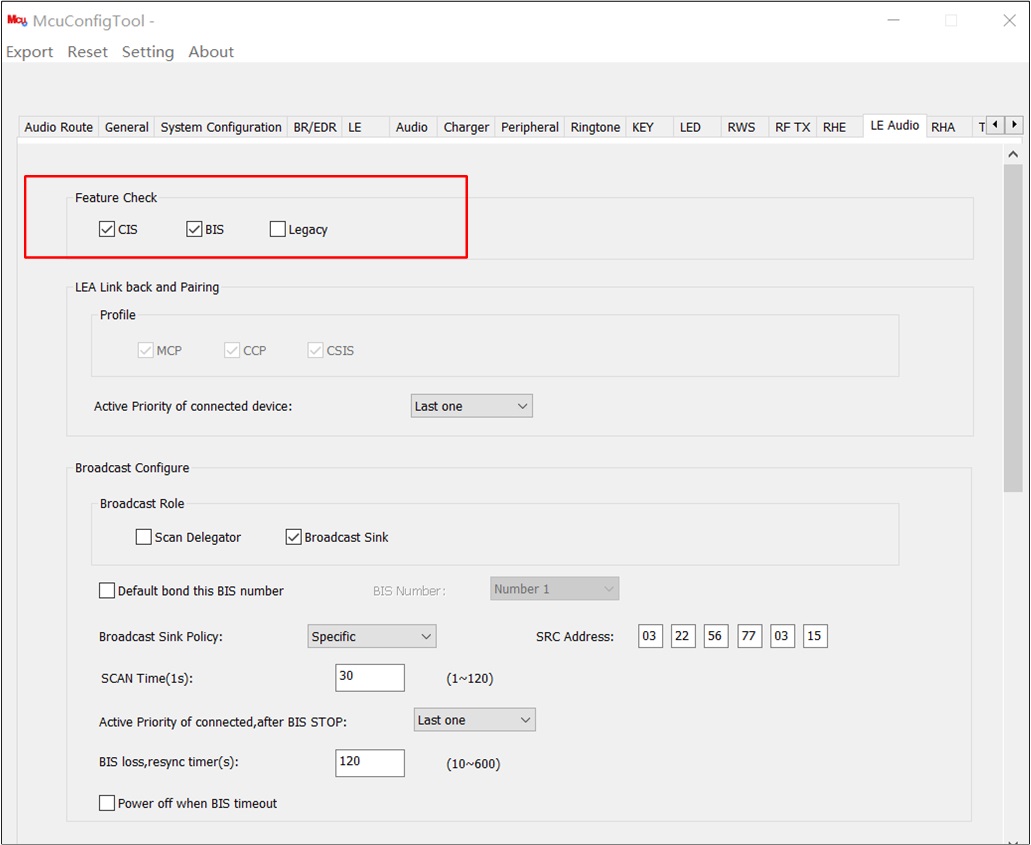
Turn on BIS and CIS.
Turn off Legacy.
Configure LE link number.
Configure the sample rate of conversation to 16K.
DSP1 Only for RTL87x3D
The settings of RTL87x3D for DSP1 only.
DSP1 for RTL87x3D
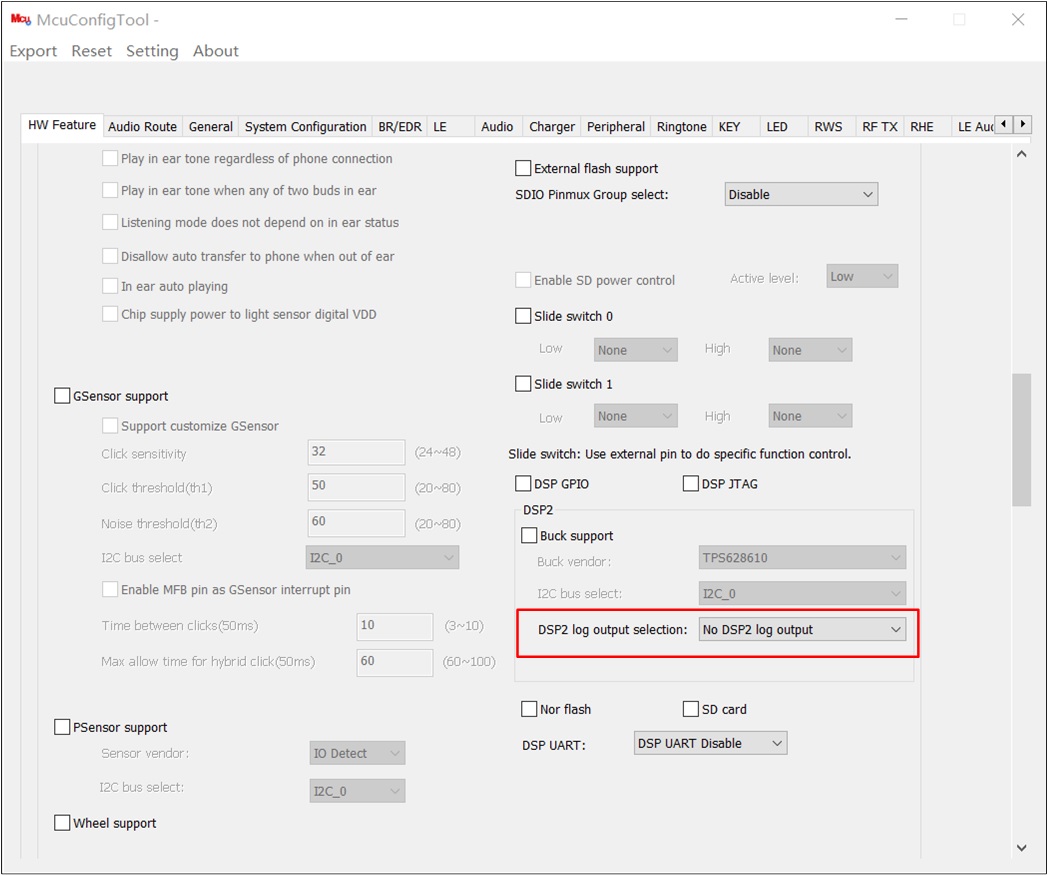
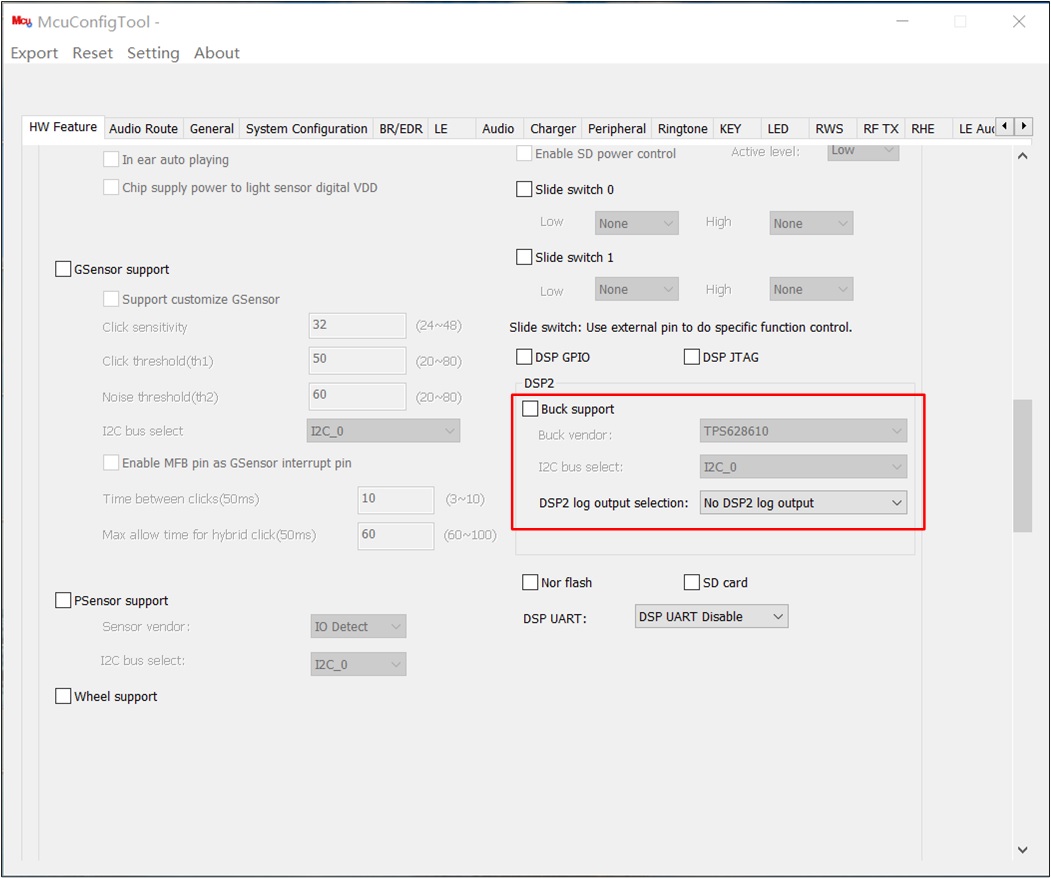
DSP1+DSP2 for RTL87x3D
The settings of RTL87x3D for DSP1 with DSP2.
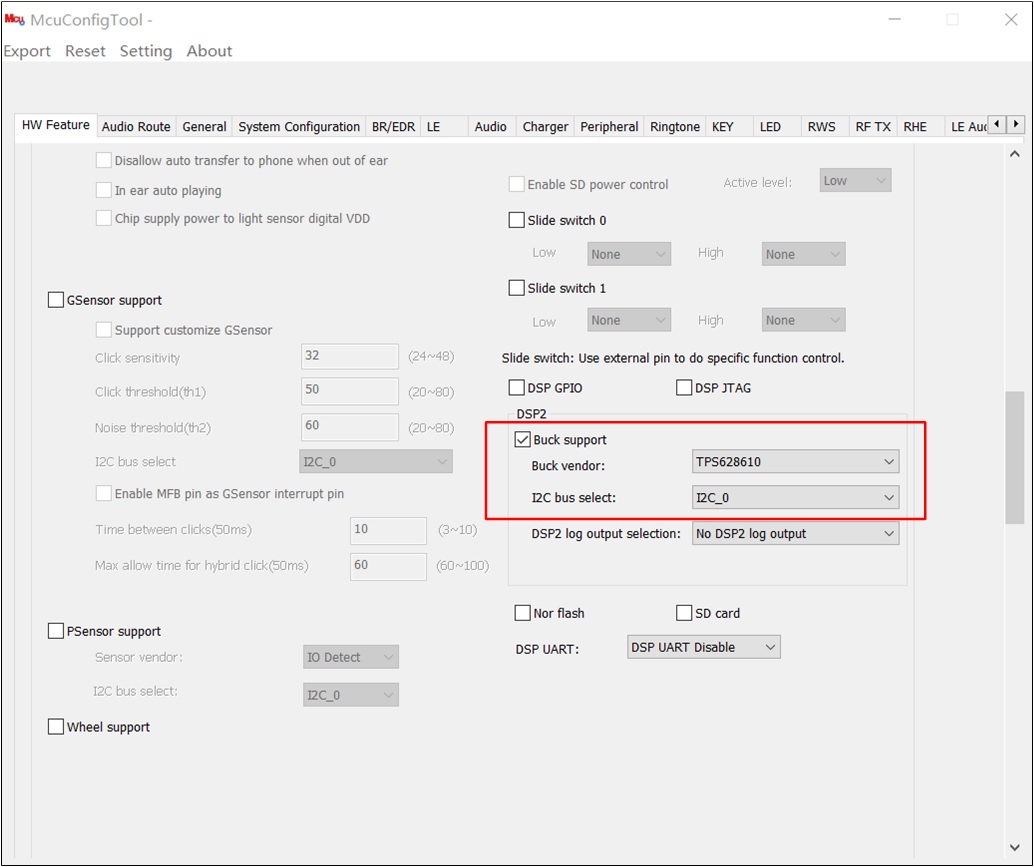
DSP1 and DSP2 for RTL87x3D
Open Buck support.
Fixed Transmit Power
The settings of fixed transmit power.
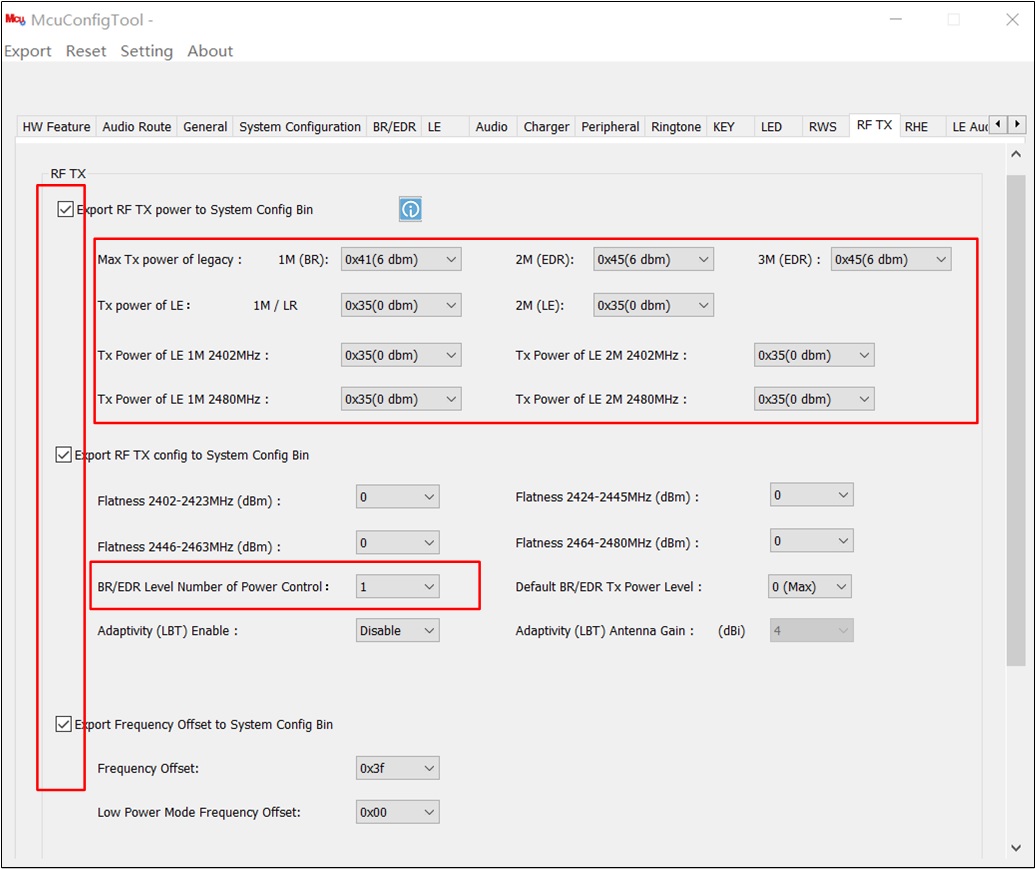
Fixed Transmit Power
For power consumption data stability, the RTK’s tested situation fixed the transmit power of BR/EDR/LE at 6dbm. To disable transmit power control and fix the transmit power, please follow the shown steps.
Enable Export RF TX power to System Config Bin.
Enable Export Frequency Offset to System Config Bin.
Set BR/EDR Level Number of Power Control to 1. LE transmit power setting is also controlled by this setting.
Set the transmit power of BR/EDR/LE to the target value.
Note
This configuration is only for the power consumption test. The transmit power control needs to be enabled when BQB certification.
DSP Configure
The settings of DSP.
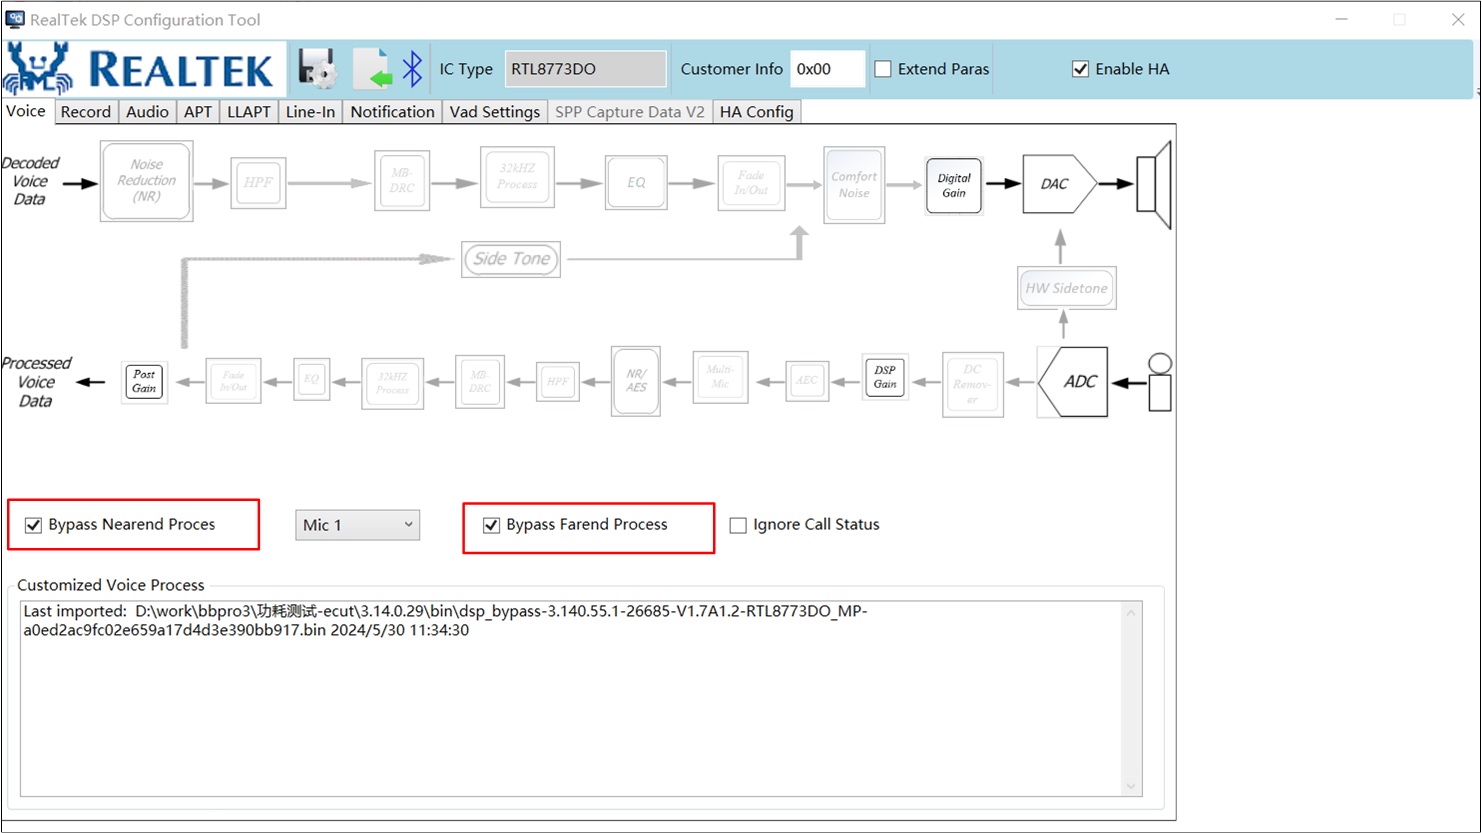
Part One DSP Config Configuration

Part Two DSP Config Configuration
Select Bypass Nearend Process.
Select Bypass Farend Process.
Disable APT.
Application
The settings of the application.
Disable RSSI and Lower Battery Role Swap
Set F_APP_POWER_TEST in app_flags.h to 1.