Lighting
This lighting sample demonstrates the usage of the Matter application layer to build a lighting bulb device and how to do the single light control. It covers setting up the environment, wiring LEDs, modifying configurations, building, and downloading. Additionally, it includes steps for testing using the CHIP Tool and commissioning the device into a Thread network. You can use this sample as a reference for creating your own application.
Requirements
The sample supports the following development kits:
Hardware platforms |
Board name |
|---|---|
RTL8777G HDK |
RTL8777G EVB |
Prepare Matter Environment
To set up the Matter environment, follow the steps listed in Development Setup.
Prepare CHIP Tool
The CHIP Tool (chip-tool) is a Matter controller implementation that allows commissioning a Matter device into the network and communicating with it using Matter messages, which may encode Data Model actions, such as cluster commands. The tool also provides other utilities specific to Matter, such as parsing the setup payload or performing discovery actions.
To build the target, follow the steps listed on the CHIP Tool.
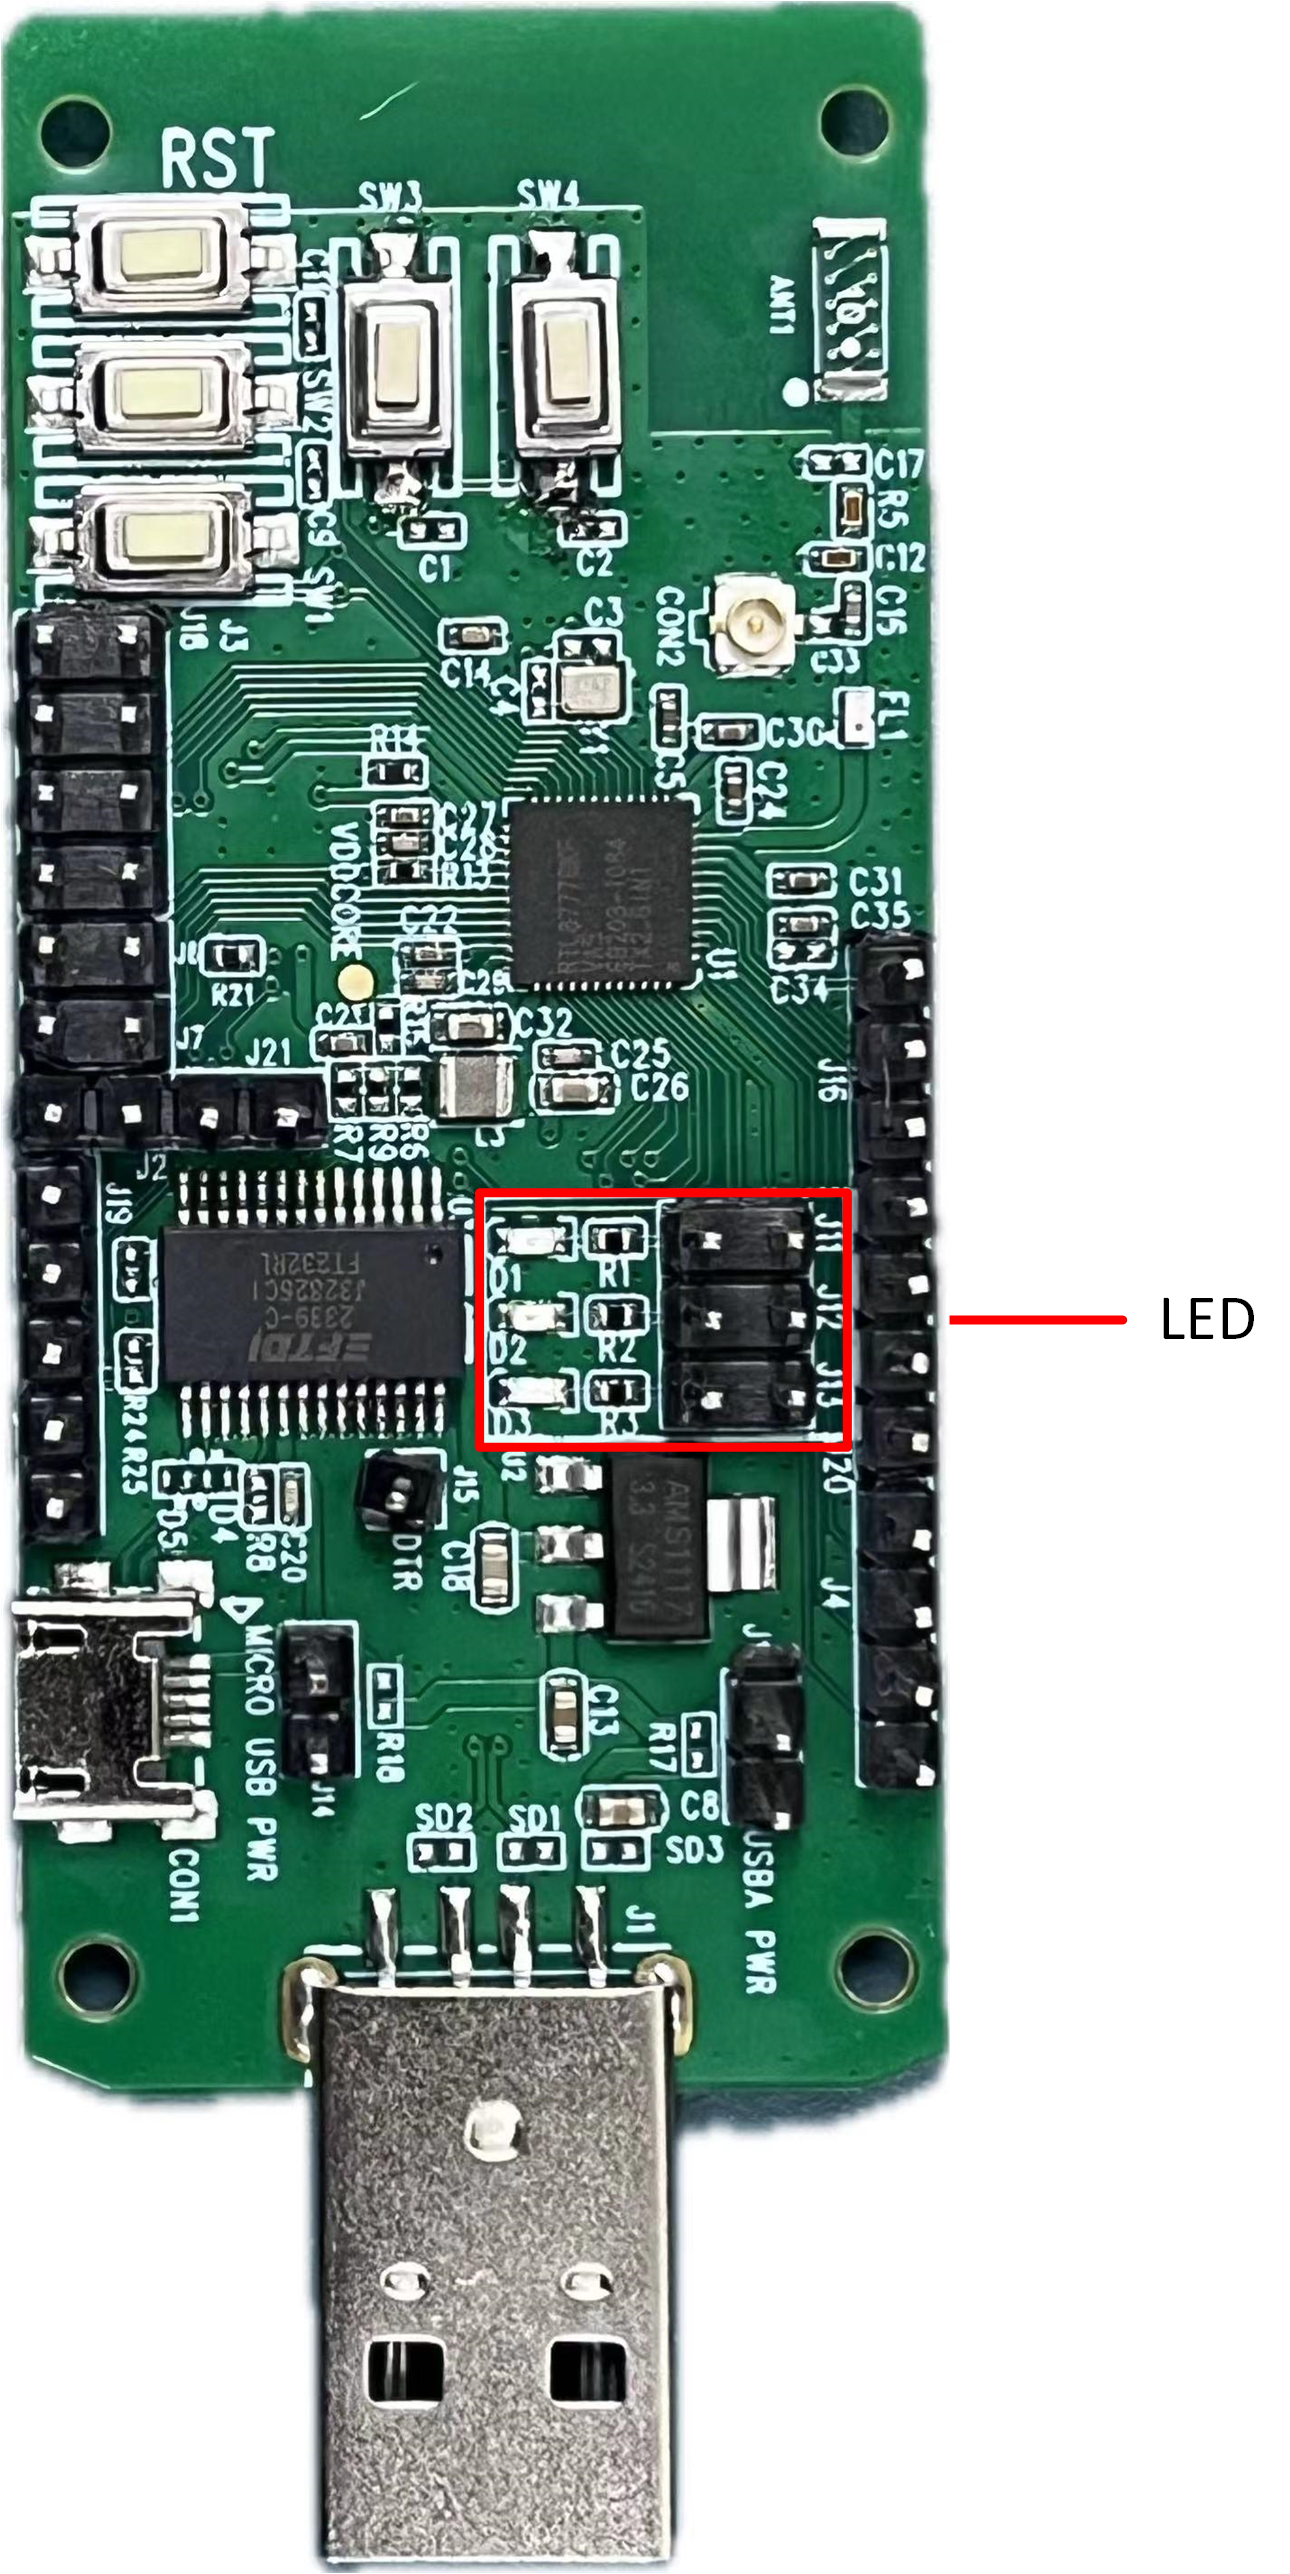
Wiring
Connect the pins of three LEDs in the red box.
LED1: Indicates the On/Off state.
LED2: Indicates the identify state.
LED3: Indicates the system state. During the factory reset, the LED will blink every 500ms. After factory reset, the LED will flash by staying on for 50ms and off for 950ms. If the system has Bluetooth LE connection(s), the LED will blink every 100ms.
Wiring
Configurations
Sample Configurations
Our example samples all have default configurations.
If wanting to modify the sample configuration,
change CHIPProjectConfig.h under the path matter/connectedhomeip/examples/<app_name>/realtek/common/main/include,
where app_name refers to the name of the application, for example, lighting-app.
See APP Config for more information about configuration items.
Factory Data Configurations
The factory data is disabled by default for the evb board. To use factory data, follow the section Enable Factory Data Support and Factory Data Generation in Factory Data.
Building and Downloading
Building
Navigate to the specified directory and build lighting app.
$ cd ./subsys/matter/samples
$ rm -r build/
$ ./build.py rtl8777g lighting
Downloading
After the app is successfully built, the app bin matter-cli-ftd_bank0_MP_dev_*.bin will be generated in the directory build/bank0/bin.
To download app bin into EVB board, follow the steps listed on the Downloading in Quick Start. If the factory data is enabled, also refer to Program Factory Data in Factory Data.
Then press reset button on EVB board and it will start running.
Other files required for downloading are listed in the table below.
File type |
File name |
File path |
|---|---|---|
System ConfigFile |
configFile_xxx.bin |
\subsys\openthread\vendor\rtl87x2g\rtl8777g\firmware\trustzone_disable |
Bank0 Boot PatchImage |
BANK0_boot_patch_MP_release_xxx.bin |
\subsys\openthread\vendor\rtl87x2g\rtl8777g\firmware |
Bank0 OTA HeaderFile |
OTAHeader_Bank0_xxx.bin |
\subsys\openthread\vendor\rtl87x2g\rtl8777g\firmware\trust_zone_disable |
Bank0 SystemPatch Image |
sys_patch_MP_release_xxx.bin |
\subsys\openthread\vendor\rtl87x2g\rtl8777g\firmware |
Bank0 Bluetooth StackPatch Image |
bt_stack_patch_MP_master_xxx.bin |
\subsys\openthread\vendor\rtl87x2g\rtl8777g\firmware |
Bank0 Bluetooth HostImage |
bt_host_MP_xxx.bin |
\subsys\openthread\vendor\rtl87x2g\rtl8777g\firmware |
Experimental Verification
After programming the sample to your EVB board, complete the steps in the following sections.
Preparation Phase
Connect the kit to the computer using a USB cable.
Open a serial port connection to the kit using a terminal emulator (for example, Tera Term).
If the device was not erased during the programming, press and hold SW2 for more than 6.5 seconds until the factory reset takes place.
Press RST to start the Bluetooth LE advertising.
Commission the device to the Matter network. See Commissioning the Device for more information. During the commissioning process, write down the value for the light bulb node ID for later use (<light_bulb_node_ID>).
Testing Phase
After preparing the device for testing, use CHIP Tool to test the single light control.
Run the following commands:
-
Check on-off attribute value before toggle command.
$ ./chip-tool onoff read on-off <light_bulb_node_ID> <endpoint_id>
<light_bulb_node_ID>: Obtained from the previous step<endpoint_id>: ID of the endpoint with OnOff cluster implemented
For example:
$ ./chip-tool onoff read on-off 2 1
The following message will appear in logs:
CHIP:TOO: OnOff: False -
Toggle the on-off attribute state.
$ ./chip-tool onoff toggle <light_bulb_node_ID> <endpoint_id>
For example:
$ ./chip-tool onoff toggle 2 1
-
Check on-off attribute value has changed after toggle command.
$ ./chip-tool onoff read on-off <light_bulb_node_ID> <endpoint_id>
For example:
$ ./chip-tool onoff read on-off 2 1
The following message will appear in logs:
CHIP:TOO: OnOff: True