HFP/AG/OOR/BV-02-C |
Click Ok, then initiate a service level connection from the Implementation Under Test (IUT) to the PTS. Click Ok, then place a call from an external line to the Implementation Under Test (IUT). Do not answer the call unless prompted to do so. Verify the presence of an audio connection, then click Ok. -
Click Ok, then move the PTS and the Implementation Under Test (IUT) out of range of each other by performing one of the following IUT specific actions:
Hands Free (HF) IUT - Place the IUT in the RF shield box or physically take out of range from the PTS.
Audio Gateway (AG) IUT- Physically take the IUT out range. Do not place in the RF shield box as it will interfere with the cellular network.
Note: The PTS can also be placed in the RF shield box if necessary.
Click Ok, then remove the Implementation Under Test (IUT) and/or the PTS from the RF shield. If the out of range method was used, bring the IUT and PTS back within range. Make the Implementation Under Test (IUT) connectable, then click Ok. Verify the presence of an audio connection, then click Ok. Click Ok, then end the call using the external terminal. Click Ok, then close the audio connection (SCO) between the Implementation Under Test (IUT) and the PTS. Do not close the serivice level connection (SLC) or power-off the IUT. Click Ok, then disable the service level connection using the Implementation Under Test (IUT). |
-
Click Ok.
rfcomm connect hfp_ag 0x01 0xA9 0xE5 0x08 0xDC 0x1B 0x00
-
Click Ok.
hfhs_ag call_incoming 1234567 129 0xA9 0xE5 0x08 0xDC 0x1B 0x00
Click Ok. -
Click Ok.
rfcomm disconnect hfp_ag 0xA9 0xE5 0x08 0xDC 0x1B 0x00
-
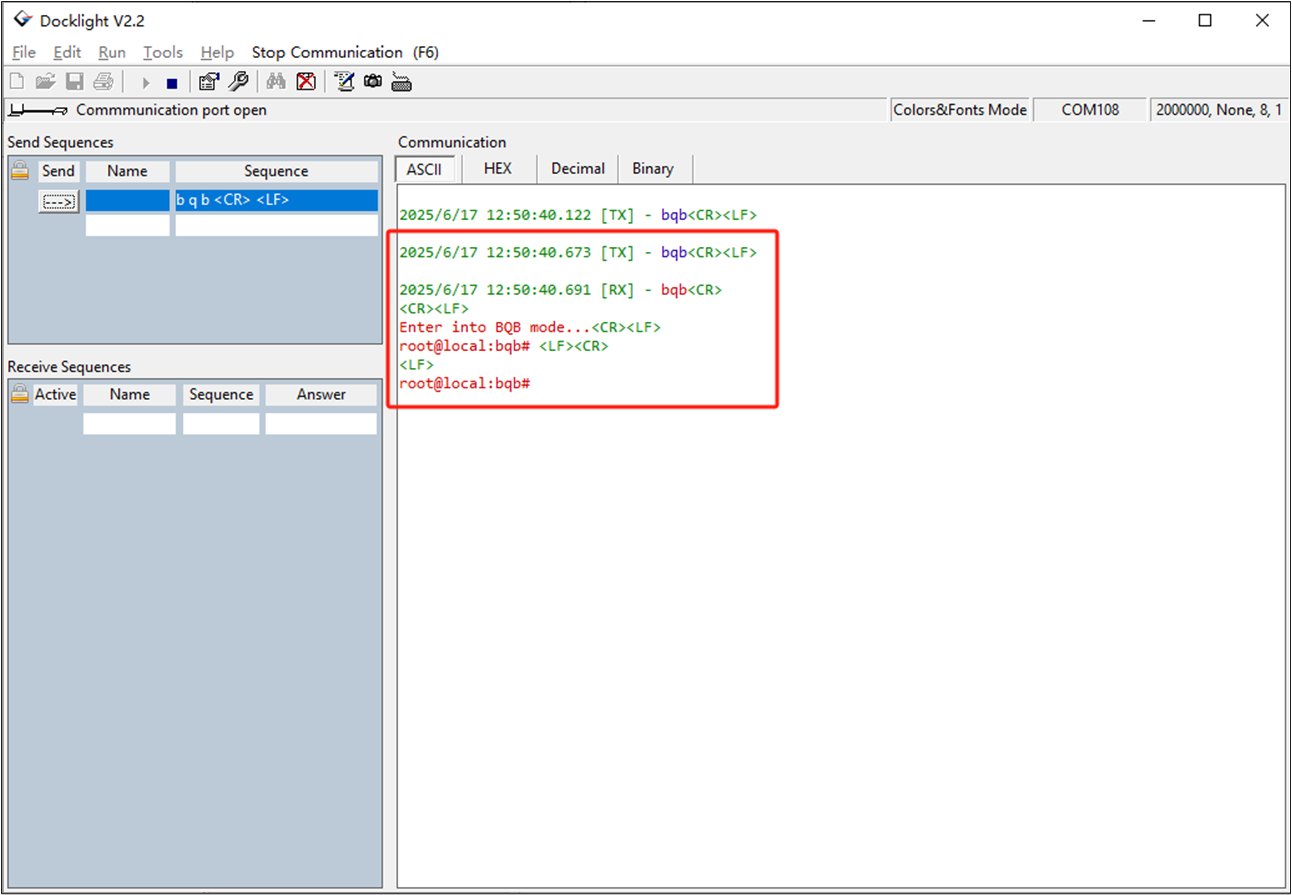
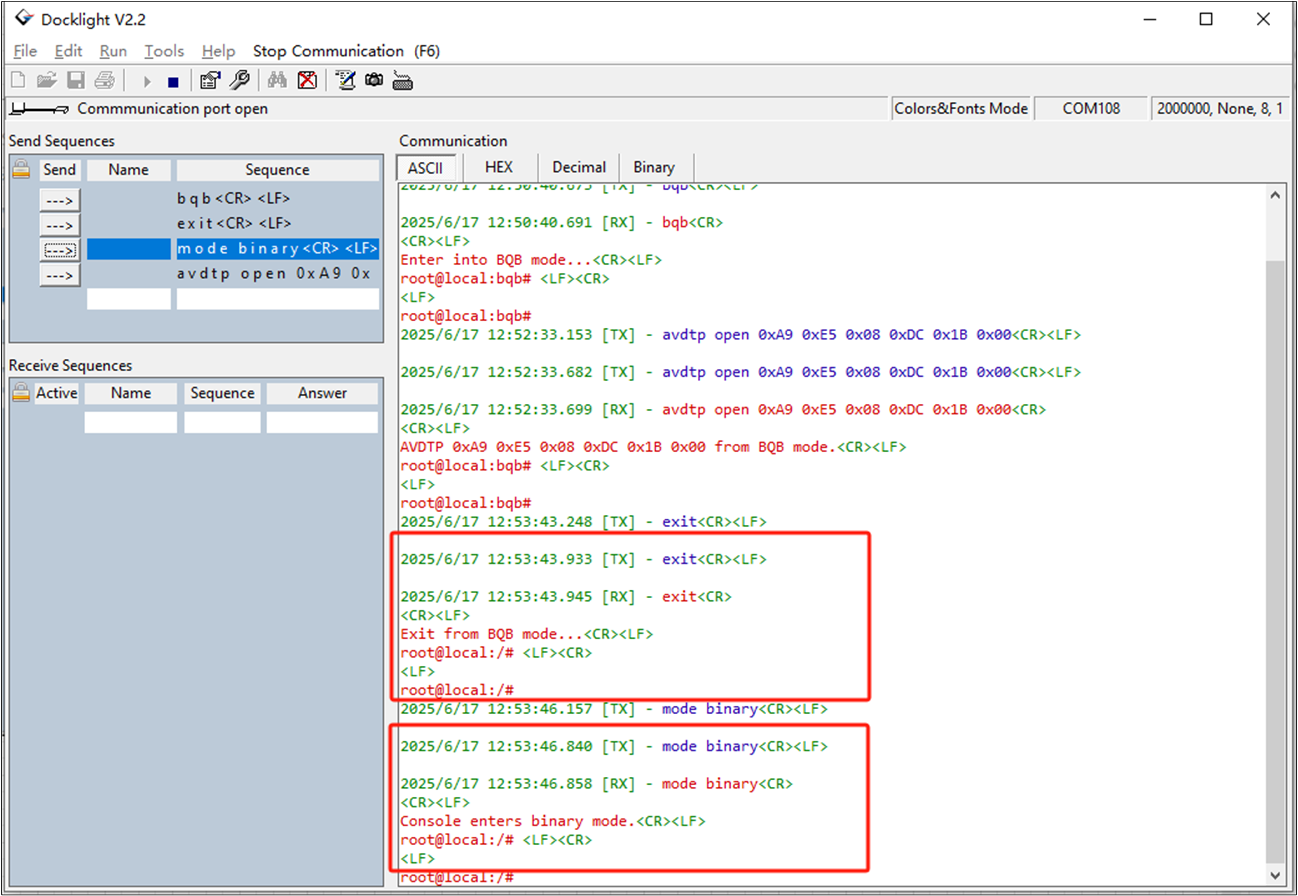
Switch to binary mode.
Then send the CMD: hfpag set_in_call_hold_idle.
Click Ok. Click Ok. -
Click Ok.
hfpag set_in_call_idle
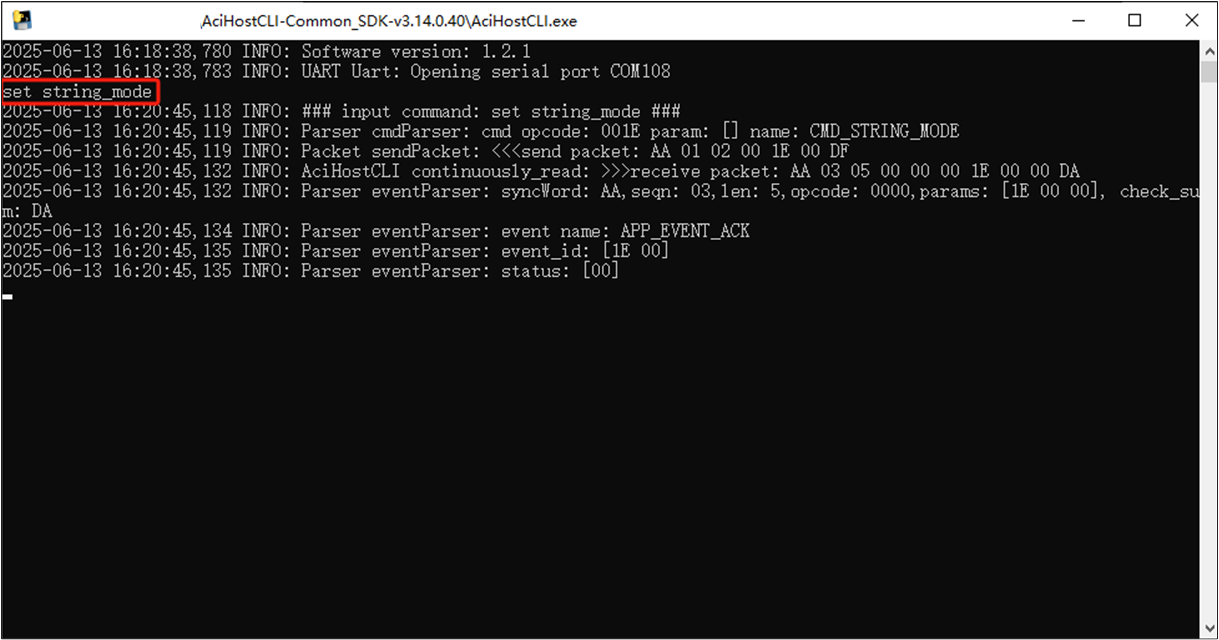
set string mode
Switch to string mode, send the CMD:
hfhs_ag call_terminate 0xA9 0xE5 0x08 0xDC 0x1B 0x00
-
Click Ok.
hfhs_ag disconnect sco 0xA9 0xE5 0x08 0xDC 0x1B 0x00
-
Click Ok.
rfcomm disconnect hfp_ag 0xA9 0xE5 0x08 0xDC 0x1B 0x00
|
HFP/AG/TRS/BV-01-C |
Click Ok, then initiate a service level connection from the Implementation Under Test (IUT) to the PTS. -
Click Ok, then disable the cellular network using the Implementation Under Test (IUT) by performing one of the below actions:
If the IUT is an Audio Gateway (AG), turn the cellular network using the UI.
Place the PTS and IUT in an RF shield box. Once the network is disabled the PTS will send an alert to your machine confirming the network connection was lost. Please note that speakers are needed to hear the said alert.
Click Ok, then enable the cellular network using the Implementation Under Test (IUT). Click Ok, then disable the service level connection using the Implementation Under Test (IUT). |
-
Click Ok.
rfcomm connect hfp_ag 0x01 0xA9 0xE5 0x08 0xDC 0x1B 0x00
Click Ok. -
Click Ok.
hfhs_ag service_status_indicator_send 0x01 0xA9 0xE5 0x08 0xDC 0x1B 0x00
-
Click Ok.
rfcomm disconnect hfp_ag 0xA9 0xE5 0x08 0xDC 0x1B 0x00
|
HFP/AG/PSI/BV-01-C |
Click Ok, then initiate a service level connection from the Implementation Under Test (IUT) to the PTS. Verify that the signal reported on the Implementaion Under Test (IUT) is proportional to the value (out of 5), then click Ok.5. Impair the cellular signal by placing the Implementation Under Test (IUT) under partial RF shielding, then click Ok. Verify that the signal reported on the Implementaion Under Test (IUT) is proportional to the value (out of 5), then click Ok.3. Click Ok, then disable the service level connection using the Implementation Under Test (IUT). |
-
Click Ok.
rfcomm connect hfp_ag 0x01 0xA9 0xE5 0x08 0xDC 0x1B 0x00
-
Click Ok.
hfhs_ag signal_strength_indicator_send 0x01 0xA9 0xE5 0x08 0xDC 0x1B 0x00
-
Click Ok.
rfcomm disconnect hfp_ag 0xA9 0xE5 0x08 0xDC 0x1B 0x00
|
HFP/AG/PSI/BV-03-C |
Click Ok, then initiate a service level connection from the Implementation Under Test (IUT) to the PTS. Manipulate the Implementation Under Test (IUT) so that the battery level is not fully charged, then click Ok. Click Ok, then manipulate the Implementation Under Test (IUT) so that the battery is fully charged. Click Ok, then disable the service level connection using the Implementation Under Test (IUT). |
-
Click Ok.
rfcomm connect hfp_ag 0x01 0xA9 0xE5 0x08 0xDC 0x1B 0x00
-
hfhs_ag battery_change_indicator_send 0x01 0xA9 0xE5 0x08 0xDC 0x1B 0x00
Click Ok.
-
Click Ok.
hfhs_ag battery_change_indicator_send 0x05 0xA9 0xE5 0x08 0xDC 0x1B 0x00
-
Click Ok.
rfcomm disconnect hfp_ag 0xA9 0xE5 0x08 0xDC 0x1B 0x00
|
HFP/AG/PSI/BV-04-C |
Click Ok, then initiate a service level connection from the Implementation Under Test (IUT) to the PTS. Verify the following information matches the network operator reported on the Implementation Under Test(IUT), then click Ok. Click Ok, then disable the service level connection using the Implementation Under Test (IUT). |
-
Click Ok.
rfcomm connect hfp_ag 0x01 0xA9 0xE5 0x08 0xDC 0x1B 0x00
hfhs_ag operator_name_send China_Mobile 0xA9 0xE5 0x08 0xDC 0x1B 0x00
Click Ok. -
Click Ok.
rfcomm disconnect hfp_ag 0xA9 0xE5 0x08 0xDC 0x1B 0x00
|
HFP/AG/PSI/BV-05-C |
Make sure the IUT is registered on home network. Then click Ok. Click Ok, then disable the service level connection using the Implementation Under Test (IUT). |
Click Ok. -
Click Ok.
rfcomm disconnect hfp_ag 0xA9 0xE5 0x08 0xDC 0x1B 0x00
|
|
HFP/AG/ACS/BV-04-C
HFP/AG/ACS/BV-08-C
HFP/AG/ACS/BV-08-C
HFP/AG/ACS/BV-08-C
HFP/AG/ACS/BV-08-C
|
Click Ok, then initiate a service level connection from the Implementation Under Test (IUT) to the PTS. Click Ok, then place a call from an external line to the Implementation Under Test (IUT). Do not answer the call unless prompted to do so. Verify the presence of an audio connection, then click Ok. Click Ok, then close the audio connection (SCO) between the Implementation Under Test (IUT) and the PTS. Do not close the serivice level connection (SLC) or power-off the IUT. Verify the presence of an audio connection, then click Ok. Click Ok, then end the call using the external terminal. Click Ok, then disable the service level connection using the Implementation Under Test (IUT). |
-
Click Ok.
rfcomm connect hfp_ag 0x01 0xA9 0xE5 0x08 0xDC 0x1B 0x00
-
Click Ok.
hfhs_ag call_incoming 1234567 129 0xA9 0xE5 0x08 0xDC 0x1B 0x00
Click Ok. -
Click Ok.
hfhs_ag disconnect sco 0xA9 0xE5 0x08 0xDC 0x1B 0x00
Click Ok. -
Click Ok.
hfhs_ag call_terminate 0xA9 0xE5 0x08 0xDC 0x1B 0x00
-
Click Ok.
rfcomm disconnect hfp_ag 0xA9 0xE5 0x08 0xDC 0x1B 0x00
|
HFP/AG/ACR/BV-01-C |
Click Ok, then initiate a service level connection from the Implementation Under Test (IUT) to the PTS. Click Ok, then place a call from an external line to the Implementation Under Test (IUT). Do not answer the call unless prompted to do so. Verify the presence of an audio connection, then click Ok. Click Ok, then end the call using the external terminal. Click Ok, then disable the service level connection using the Implementation Under Test (IUT). |
-
Click Ok.
rfcomm connect hfp_ag 0x01 0xA9 0xE5 0x08 0xDC 0x1B 0x00
-
Click Ok.
hfhs_ag call_incoming 1234567 129 0xA9 0xE5 0x08 0xDC 0x1B 0x00
Click Ok. -
Click Ok.
hfhs_ag call_terminate 0xA9 0xE5 0x08 0xDC 0x1B 0x00
-
Click Ok.
rfcomm disconnect hfp_ag 0xA9 0xE5 0x08 0xDC 0x1B 0x00
|
HFP/AG/ACR/BV-02-C |
Click Ok, then initiate a service level connection from the Implementation Under Test (IUT) to the PTS. Click Ok, then place a call from an external line to the Implementation Under Test (IUT). Do not answer the call unless prompted to do so. Verify the presence of an audio connection, then click Ok. Click Ok, then end the call using the external terminal. -
Click Ok, then close the audio connection (SCO) by one of the following ways:
Close the service level connection(SLC). Powering off the Implementation Under Test (IUT).
|
-
Click Ok.
rfcomm connect hfp_ag 0x01 0xA9 0xE5 0x08 0xDC 0x1B 0x00
-
Click Ok.
hfhs_ag call_incoming 1234567 129 0xA9 0xE5 0x08 0xDC 0x1B 0x00
Click Ok. -
Click Ok.
hfhs_ag call_terminate 0xA9 0xE5 0x08 0xDC 0x1B 0x00
-
Click Ok.
rfcomm disconnect hfp_ag 0xA9 0xE5 0x08 0xDC 0x1B 0x00
|
HFP/AG/CLI/BV-01-C |
Click Ok, then initiate a service level connection from the Implementation Under Test (IUT) to the PTS. Click Ok, then place a call from an external line to the Implementation Under Test (IUT). Do not answer the call unless prompted to do so. Verify the presence of an audio connection, then click Ok. Click Ok, then close the audio connection (SCO) between the Implementation Under Test (IUT) and the PTS. Do not close the serivice level connection (SLC) or power-off the IUT. Verify the presence of an audio connection, then click Ok. Click Ok, then disable the service level connection using the Implementation Under Test (IUT). |
-
Click Ok.
rfcomm connect hfp_ag 0x01 0xA9 0xE5 0x08 0xDC 0x1B 0x00
-
Click Ok.
hfhs_ag call_incoming 1234567 129 0xA9 0xE5 0x08 0xDC 0x1B 0x00
Click Ok. -
Click Ok.
hfhs_ag call_terminate 0xA9 0xE5 0x08 0xDC 0x1B 0x00
-
Click Ok.
rfcomm disconnect hfp_ag 0xA9 0xE5 0x08 0xDC 0x1B 0x00
|
HFP/AG/ICA/BV-01-C |
Click Ok, then initiate a service level connection from the Implementation Under Test (IUT) to the PTS. Click Ok, then enable the in-band ringtone using the Implementation Under Test (IUT). Click Ok, then place a call from an external line to the Implementation Under Test (IUT). Do not answer the call unless prompted to do so. Verify the presence of an audio connection, then click Ok. Click Ok, then end the call using the external terminal. Click Ok, then close the audio connection (SCO) between the Implementation Under Test (IUT) and the PTS. Do not close the serivice level connection (SLC) or power-off the IUT. Click Ok, then disable the service level connection using the Implementation Under Test (IUT). |
-
Click Ok.
rfcomm connect hfp_ag 0x01 0xA9 0xE5 0x08 0xDC 0x1B 0x00
Click Ok. -
Click Ok.
hfhs_ag call_incoming 1234567 129 0xA9 0xE5 0x08 0xDC 0x1B 0x00
Click Ok. -
Click Ok.
hfhs_ag call_terminate 0xA9 0xE5 0x08 0xDC 0x1B 0x00
-
Click Ok.
hfhs_ag disconnect sco 0xA9 0xE5 0x08 0xDC 0x1B 0x00
-
Click Ok.
rfcomm disconnect hfp_ag 0xA9 0xE5 0x08 0xDC 0x1B 0x00
|
HFP/AG/ICA/BV-04-C |
Click Ok, then initiate a service level connection from the Implementation Under Test (IUT) to the PTS. Click Ok, then disable the in-band ringtone using the Implementation Under Test (IUT). Click Ok, then place a call from an external line to the Implementation Under Test (IUT). Do not answer the call unless prompted to do so. Verify the presence of an audio connection, then click Ok. Click Ok, then end the call using the external terminal. Click Ok, then close the audio connection (SCO) between the Implementation Under Test (IUT) and the PTS. Do not close the serivice level connection (SLC) or power-off the IUT. Click Ok, then disable the service level connection using the Implementation Under Test (IUT). |
-
Click Ok.
rfcomm connect hfp_ag 0x01 0xA9 0xE5 0x08 0xDC 0x1B 0x00
-
Click Ok.
hfhs_ag inband_ringing_set ring_disable 0xA9 0xE5 0x08 0xDC 0x1B 0x00
-
Click Ok.
hfhs_ag call_incoming 1234567 129 0xA9 0xE5 0x08 0xDC 0x1B 0x00
Click Ok. -
Click Ok.
hfhs_ag call_terminate 0xA9 0xE5 0x08 0xDC 0x1B 0x00
-
Click Ok.
hfhs_ag disconnect sco 0xA9 0xE5 0x08 0xDC 0x1B 0x00
-
Click Ok.
rfcomm disconnect hfp_ag 0xA9 0xE5 0x08 0xDC 0x1B 0x00
|
HFP/AG/ICA/BV-06-C |
Click Ok, then initiate a service level connection from the Implementation Under Test (IUT) to the PTS. Click Ok, then place a call from an external line to the Implementation Under Test (IUT). Do not answer the call unless prompted to do so. Click Ok, then answer the incoming call on the Implementation Under Test (IUT). Click Ok, then end the call using the external terminal. Click Ok, then disable the service level connection using the Implementation Under Test (IUT). |
-
Click Ok.
rfcomm connect hfp_ag 0x01 0xA9 0xE5 0x08 0xDC 0x1B 0x00
-
Click Ok.
hfhs_ag call_incoming 1234567 129 0xA9 0xE5 0x08 0xDC 0x1B 0x00
-
Click Ok.
hfhs_ag call_answer 0xA9 0xE5 0x08 0xDC 0x1B 0x00
-
Click Ok.
hfhs_ag call_terminate 0xA9 0xE5 0x08 0xDC 0x1B 0x00
-
Click Ok.
rfcomm disconnect hfp_ag 0xA9 0xE5 0x08 0xDC 0x1B 0x00
|
HFP/AG/ICR/BV-01-C |
Click Ok, then initiate a service level connection from the Implementation Under Test (IUT) to the PTS. Click Ok, then place a call from an external line to the Implementation Under Test (IUT). Do not answer the call unless prompted to do so. Click Ok, then disable the service level connection using the Implementation Under Test (IUT). |
-
Click Ok.
rfcomm connect hfp_ag 0x01 0xA9 0xE5 0x08 0xDC 0x1B 0x00
-
Click Ok.
hfhs_ag call_incoming 1234567 129 0xA9 0xE5 0x08 0xDC 0x1B 0x00
-
Click Ok.
rfcomm disconnect hfp_ag 0xA9 0xE5 0x08 0xDC 0x1B 0x00
|
HFP/AG/ICR/BV-02-C |
Click Ok, then initiate a service level connection from the Implementation Under Test (IUT) to the PTS. Click Ok, then place a call from an external line to the Implementation Under Test (IUT). Do not answer the call unless prompted to do so. Click Ok, then reject the incoming call using the Implemention Under Test (IUT). Click Ok, then disable the service level connection using the Implementation Under Test (IUT). |
-
Click Ok.
rfcomm connect hfp_ag 0x01 0xA9 0xE5 0x08 0xDC 0x1B 0x00
-
Click Ok.
hfhs_ag call_incoming 1234567 129 0xA9 0xE5 0x08 0xDC 0x1B 0x00
-
Click Ok.
hfhs_ag call_terminate 0xA9 0xE5 0x08 0xDC 0x1B 0x00
-
Click Ok.
rfcomm disconnect hfp_ag 0xA9 0xE5 0x08 0xDC 0x1B 0x00
|
HFP/AG/TCA/BV-01-C |
Click Ok, then initiate a service level connection from the Implementation Under Test (IUT) to the PTS. Click Ok, then place a call from an external line to the Implementation Under Test (IUT). Do not answer the call unless prompted to do so. Verify the presence of an audio connection, then click Ok. Click Ok, then disable the service level connection using the Implementation Under Test (IUT). |
-
Click Ok.
rfcomm connect hfp_ag 0x01 0xA9 0xE5 0x08 0xDC 0x1B 0x00
-
Click Ok.
hfhs_ag call_incoming 1234567 129 0xA9 0xE5 0x08 0xDC 0x1B 0x00
Click Ok. -
Click Ok.
rfcomm disconnect hfp_ag 0xA9 0xE5 0x08 0xDC 0x1B 0x00
|
|
HFP/AG/TCA/BV-02-C
HFP/AG/TCA/BV-02-C
|
Click Ok, then initiate a service level connection from the Implementation Under Test (IUT) to the PTS. Click Ok, then place a call from an external line to the Implementation Under Test (IUT). Do not answer the call unless prompted to do so. Verify the presence of an audio connection, then click Ok. Click Ok, then end the incoming call using the Implemention Under Test (IUT). Click Ok, then close the audio connection (SCO) between the Implementation Under Test (IUT) and the PTS. Do not close the serivice level connection (SLC) or power-off the IUT. Click Ok, then disable the service level connection using the Implementation Under Test (IUT). |
-
Click Ok.
rfcomm connect hfp_ag 0x01 0xA9 0xE5 0x08 0xDC 0x1B 0x00
-
Click Ok.
hfhs_ag call_incoming 1234567 129 0xA9 0xE5 0x08 0xDC 0x1B 0x00
Click Ok. -
Click Ok.
hfhs_ag call_terminate 0xA9 0xE5 0x08 0xDC 0x1B 0x00
-
Click Ok.
hfhs_ag disconnect sco 0xA9 0xE5 0x08 0xDC 0x1B 0x00
-
Click Ok.
rfcomm disconnect hfp_ag 0xA9 0xE5 0x08 0xDC 0x1B 0x00
|
HFP/AG/TCA/BV-04-C |
Click Ok, then initiate a service level connection from the Implementation Under Test (IUT) to the PTS. Click Ok, then disable the service level connection using the Implementation Under Test (IUT). |
-
Click Ok.
rfcomm connect hfp_ag 0x01 0xA9 0xE5 0x08 0xDC 0x1B 0x00
-
Click Ok.
rfcomm disconnect hfp_ag 0xA9 0xE5 0x08 0xDC 0x1B 0x00
|
HFP/AG/TCA/BV-05-C |
Click Ok, then initiate a service level connection from the Implementation Under Test (IUT) to the PTS. Click Ok, then place a call from an external line to the Implementation Under Test (IUT). Do not answer the call unless prompted to do so. Verify the presence of an audio connection, then click Ok. Click Ok, then place a second call from an external line to the Implementation Under Test (IUT). Do not answer the call unless prompted to do so. Click Ok, then disable the service level connection using the Implementation Under Test (IUT). |
-
Click Ok.
rfcomm connect hfp_ag 0x01 0xA9 0xE5 0x08 0xDC 0x1B 0x00
-
Click Ok.
hfhs_ag call_incoming 1234567 129 0xA9 0xE5 0x08 0xDC 0x1B 0x00
Click Ok. -
Click Ok.
hfhs_ag call_waiting 7654321 129 0xA9 0xE5 0x08 0xDC 0x1B 0x00
hfhs_ag call_setup_status_indicator_send 0x01 0xA9 0xE5 0x08 0xDC 0x1B 0x00
-
Click Ok.
rfcomm disconnect hfp_ag 0xA9 0xE5 0x08 0xDC 0x1B 0x00
|
HFP/AG/TDS/BV-01-C |
Click Ok, then place a call from an external line to the Implementation Under Test (IUT). Do not answer the call unless prompted to do so. Verify the presence of an audio connection, then click Ok. Click Ok, then initiate an audio connection using the Codec Connection Setup procedure. Verify the presence of an audio connection, then click Ok. Click Ok, then end the call using the external terminal. Click Ok, then close the audio connection (SCO) between the Implementation Under Test (IUT) and the PTS. Do not close the serivice level connection (SLC) or power-off the IUT. Click Ok, then disable the service level connection using the Implementation Under Test (IUT). |
-
Click Ok.
hfhs_ag call_incoming 1234567 129 0xA9 0xE5 0x08 0xDC 0x1B 0x00
Click Ok. -
Click Ok.
hfhs_ag connect sco 0xA9 0xE5 0x08 0xDC 0x1B 0x00
-
Click Ok.
hfhs_ag call_terminate 0xA9 0xE5 0x08 0xDC 0x1B 0x00
-
Click Ok.
hfhs_ag disconnect sco 0xA9 0xE5 0x08 0xDC 0x1B 0x00
-
Click Ok.
rfcomm disconnect hfp_ag 0xA9 0xE5 0x08 0xDC 0x1B 0x00
|
HFP/AG/ATH/BV-03-C |
Place a call from an external line to the Implementation Under Test (IUT). Do not answer the call unless prompted to do so. Verify the presence of an audio connection, then click Ok. Click Ok, then end the call using the external terminal. Click Ok, then close the audio connection (SCO) between the Implementation Under Test (IUT) and the PTS. Do not close the serivice level connection (SLC) or power-off the IUT. |
-
hfpag set_in_call_hold_idle
Click Ok.
Click Ok. hfpag call_terminate -
Click Ok.
disconnect pts
hfpag set_in_call_idle |
HFP/AG/ATH/BV-04-C |
Click Ok, then initiate a service level connection from the Implementation Under Test (IUT) to the PTS. Click Ok, then place a call from an external line to the Implementation Under Test (IUT). Do not answer the call unless prompted to do so. Verify the presence of an audio connection, then click Ok. Click Ok, then close the audio connection (SCO) between the Implementation Under Test (IUT) and the PTS. Do not close the serivice level connection (SLC) or power-off the IUT. Verify the absence of an audio connection, then click Ok Verify the presence of an audio connection, then click Ok. Click Ok, then end the call using the external terminal. Click Ok, then close the audio connection (SCO) between the Implementation Under Test (IUT) and the PTS. Do not close the serivice level connection (SLC) or power-off the IUT. Click Ok, then disable the service level connection using the Implementation Under Test (IUT). |
-
Click Ok.
rfcomm connect hfp_ag 0x01 0xA9 0xE5 0x08 0xDC 0x1B 0x00
-
Click Ok.
hfhs_ag call_incoming 1234567 129 0xA9 0xE5 0x08 0xDC 0x1B 0x00
Click Ok. -
Click Ok.
hfhs_ag disconnect sco 0xA9 0xE5 0x08 0xDC 0x1B 0x00
Click Ok. Click Ok. -
Click Ok.
hfhs_ag call_terminate 0xA9 0xE5 0x08 0xDC 0x1B 0x00
-
Click Ok.
hfhs_ag disconnect sco 0xA9 0xE5 0x08 0xDC 0x1B 0x00
-
Click Ok.
rfcomm disconnect hfp_ag 0xA9 0xE5 0x08 0xDC 0x1B 0x00
|
HFP/AG/ATH/BV-06-C |
Click Ok, then initiate a service level connection from the Implementation Under Test (IUT) to the PTS. Click Ok, then place a call from an external line to the Implementation Under Test (IUT). Do not answer the call unless prompted to do so. Verify the presence of an audio connection, then click Ok. Click Ok, then close the audio connection (SCO) between the Implementation Under Test (IUT) and the PTS. Do not close the serivice level connection (SLC) or power-off the IUT. Verify the absence of an audio connection, then click Ok. Click Ok, then initiate an audio connection (SCO) from the Implementation Under Test (IUT) to the PTS. Verify the presence of an audio connection, then click Ok. Click Ok, then end the call using the external terminal. Click Ok, then close the audio connection (SCO) between the Implementation Under Test (IUT) and the PTS. Do not close the serivice level connection (SLC) or power-off the IUT. Click Ok, then disable the service level connection using the Implementation Under Test (IUT). |
-
Click Ok.
rfcomm connect hfp_ag 0x01 0xA9 0xE5 0x08 0xDC 0x1B 0x00
-
Click Ok.
hfhs_ag call_incoming 1234567 129 0xA9 0xE5 0x08 0xDC 0x1B 0x00
Click Ok. -
Click Ok.
hfhs_ag disconnect sco 0xA9 0xE5 0x08 0xDC 0x1B 0x00
Click Ok. -
Click Ok.
hfhs_ag connect sco 0xA9 0xE5 0x08 0xDC 0x1B 0x00
Click Ok. -
Click Ok.
hfhs_ag call_terminate 0xA9 0xE5 0x08 0xDC 0x1B 0x00
-
Click Ok.
hfhs_ag disconnect sco 0xA9 0xE5 0x08 0xDC 0x1B 0x00
-
Click Ok.
rfcomm disconnect hfp_ag 0xA9 0xE5 0x08 0xDC 0x1B 0x00
|
HFP/AG/ATA/BV-01-C |
Click Ok, then initiate a service level connection from the Implementation Under Test (IUT) to the PTS. Click Ok, then place a call from an external line to the Implementation Under Test (IUT). Do not answer the call unless prompted to do so. Verify the presence of an audio connection, then click Ok. Click Ok, then close the audio connection (SCO) between the Implementation Under Test (IUT) and the PTS. Do not close the serivice level connection (SLC) or power-off the IUT. Verify the absence of an audio connection, then click Ok. Click Ok, then end the call using the external terminal. Click Ok, then disable the service level connection using the Implementation Under Test (IUT). |
-
Click Ok.
rfcomm connect hfp_ag 0x01 0xA9 0xE5 0x08 0xDC 0x1B 0x00
-
Click Ok.
hfhs_ag call_incoming 1234567 129 0xA9 0xE5 0x08 0xDC 0x1B 0x00
Click Ok. -
Click Ok
hfhs_ag disconnect sco 0xA9 0xE5 0x08 0xDC 0x1B 0x00
Click Ok. -
Click Ok.
hfhs_ag call_terminate 0xA9 0xE5 0x08 0xDC 0x1B 0x00
-
Click Ok.
rfcomm disconnect hfp_ag 0xA9 0xE5 0x08 0xDC 0x1B 0x00
|
HFP/AG/OCM/BV-01-C |
Click Ok, then initiate a service level connection from the Implementation Under Test (IUT) to the PTS. Place the Implementation Under Test(IUT) in a mode that will allow an outgoing call initiated by the PTS, and click Ok. Click Ok, then answer the incoming call on the external terminal. Verify the presence of an audio connection, then click Ok. Click Ok, then end the call using the external terminal. Click Ok, then close the audio connection (SCO) between the Implementation Under Test (IUT) and the PTS. Do not close the serivice level connection (SLC) or power-off the IUT. Click Ok, then disable the service level connection using the Implementation Under Test (IUT). |
-
Click Ok.
rfcomm connect hfp_ag 0x01 0xA9 0xE5 0x08 0xDC 0x1B 0x00
-
Click Ok.
hfhs_ag call_incoming 1234567 129 0xA9 0xE5 0x08 0xDC 0x1B 0x00
-
Click Ok.
hfhs_ag ok_send 0xA9 0xE5 0x08 0xDC 0x1B 0x00
hfhs_ag call_setup_status_indicator_send 0x02 0xA9 0xE5 0x08 0xDC 0x1B 0x00
hfhs_ag call_status_indicator_send 0x01 0xA9 0xE5 0x08 0xDC 0x1B 0x00
hfhs_ag call_setup_status_indicator_send 0x00 0xA9 0xE5 0x08 0xDC 0x1B 0x00
-
hfhs_ag connect sco 0xA9 0xE5 0x08 0xDC 0x1B 0x00
Click Ok.
-
Click Ok.
hfhs_ag call_terminate 0xA9 0xE5 0x08 0xDC 0x1B 0x00
-
Click Ok.
hfhs_ag disconnect sco 0xA9 0xE5 0x08 0xDC 0x1B 0x00
-
Click Ok.
rfcomm disconnect hfp_ag 0xA9 0xE5 0x08 0xDC 0x1B 0x00
|
HFP/AG/OCM/BV-02-C |
Click Ok, then initiate a service level connection from the Implementation Under Test (IUT) to the PTS. Clear the memory indexed by TSPX_phone_number_memory on the AG such that the memory slot becomes empty, then click Ok. Place the Implementation Under Test(IUT) in a mode that will allow an outgoing call initiated by the PTS, and click Ok. The PTS will send a call request containing an invalid/out of range memory index from the TSPX_phone_number_memory_inval id_index found in the IXIT settings. Place the Implementation Under Test(IUT) in a mode that will allow an outgoing call initiated by the PTS, and click Ok. Click Ok, then disable the service level connection using the Implementation Under Test (IUT). |
-
Click Ok.
rfcomm connect hfp_ag 0x01 0xA9 0xE5 0x08 0xDC 0x1B 0x00
Click Ok. -
Click Ok.
hfhs_ag error_send 0x00 0xA9 0xE5 0x08 0xDC 0x1B 0x00
Click Ok. -
Click Ok.
hfhs_ag error_send 0x00 0xA9 0xE5 0x08 0xDC 0x1B 0x00
-
Click Ok.
rfcomm disconnect hfp_ag 0xA9 0xE5 0x08 0xDC 0x1B 0x00
|
HFP/AG/OCL/BV-01-C |
1Place the Implemenation Under Test(IUT) in a state which will accept an outgoing call set-up request from the PTS, then click Ok. Click Ok, then initiate a service level connection from the Implementation Under Test (IUT) to the PTS. Place the Implementation Under Test (IUT) in a mode that will allow an outgoing call initiated by the PTS, and click Ok. Click Ok, then answer the incoming call on the external terminal. Verify the presence of an audio connection, then click Ok. Verify that the Implemenation Under Test (IUT) has called the last dialed number and the bi-directional conversation is available between the external line and the HF. Click Ok, then end the call using the external terminal. Click Ok, then close the audio connection (SCO) between the Implementation Under Test (IUT) and the PTS. Do not close the serivice level connection (SLC) or power-off the IUT. Click Ok, then disable the service level connection using the Implementation Under Test (IUT). |
Click Ok. -
Click Ok.
rfcomm connect hfp_ag 0x01 0xA9 0xE5 0x08 0xDC 0x1B 0x00
-
Click Ok.
hfhs_ag ok_send 0xA9 0xE5 0x08 0xDC 0x1B 0x00
hfhs_ag call_setup_status_indicator_send 0x02 0xA9 0xE5 0x08 0xDC 0x1B 0x00
-
Click Ok.
hfhs_ag call_status_indicator_send 0x01 0xA9 0xE5 0x08 0xDC 0x1B 0x00
-
hfhs_ag call_setup_status_indicator_send 0x00 0xA9 0xE5 0x08 0xDC 0x1B 0x00
hfhs_ag connect sco 0xA9 0xE5 0x08 0xDC 0x1B 0x00
Click Ok.
Click Ok. -
Click Ok.
hfhs_ag call_status_indicator_send 0x00 0xA9 0xE5 0x08 0xDC 0x1B 0x00
-
Click Ok.
hfhs_ag disconnect sco 0xA9 0xE5 0x08 0xDC 0x1B 0x00
-
Click Ok.
rfcomm disconnect hfp_ag 0xA9 0xE5 0x08 0xDC 0x1B 0x00
|
HFP/AG/OCL/BV-02-C |
Click Ok, then initiate a service level connection from the Implementation Under Test (IUT) to the PTS. Clear the call history on the Implementation Under Test (IUT) such that there are zero records of any numbers dialed, then click Ok. Place the Implementation Under Test(IUT) in a mode that will allow an outgoing call initiated by the PTS, and click Ok. Click Ok, then disable the service level connection using the Implementation Under Test (IUT). |
Click Ok. Click Ok. -
Click Ok.
hfhs_ag error_send 0x00 0xA9 0xE5 0x08 0xDC 0x1B 0x00
-
Click Ok.
rfcomm disconnect hfp_ag 0xA9 0xE5 0x08 0xDC 0x1B 0x00
|
HFP/AG/TWC/BV-02-C |
Click Ok, then initiate a service level connection from the Implementation Under Test (IUT) to the PTS. Click Ok, then place a call from an external line to the Implementation Under Test (IUT). Do not answer the call unless prompted to do so. -
Verify the presence of an audio connection, then click Ok.
NOTE: The following rules apply for this test case:
TSPX_phone_number - the 1st call TSPX_second_phone_number - the 2nd call
Edits can be made within the IXIT settings for the above phone numbers.
Click Ok, then place a second call from an external line to the Implementation Under Test (IUT). Do not answer the call unless prompted to do so. Set the Implementation Under Test (IUT) in a state that will allow the PTS to initiate a AT+CHLD=1 operation, then click Ok. Verify the audio is returned to the 2nd call and then click Ok. Resume action may be needed. If the audio is not returned to the 2nd call, click Cancel. Click Ok, then end the call using the external terminal. Click Ok, then close the audio connection (SCO) between the Implementation Under Test (IUT) and the PTS. Do not close the serivice level connection (SLC) or power-off the IUT. Click Ok, then disable the service level connection using the Implementation Under Test (IUT). |
-
Click Ok.
rfcomm connect hfp_ag 0x01 0xA9 0xE5 0x08 0xDC 0x1B 0x00
-
Click Ok.
hfhs_ag call_incoming 1234567 129 0xA9 0xE5 0x08 0xDC 0x1B 0x00
Click Ok. -
Click Ok.
hfhs_ag call_waiting 7654321 129 0xA9 0xE5 0x08 0xDC 0x1B 0x00
hfhs_ag call_setup_status_indicator_send 0x01 0xA9 0xE5 0x08 0xDC 0x1B 0x00
Click Ok. Click Ok. -
Click Ok.
hfhs_ag call_terminate 0xA9 0xE5 0x08 0xDC 0x1B 0x00
-
Click Ok.
hfhs_ag disconnect sco 0xA9 0xE5 0x08 0xDC 0x1B 0x00
-
Click Ok.
rfcomm disconnect hfp_ag 0xA9 0xE5 0x08 0xDC 0x1B 0x00
|
HFP/AG/TWC/BV-03-C |
Click Ok, then initiate a service level connection from the Implementation Under Test (IUT) to the PTS. Click Ok, then place a call from an external line to the Implementation Under Test (IUT). Do not answer the call unless prompted to do so. Verify the presence of an audio connection, then click Ok. -
NOTE: The following rules apply for this test case:
TSPX_phone_number - the 1st call TSPX_second_phone_number - the 2nd call
Edits can be made within the IXIT settings for the above phone numbers.
Click Ok, then place a second call from an external line to the Implementation Under Test (IUT). Do not answer the call unless prompted to do so. Verify the audio is returned to the 2nd call and then click Ok. Resume action may be needed. If the audio is not returned to the 2nd call, click Cancel. Verify the audio is returned to the 1st call and click Ok. Resume action my be needed. If the audio is not present in the 1st call, click Cancel. Set the Implementation Under Test (IUT) in a state that will allow the PTS to initiate a AT+CHLD=1 operation, then click Ok. Verify the audio is returned to the 2nd call and then click Ok. Resume action may be needed. If the audio is not returned to the 2nd call, click Cancel. Click Ok, then end the call using the external terminal. Click Ok, then close the audio connection (SCO) between the Implementation Under Test (IUT) and the PTS. Do not close the serivice level connection (SLC) or power-off the IUT. Click Ok, then disable the service level connection using the Implementation Under Test (IUT). |
-
Click Ok.
rfcomm connect hfp_ag 0x01 0xA9 0xE5 0x08 0xDC 0x1B 0x00
-
Click Ok.
hfhs_ag call_incoming 1234567 129 0xA9 0xE5 0x08 0xDC 0x1B 0x00
Click Ok. Click Ok. -
Click Ok.
hfhs_ag call_waiting 7654321 129 0xA9 0xE5 0x08 0xDC 0x1B 0x00
hfhs_ag call_setup_status_indicator_send 0x01 0xA9 0xE5 0x08 0xDC 0x1B 0x00
-
Click Ok.
hfhs_ag ok_send 0xA9 0xE5 0x08 0xDC 0x1B 0x00
hfhs_ag call_held_status_indicator_send 0x01 0xA9 0xE5 0x08 0xDC 0x1B 0x00
Click Ok. -
Click Ok.
hfhs_ag ok_send 0xA9 0xE5 0x08 0xDC 0x1B 0x00
hfhs_ag call_held_status_indicator_send 0x00 0xA9 0xE5 0x08 0xDC 0x1B 0x00
Click Ok. -
Click Ok.
hfhs_ag call_terminate 0xA9 0xE5 0x08 0xDC 0x1B 0x00
-
Click Ok.
hfhs_ag disconnect sco 0xA9 0xE5 0x08 0xDC 0x1B 0x00
-
Click Ok.
rfcomm disconnect hfp_ag 0xA9 0xE5 0x08 0xDC 0x1B 0x00
|
HFP/AG/TWC/BV-05-C |
-
NOTE: The following rules apply for this test case:
TSPX_phone_number - the 1st call TSPX_second_phone_number - the 2nd call
Edits can be made within the IXIT settings for the above phone numbers.
Set the Implementation Under Test (IUT) in a state that will allow the PTS to initiate a AT+CHLD=1 operation, then click Ok. Click Ok, then initiate a service level connection from the Implementation Under Test (IUT) to the PTS. Click Ok, then place a call from an external line to the Implementation Under Test (IUT). Do not answer the call unless prompted to do so. Verify the presence of an audio connection, then click Ok. Click Ok, then answer the incoming call on the external terminal. Verify the audio is returned to the 2nd call and then click Ok. Resume action may be needed. If the audio is not returned to the 2nd call, click Cancel. Set the Implementation Under Test (IUT) in a state that will allow the PTS to initiate a AT+CHLD=1 operation, then click Ok. Verify the audio is returned to the 1st call and click Ok. Resume action my be needed. If the audio is not present in the 1st call, click Cancel. Click Ok, then end the call using the external terminal. Click Ok, then close the audio connection (SCO) between the Implementation Under Test (IUT) and the PTS. Do not close the serivice level connection (SLC) or power-off the IUT. Click Ok, then disable the service level connection using the Implementation Under Test (IUT). |
Click Ok. Click Ok. -
Click Ok.
rfcomm connect hfp_ag 0x01 0xA9 0xE5 0x08 0xDC 0x1B 0x00
-
Click Ok.
hfhs_ag call_incoming 1234567 129 0xA9 0xE5 0x08 0xDC 0x1B 0x00
Click Ok. -
Click Ok.
hfhs_ag ok_send 0xA9 0xE5 0x08 0xDC 0x1B 0x00
hfhs_ag call_held_status_indicator_send 0x01 0xA9 0xE5 0x08 0xDC 0x1B 0x00
Click Ok. -
Click Ok.
hfhs_ag call_held_status_indicator_send 0x00 0xA9 0xE5 0x08 0xDC 0x1B 0x00
hfhs_ag ok_send 0xA9 0xE5 0x08 0xDC 0x1B 0x00
-
Click Ok.
hfhs_ag call_status_indicator_send 0x01 0xA9 0xE5 0x08 0xDC 0x1B 0x00
hfhs_ag call_status_indicator_send 0x00 0xA9 0xE5 0x08 0xDC 0x1B 0x00
-
Click Ok.
hfhs_ag call_terminate 0xA9 0xE5 0x08 0xDC 0x1B 0x00
-
Click Ok.
hfhs_ag disconnect sco 0xA9 0xE5 0x08 0xDC 0x1B 0x00
-
Click Ok.
rfcomm disconnect hfp_ag 0xA9 0xE5 0x08 0xDC 0x1B 0x00
|
HFP/AG/CIT/BV-01-C |
Click Ok, then initiate a service level connection from the Implementation Under Test (IUT) to the PTS. Click Ok, then place a call from an external line to the Implementation Under Test (IUT). Do not answer the call unless prompted to do so. Click Ok, then end the call using the external terminal. Click Ok, then close the audio connection (SCO) between the Implementation Under Test (IUT) and the PTS. Do not close the serivice level connection (SLC) or power-off the IUT. Click Ok, then disable the service level connection using the Implementation Under Test (IUT). |
-
Click Ok.
rfcomm connect hfp_ag 0x01 0xA9 0xE5 0x08 0xDC 0x1B 0x00
-
Click Ok.
hfhs_ag call_incoming 1234567 129 0xA9 0xE5 0x08 0xDC 0x1B 0x00
-
Click Ok.
hfhs_ag call_terminate 0xA9 0xE5 0x08 0xDC 0x1B 0x00
-
Click Ok.
hfhs_ag disconnect sco 0xA9 0xE5 0x08 0xDC 0x1B 0x00
-
Click Ok.
rfcomm disconnect hfp_ag 0xA9 0xE5 0x08 0xDC 0x1B 0x00
|
HFP/AG/ENO/BV-02-C |
Click Ok, then initiate a service level connection from the Implementation Under Test (IUT) to the PTS. Click Ok, then place a call from an external line to the Implementation Under Test (IUT). Do not answer the call unless prompted to do so. Verify the presence of an audio connection, then click Ok. Click Ok, then end the call using the external terminal. Click Ok, then close the audio connection (SCO) between the Implementation Under Test (IUT) and the PTS. Do not close the serivice level connection (SLC) or power-off the IUT. Click Ok, then disable the service level connection using the Implementation Under Test (IUT). |
-
Click Ok.
rfcomm connect hfp_ag 0x01 0xA9 0xE5 0x08 0xDC 0x1B 0x00
hfhs_ag error_send 0x00 0xA9 0xE5 0x08 0xDC 0x1B 0x00
-
Click Ok.
hfhs_ag call_incoming 1234567 129 0xA9 0xE5 0x08 0xDC 0x1B 0x00
Click Ok. -
Click Ok.
hfhs_ag call_terminate 0xA9 0xE5 0x08 0xDC 0x1B 0x00
-
Click Ok.
hfhs_ag disconnect sco 0xA9 0xE5 0x08 0xDC 0x1B 0x00
-
Click Ok.
rfcomm disconnect hfp_ag 0xA9 0xE5 0x08 0xDC 0x1B 0x00
|
HFP/AG/TDC/BV-01-C |
Click Ok, then initiate a service level connection from the Implementation Under Test (IUT) to the PTS. Click Ok, then place a call from an external line to the Implementation Under Test (IUT). Do not answer the call unless prompted to do so. Verify the presence of an audio connection, then click Ok. Click Ok, then end the call using the external terminal. Click Ok, then close the audio connection (SCO) between the Implementation Under Test (IUT) and the PTS. Do not close the serivice level connection (SLC) or power-off the IUT. Click Ok, then disable the service level connection using the Implementation Under Test (IUT). |
-
Click Ok.
rfcomm connect hfp_ag 0x01 0xA9 0xE5 0x08 0xDC 0x1B 0x00
hfhs_ag error_send 0x00 0xA9 0xE5 0x08 0xDC 0x1B 0x00
-
Click Ok.
hfhs_ag call_incoming 1234567 129 0xA9 0xE5 0x08 0xDC 0x1B 0x00
Click Ok. -
Click Ok.
hfhs_ag call_terminate 0xA9 0xE5 0x08 0xDC 0x1B 0x00
-
Click Ok.
hfhs_ag disconnect sco 0xA9 0xE5 0x08 0xDC 0x1B 0x00
-
Click Ok.
rfcomm disconnect hfp_ag 0xA9 0xE5 0x08 0xDC 0x1B 0x00
|
HFP/AG/ECS/BV-01-C |
Place a call from an external line to the Implementation Under Test (IUT). When the call is active, click Ok. Place a second call from an external line to the Implementaion Under Test (IUT), putting the current active call on hold. When the second call is active and first call is on hold, click Ok. After the test verdict is given, end all active calls using the external line or the Implementation Under Test (IUT). Click Ok to continue. |
Before case, send this CMD first: hfpag set_in_call_hold_and_active_call
Click Ok. -
Click Ok.
hfhs_ag clcc_send 0x01 0x01 0x01 0x00 0x00 1234567 129 0xA9 0xE5 0x08 0xDC 0x1B 0x00
hfhs_ag clcc_send 0x02 0x01 0x00 0x00 0x00 7654321 129 0xA9 0xE5 0x08 0xDC 0x1B 0x00
hfhs_ag ok_send 0xA9 0xE5 0x08 0xDC 0x1B 0x00
Click Ok.
After case, send this CMD: hfpag set_in_call_idle.
|
HFP/AG/ECS/BV-02-C |
Place a call from an external line to the Implementation Under Test (IUT). When the call is active, click Ok. Place a second call from an external line to the Implementaion Under Test (IUT), putting the current active call on hold. When the second call is active and first call is on hold, click Ok. After the test verdict is given, end all active calls using the external line or the Implementation Under Test (IUT). Click Ok to continue. |
Before case, send this CMD first: hfpag set_in_call_hold_and_active_call.
Click Ok. Click Ok. Click Ok.
After case, send this CMD: hfpag set_in_call_idle.
|
HFP/AG/ECS/BV-03-C |
Click Ok, then initiate a service level connection from the Implementation Under Test (IUT) to the PTS. Click Ok, then place a call from an external line to the Implementation Under Test (IUT). Do not answer the call unless prompted to do so. Verify the presence of an audio connection, then click Ok. Click Ok, then place a second call from an external line to the Implementation Under Test (IUT). Do not answer the call unless prompted to do so. Click Ok, then place the current call on hold and make the incoming/held call active using the Implementation Under Test (IUT). Verify the audio is returned to the 2nd call and then click Ok. Resume action may be needed. If the audio is not returned to the 2nd call, click Cancel. After the test verdict is given, end all active calls using the external line or the Implementation Under Test (IUT). Click Ok to continue. |
-
Click Ok.
rfcomm connect hfp_ag 0x01 0xA9 0xE5 0x08 0xDC 0x1B 0x00
-
Click Ok.
hfhs_ag call_incoming 1234567 129 0xA9 0xE5 0x08 0xDC 0x1B 0x00
Click Ok. -
Click Ok.
hfhs_ag call_waiting 7654321 129 0xA9 0xE5 0x08 0xDC 0x1B 0x00
hfhs_ag call_setup_status_indicator_send 0x01 0xA9 0xE5 0x08 0xDC 0x1B 0x00
-
Click Ok.
hfhs_ag call_setup_status_indicator_send 0x00 0xA9 0xE5 0x08 0xDC 0x1B 0x00
hfhs_ag call_held_status_indicator_send 0x01 0xA9 0xE5 0x08 0xDC 0x1B 0x00
Click Ok. Click Ok. |
|
HFP/AG/ECC/BI-03-C
HFP/AG/ECC/BI-04-C
|
Place a call from an external line to the Implementation Under Test (IUT). When the call is active, click Ok. Place a second call from an external line to the Implementaion Under Test (IUT), putting the current active call on hold. When the second call is active and first call is on hold, click Ok. Verfiy that the 2nd call is active and the 1st call is being held. After the test verdict is given, end all active calls using the external line or the Implementation Under Test (IUT). Click Ok to continue. |
Before case, send this CMD first: hfpag set_in_call_hold_and_active_call.
Click Ok. Click Ok. Click Ok.
After case, send this CMD: hfpag set_in_call_idle.
|
HFP/AG/NUM/BV-01-C |
Click Ok, then initiate a service level connection from the Implementation Under Test (IUT) to the PTS. Click Ok, then disable the service level connection using the Implementation Under Test (IUT). |
-
Click Ok .
rfcomm connect hfp_ag 0x01 0xA9 0xE5 0x08 0xDC 0x1B 0x00
hfhs_ag ok_send 0xA9 0xE5 0x08 0xDC 0x1B 0x00
-
Click Ok.
rfcomm disconnect hfp_ag 0xA9 0xE5 0x08 0xDC 0x1B 0x00
|
|
HFP/AG/SLC/BV-01-C
HFP/AG/SLC/BV-03-C
|
Make the Implementation Under Test (IUT) connectable, then click Ok. Click Ok, then disable the service level connection using the Implementation Under Test (IUT). |
rfcomm disconnect hfp_ag 0xA9 0xE5 0x08 0xDC 0x1B 0x00 |
|
HFP/AG/SLC/BV-02-C
HFP/AG/SLC/BV-04-C
|
Make the Implementation Under Test (IUT) connectable, then click Ok. Click Ok, then initiate a service level connection from the Implementation Under Test (IUT) to the PTS. Click Ok, then disable the service level connection using the Implementation Under Test (IUT). |
Click Ok. -
Click Ok.
rfcomm connect hfp_ag 0x01 0xA9 0xE5 0x08 0xDC 0x1B 0x00
-
Click Ok.
rfcomm disconnect hfp_ag 0xA9 0xE5 0x08 0xDC 0x1B 0x00
|
|
HFP/AG/SLC/BV-05-C
HFP/AG/SLC/BV-07-C
|
Click Ok, then disable the service level connection using the Implementation Under Test (IUT). |
-
Click Ok.
rfcomm disconnect hfp_ag 0xA9 0xE5 0x08 0xDC 0x1B 0x00
|
|
HFP/AG/SLC/BV-06-C
HFP/AG/SLC/BV-09-C
HFP/AG/SLC/BV-10-C
|
Click Ok, then initiate a service level connection from the Implementation Under Test (IUT) to the PTS. Click Ok, then disable the service level connection using the Implementation Under Test (IUT). |
-
Click Ok.
rfcomm connect hfp_ag 0x01 0xA9 0xE5 0x08 0xDC 0x1B 0x00
-
Click Ok.
rfcomm disconnect hfp_ag 0xA9 0xE5 0x08 0xDC 0x1B 0x00
|
HFP/AG/ACC/BI-09-C |
Click Ok, then place a call from an external line to the Implementation Under Test (IUT). Do not answer the call unless prompted to do so. Verify the presence of an audio connection, then click Ok. Click Ok, then end the call using the external terminal. Click Ok, then close the audio connection (SCO) between the Implementation Under Test (IUT) and the PTS. Do not close the serivice level connection (SLC) or power-off the IUT. Click Ok, then disable the service level connection using the Implementation Under Test (IUT). |
-
Click Ok.
hfhs_ag call_incoming 1234567 129 0xA9 0xE5 0x08 0xDC 0x1B 0x00
Click Ok. -
Click Ok.
hfhs_ag call_terminate 0xA9 0xE5 0x08 0xDC 0x1B 0x00
-
Click Ok.
hfhs_ag disconnect sco 0xA9 0xE5 0x08 0xDC 0x1B 0x00
-
Click Ok.
rfcomm disconnect hfp_ag 0xA9 0xE5 0x08 0xDC 0x1B 0x00
|
|
HFP/AG/ACC/BI-14-C
HFP/AG/ACC/BI-15-C
|
Click Ok, then place a call from an external line to the Implementation Under Test (IUT). Do not answer the call unless prompted to do so. Verify the presence of an audio connection, then click Ok. Click Ok, then initiate an audio connection with WBS codec using the Codec Connection Setup procedure. Verify the presence of an audio connection, then click Ok. Click Ok, then end the call using the external terminal. Click Ok, then close the audio connection (SCO) between the Implementation Under Test (IUT) and the PTS. Do not close the serivice level connection (SLC) or power-off the IUT. Click Ok, then disable the service level connection using the Implementation Under Test (IUT). |
-
Click Ok.
hfhs_ag call_incoming 1234567 129 0xA9 0xE5 0x08 0xDC 0x1B 0x00
Click Ok. -
Click Ok.
hfhs_ag connect sco 0xA9 0xE5 0x08 0xDC 0x1B 0x00
Click Ok. -
Click Ok.
hfhs_ag call_terminate 0xA9 0xE5 0x08 0xDC 0x1B 0x00
-
Click Ok.
hfhs_ag disconnect sco 0xA9 0xE5 0x08 0xDC 0x1B 0x00
-
Click Ok.
rfcomm disconnect hfp_ag 0xA9 0xE5 0x08 0xDC 0x1B 0x00
|
|
HFP/AG/ACC/BV-16-C
HFP/AG/ACC/BV-17-C
|
Click Ok, then place a call from an external line to the Implementation Under Test (IUT). Do not answer the call unless prompted to do so. Verify the presence of an audio connection, then click Ok. Click Ok, then end the call using the external terminal. Click Ok, then close the audio connection (SCO) between the Implementation Under Test (IUT) and the PTS. Do not close the serivice level connection (SLC) or power-off the IUT. Click Ok, then disable the service level connection using the Implementation Under Test (IUT). |
-
Click Ok.
hfhs_ag call_incoming 1234567 129 0xA9 0xE5 0x08 0xDC 0x1B 0x00
Click Ok. -
Click Ok.
hfhs_ag call_terminate 0xA9 0xE5 0x08 0xDC 0x1B 0x00
-
Click Ok.
hfhs_ag disconnect sco 0xA9 0xE5 0x08 0xDC 0x1B 0x00
-
Click Ok.
rfcomm disconnect hfp_ag 0xA9 0xE5 0x08 0xDC 0x1B 0x00
|
HFP/AG/ACC/BV-18-C |
Click Ok, then place a call from an external line to the Implementation Under Test (IUT). Do not answer the call unless prompted to do so. Click Ok, then initiate an audio connection using the Codec Connection Setup procedure. Verify the presence of an audio connection, then click Ok. Click Ok, then end the call using the external terminal. Click Ok, then close the audio connection (SCO) between the Implementation Under Test (IUT) and the PTS. Do not close the serivice level connection (SLC) or power-off the IUT. Click Ok, then disable the service level connection using the Implementation Under Test (IUT). |
-
Click Ok.
hfhs_ag call_incoming 1234567 129 0xA9 0xE5 0x08 0xDC 0x1B 0x00
-
Click Ok.
hfhs_ag connect sco 0xA9 0xE5 08 0xDC 0x1B 0x00
Click Ok. -
Click Ok.
hfhs_ag call_terminate 0xA9 0xE5 0x08 0xDC 0x1B 0x00
-
Click Ok.
hfhs_ag disconnect sco 0xA9 0xE5 0x08 0xDC 0x1B 0x00
-
Click Ok.
rfcomm disconnect hfp_ag 0xA9 0xE5 0x08 0xDC 0x1B 0x00
|
HFP/AG/ACC/BV-20-C |
Click Ok, then place a call from an external line to the Implementation Under Test (IUT). Do not answer the call unless prompted to do so. Click Ok, then initiate an audio connection using the Codec Connection Setup procedure. Verify the presence of an audio connection, then click Ok. Click Ok, then initiate an audio connection using the Codec Connection Setup procedure. Verify the presence of an audio connection, then click Ok. Click Ok, then close the audio connection (SCO) between the Implementation Under Test (IUT) and the PTS. Do not close the serivice level connection (SLC) or power-off the IUT. Click Ok, then disable the service level connection using the Implementation Under Test (IUT). |
-
Click Ok.
hfhs_ag call_incoming 1234567 129 0xA9 0xE5 0x08 0xDC 0x1B 0x00
-
Click Ok.
hfhs_ag connect sco 0xA9 0xE5 0x08 0xDC 0x1B 0x00
Click Ok. hfhs_ag connect sco 0xA9 0xE5 0x08 0xDC 0x1B 0x00 Click Ok. -
Click Ok.
hfhs_ag disconnect sco 0xA9 0xE5 0x08 0xDC 0x1B 0x00
-
Click Ok.
rfcomm disconnect hfp_ag 0xA9 0xE5 0x08 0xDC 0x1B 0x00
|
|
HFP/AG/ACC/BV-24-C
HFP/AG/ACC/BV-25-C
|
Make the Implementation Under Test (IUT) connectable, then click Ok. Click Ok, then place a call from an external line to the Implementation Under Test (IUT). Verify the presence of an audio connection, then click Ok. Click Ok, then end the call using the external terminal. Click Ok, then close the audio connection (SCO) between the Implementation Under Test (IUT) and the PTS. Click Ok, then disable the service level connection using the Implementation Under Test (IUT). |
Click Ok. -
Click Ok.
hfhs_ag call_incoming 1234567 129 0xA9 0xE5 0x08 0xDC 0x1B 0x00
hfhs_ag ok_send 0xA9 0xE5 0x08 0xDC 0x1B 0x00
Click Ok. -
Click Ok.
hfhs_ag call_terminate 0xA9 0xE5 0x08 0xDC 0x1B 0x00
-
Click Ok.
hfhs_ag disconnect sco 0xA9 0xE5 0x08 0xDC 0x1B 0x00
-
Click Ok.
rfcomm disconnect hfp_ag 0xA9 0xE5 0x08 0xDC 0x1B 0x00
|
|
HFP/AG/ACC/BV-26-C
HFP/AG/ACC/BV-34-C
|
Click Ok, then initiate a service level connection from the Implementation Under Test (IUT) to the PTS. Click Ok, then initiate an audio connection with WBS codec using the Codec Connection Setup procedure. Verify the presence of an audio connection, then click Ok. |
-
Click Ok.
btcfm t
-
Click Ok.
hfhs_ag call_incoming 1234567 129 0xA9 0xE5 0x08 0xDC 0x1B 0x00
hfhs_ag ok_send 0xA9 0xE5 0x08 0xDC 0x1B 0x00
Click Ok. |
HFP/AG/DIS/BV-01-C |
Delete the pairing with the PTS using the Implementation Under Test (IUT), then click Ok. Using the Implementation Under Test (IUT), perform a search for the PTS. If found, click Ok. Click Ok, then make a connection request to the PTS from the Implementation Under Test (IUT). Click Ok, then disable the service level connection using the Implementation Under Test (IUT). |
-
mmi freset
mmi pwron
mode all_enable
Click Ok.
Click Ok. -
Click Ok.
connect pts
btcfm t
-
Click Ok.
disconnect pts
|
HFP/AG/SDP/BV-01-C |
Delete the pairing with the PTS using the Implementation Under Test (IUT), then click Ok. Make the Implementation Under Test (IUT) connectable, then click Ok. Click Ok, then place a call from an external line to the Implementation Under Test (IUT). Do not answer the call unless prompted to do so. Click Ok, then place a call from an external line to the Implementation Under Test (IUT). Do not answer the call unless prompted to do so. Verify the presence of an audio connection, then click Ok. Click Ok, then end the call using the external terminal. Click Ok, then close the audio connection (SCO) between the Implementation Under Test (IUT) and the PTS. Do not close the serivice level connection (SLC) or power-off the IUT. Click Ok, then disable the service level connection using the Implementation Under Test (IUT). |
-
mmi freset
mmi pwron
mode all_enable
Click Ok.
-
Click Ok.
btcfm t
switch to string mode: set string mode
Click Ok. -
Click Ok.
hfhs_ag call_incoming 1234567 129 0xA9 0xE5 0x08 0xDC 0x1B 0x00
Click Ok. -
Click Ok.
hfhs_ag call_terminate 0xA9 0xE5 0x08 0xDC 0x1B 0x00
-
Click Ok.
hfhs_ag disconnect sco 0xA9 0xE5 0x08 0xDC 0x1B 0x00
-
Click Ok.
rfcomm disconnect hfp_ag 0xA9 0xE5 0x08 0xDC 0x1B 0x00
|
HFP/AG/IIA/BV-01-C |
Click Ok, then initiate a service level connection from the Implementation Under Test (IUT) to the PTS. Click Ok. Then, use a test device to simulate the presence of a control channel of a cellular network, such that the AG is registered. Click Ok. Then, disable the control channel, such that the AG is de-registered. Click Ok. Then adjust the battery level on the AG to a level that should cause a battery level indication to be sent to HF. Click Ok, then disable the service level connection using the Implementation Under Test (IUT). |
-
Click Ok.
rfcomm connect hfp_ag 0x01 0xA9 0xE5 0x08 0xDC 0x1B 0x00
-
Click Ok.
hfhs_ag service_status_indicator_send 0x01 0xA9 0xE5 0x08 0xDC 0x1B 0x00
-
Click Ok.
hfhs_ag service_status_indicator_send 0x00 0xA9 0xE5 0x08 0xDC 0x1B 0x00
-
Click Ok.
hfhs_ag battery_change_indicator_send 0x05 0xA9 0xE5 0x08 0xDC 0x1B 0x00
-
Click Ok.
rfcomm disconnect hfp_ag 0xA9 0xE5 0x08 0xDC 0x1B 0x00
|
HFP/AG/IIA/BV-02-C |
Click Ok, then initiate a service level connection from the Implementation Under Test (IUT) to the PTS. Adjust the battery level on the AG to a level that should cause a battery level indication to be sent to HF. Then, click Ok. Click Ok. Then, use a test device to simulate the presence of a control channel of a cellular network, such that the AG is registered. Click Ok. Then, disable the control channel, such that the AG is de-registered. Click Ok, then disable the service level connection using the Implementation Under Test (IUT). |
-
Click Ok.
rfcomm connect hfp_ag 0x01 0xA9 0xE5 0x08 0xDC 0x1B 0x00
Click Ok. -
Click Ok.
hfhs_ag service_status_indicator_send 0x01 0xA9 0xE5 0x08 0xDC 0x1B 0x00
-
Click Ok.
hfhs_ag service_status_indicator_send 0x00 0xA9 0xE5 0x08 0xDC 0x1B 0x00
-
Click Ok.
rfcomm disconnect hfp_ag 0xA9 0xE5 0x08 0xDC 0x1B 0x00
|
HFP/AG/IIA/BV-05-C |
Click Ok, then initiate a service level connection from the Implementation Under Test (IUT) to the PTS. Adjust the battery level on the AG to a level that should cause a battery level indication to be sent to HF. Then, click Ok. Take action to make a change that normally would trigger a change in a non-mandatory indicator, e.g., impair the signal to the AG so taht a reduction in signal strength can be observed. Then click Ok. Click Ok, then disable the service level connection using the Implementation Under Test (IUT). |
-
Click Ok.
rfcomm connect hfp_ag 0x01 0xA9 0xE5 0x08 0xDC 0x1B 0x00
-
Click Ok.
hfhs_ag battery_change_indicator_send 0x05 0xA9 0xE5 0x08 0xDC 0x1B 0x00
Click Ok. -
Click Ok.
rfcomm disconnect hfp_ag 0xA9 0xE5 0x08 0xDC 0x1B 0x00
|
HFP/AG/IID/BV-01-C |
Click Ok, then initiate a service level connection from the Implementation Under Test (IUT) to the PTS. Impair the signal to the AG so that a reduction in signal strength can be observed. Then, click Ok. Click Ok, then place a call from an external line to the Implementation Under Test (IUT). Do not answer the call unless prompted to do so. Verify the presence of an audio connection, then click Ok. Click Ok, then end the call using the external terminal. Click Ok, then close the audio connection (SCO) between the Implementation Under Test (IUT) and the PTS. Do not close the serivice level connection (SLC) or power-off the IUT. Click Ok, then disable the service level connection using the Implementation Under Test (IUT). |
-
Click Ok.
rfcomm connect hfp_ag 0x01 0xA9 0xE5 0x08 0xDC 0x1B 0x00
Click Ok. -
Click Ok.
hfhs_ag call_incoming 1234567 129 0xA9 0xE5 0x08 0xDC 0x1B 0x00
Click Ok. -
Click Ok.
hfhs_ag call_terminate 0xA9 0xE5 0x08 0xDC 0x1B 0x00
-
Click Ok.
hfhs_ag disconnect sco 0xA9 0xE5 0x08 0xDC 0x1B 0x00
-
Click Ok.
rfcomm disconnect hfp_ag 0xA9 0xE5 0x08 0xDC 0x1B 0x00
|
HFP/AG/IID/BV-03-C |
Click Ok, then initiate a service level connection from the Implementation Under Test (IUT) to the PTS. Impair the signal to the AG so that a reduction in signal strength can be observed. Then, click Ok. Adjust the battery level on the AG to a level that should cause a battery level indication to be sent to HF. Then, click Ok. Click Ok. Then take action to make a change that normally would trigger a change in a non-mandatory indicator, e.g., force the AG to disable the presence of a cellular network. Click Ok, then disable the service level connection using the Implementation Under Test (IUT). |
-
Click Ok.
rfcomm connect hfp_ag 0x01 0xA9 0xE5 0x08 0xDC 0x1B 0x00
Click Ok. Click Ok. -
Click Ok.
hfhs_ag service_status_indicator_send 0x01 0xA9 0xE5 0x08 0xDC 0x1B 0x00
-
Click Ok.
rfcomm disconnect hfp_ag 0xA9 0xE5 0x08 0xDC 0x1B 0x00
|
HFP/AG/IID/BV-04-C |
Click Ok, then initiate a service level connection from the Implementation Under Test (IUT) to the PTS. Impair the signal to the AG so that a reduction in signal strength can be observed. Then, click Ok. Adjust the battery level on the AG to a level that should cause a battery level indication to be sent to HF. Then, click Ok. Click Ok, then disable the service level connection using the Implementation Under Test (IUT). |
-
Click Ok.
rfcomm connect hfp_ag 0x01 0xA9 0xE5 0x08 0xDC 0x1B 0x00
Click Ok. -
Click Ok.
hfhs_ag battery_change_indicator_send 0x05 0xA9 0xE5 0x08 0xDC 0x1B 0x00
-
Click Ok.
rfcomm disconnect hfp_ag 0xA9 0xE5 0x08 0xDC 0x1B 0x00
|
HFP/AG/IIC/BV-01-C |
Click Ok, then initiate a service level connection from the Implementation Under Test (IUT) to the PTS. Click Ok, then place a call from an external line to the Implementation Under Test (IUT). Do not answer the call unless prompted to do so. Verify the presence of an audio connection, then click Ok. Click Ok, then end the call using the external terminal. Click Ok, then disable the service level connection using the Implementation Under Test (IUT). |
-
Click Ok.
rfcomm connect hfp_ag 0x01 0xA9 0xE5 0x08 0xDC 0x1B 0x00
-
Click Ok.
hfhs_ag call_incoming 1234567 129 0xA9 0xE5 0x08 0xDC 0x1B 0x00
Click Ok. -
Click Ok.
hfhs_ag disconnect sco 0xA9 0xE5 0x08 0xDC 0x1B 0x00
-
Click Ok.
rfcomm disconnect hfp_ag 0xA9 0xE5 0x08 0xDC 0x1B 0x00
|
HFP/AG/IIC/BV-02-C |
Click Ok, then initiate a service level connection from the Implementation Under Test (IUT) to the PTS. Adjust the battery level on the AG to a level that should cause a battery level indication to be sent to HF. Then, click Ok. Click Ok. Then, use a test device to simulate the presence of a control channel of a cellular network, such that the AG is registered. Click Ok. Then, disable the control channel, such that the AG is de-registered. Click Ok, then disable the service level connection using the Implementation Under Test (IUT). |
-
Click Ok.
rfcomm connect hfp_ag 0x01 0xA9 0xE5 0x08 0xDC 0x1B 0x00
Click Ok. -
Click Ok.
hfhs_ag service_status_indicator_send 0x01 0xA9 0xE5 0x08 0xDC 0x1B 0x00
-
Click Ok.
hfhs_ag service_status_indicator_send 0x00 0xA9 0xE5 0x08 0xDC 0x1B 0x00
-
Click Ok.
rfcomm disconnect hfp_ag 0xA9 0xE5 0x08 0xDC 0x1B 0x00
|
HFP/AG/IIC/BV-03-C |
Click Ok, then initiate a service level connection from the Implementation Under Test (IUT) to the PTS. Adjust the battery level on the AG to a level that should cause a battery level indication to be sent to HF. Then, click Ok. Click Ok. Then, use a test device to simulate the presence of a control channel of a cellular network, such that the AG is registered. Click Ok. Then, disable the control channel, such that the AG is de-registered. Click Ok, then disable the service level connection using the Implementation Under Test (IUT). |
-
Click Ok.
rfcomm connect hfp_ag 0x01 0xA9 0xE5 0x08 0xDC 0x1B 0x00
-
hfhs_ag battery_change_indicator_send 0x05 0xA9 0xE5 0x08 0xDC 0x1B 0x00
Click Ok.
-
hfhs_ag service_status_indicator_send 0x00 0xA9 0xE5 0x08 0xDC 0x1B 0x00
Click Ok.
-
hfhs_ag signal_strength_indicator_send 0x02 0xA9 0xE5 0x08 0xDC 0x1B 0x00
Click Ok.
-
Click Ok.
rfcomm disconnect hfp_ag 0xA9 0xE5 0x08 0xDC 0x1B 0x00
|
|
HFP/AG/HFI/BV-02-C
HFP/AG/HFI/BV-03-C
|
Click Ok, then initiate a service level connection from the Implementation Under Test (IUT) to the PTS. Click Ok, then disable the service level connection using the Implementation Under Test (IUT). |
-
Click Ok.
rfcomm connect hfp_ag 0x01 0xA9 0xE5 0x08 0xDC 0x1B 0x00
-
Click Ok.
rfcomm disconnect hfp_ag 0xA9 0xE5 0x08 0xDC 0x1B 0x00
|