USB HID
A common protocol for linking devices with human interfaces is USB HID. Through a USB interface, it enables hardware like game controllers, keyboards, and mouses to connect with computers. Plug-and-play functionality and broad compatibility with USB HID devices allow for use without the need for extra drivers. The purpose of this document is to give an overview of the USB HID application. The USB HID project implements a very simple USB HID device. The USB user guide has more details on these files and USB.
Requirements
The sample supports the following development kits:
Hardware Platforms |
Board Name |
Build Target |
|---|---|---|
RTL87x3E EVB |
|
|
RTL87x3D HDK |
RTL87x3D EVB |
|
Note
To purchase EVB, please visit https://www.realmcu.com/en/Home/Shop.
This sample project can be found under board\evb\usb_demo in SDK folder structure. Developers can choose the project according to the Board Name and choose the Build Target according to the flash map.
When built for a xxx_4M_xxx build target, the sample is configured to build and run with a 4M flash map.
When built for a xxx_8M_xxx build target, the sample is configured to build and run with an 8M flash map.
When built for a xxx_16M_xxx build target, the sample is configured to build and run with a 16M flash map.
The sample also requires a device running a USB HID function. For example, it is enumerated as a mouse or keyboard.
To quickly set up the development environment, refer to the detailed instructions provided in Quick Start.
Configurations
-
Mouse
Mouse is configured by the macro definition
USB_HID_MOUSE_ENin the filesdk\src\sample\usb_demo\app_flags.h. If testing with the mouse function enabled is needed, please enable the macro definitionUSB_HID_MOUSE_EN.#define USB_HID_MOUSE_EN 1 #define USB_HID_KEYBOARD_EN 0
-
Keyboard
Keyboard is configured by the macro definition
USB_HID_KEYBOARD_ENin the filesdk\src\sample\usb_demo\app_flags.h. If testing with the keyboard function enabled is needed, please enable the macro definitionUSB_HID_KEYBOARD_EN.#define USB_HID_MOUSE_EN 0 #define USB_HID_KEYBOARD_EN 1
Users can easily change the value of the macro definition to switch the function or copy the referenced codes to another application.
Building and Downloading
Take the project rtl87x3e_usb_hid.uvprojx and target usb_hid_4M_dual_bank0 as an example, to build and run the sample with the Keil development environment, follow the steps listed below:
Open
rtl87x3e_usb_hid.uvprojx.-
Choose the build target
usb_hid_4M_dual_bank0.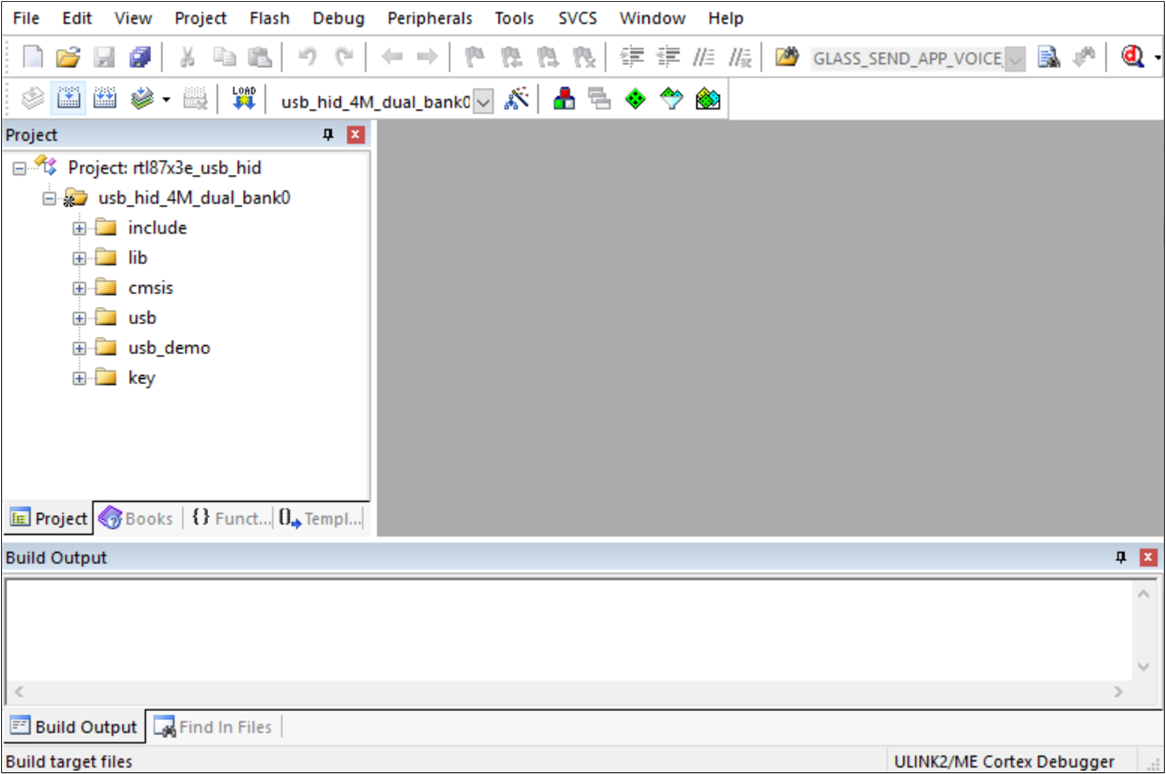
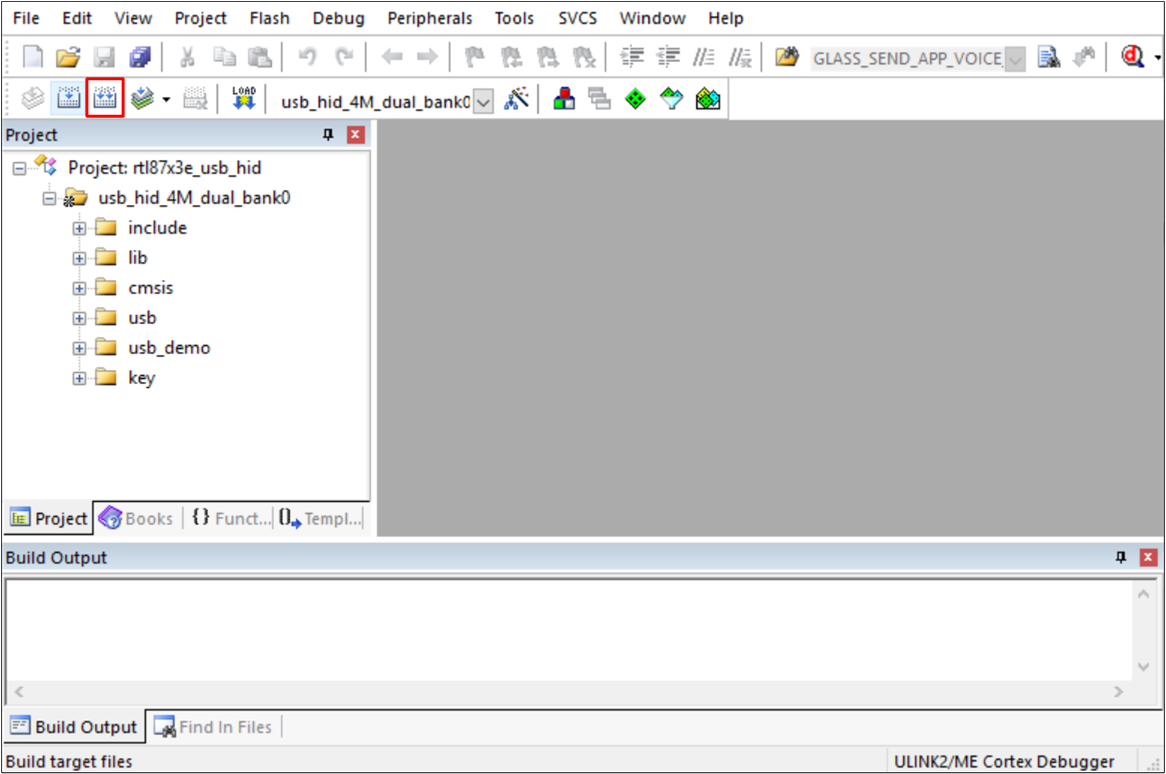
Choose Build Target
-
Building the target.
Building
After a successful build, the APP bin file
usb_hid_bank0_MP-v0.0.0.0-xxx.binwill be generated in the directoryusb_demo\bin\rtl87x3e\flash_4M_dualbank\bank0. Download APP bin into EVB board.
Press the Reset button on the EVB board, and it will start the USB function.
Experimental Verification
After programming the sample to the EVB board, users can make sure that the USB HID functionality is implemented on the EVB and the system is properly configured. This may require software development and configuration on the EVB. Connect the EVB to the host using a USB cable. Ensure that the USB cable can transfer data correctly and that the EVB is recognized by the host. Some basic functions of USB HID Application are demonstrated below.
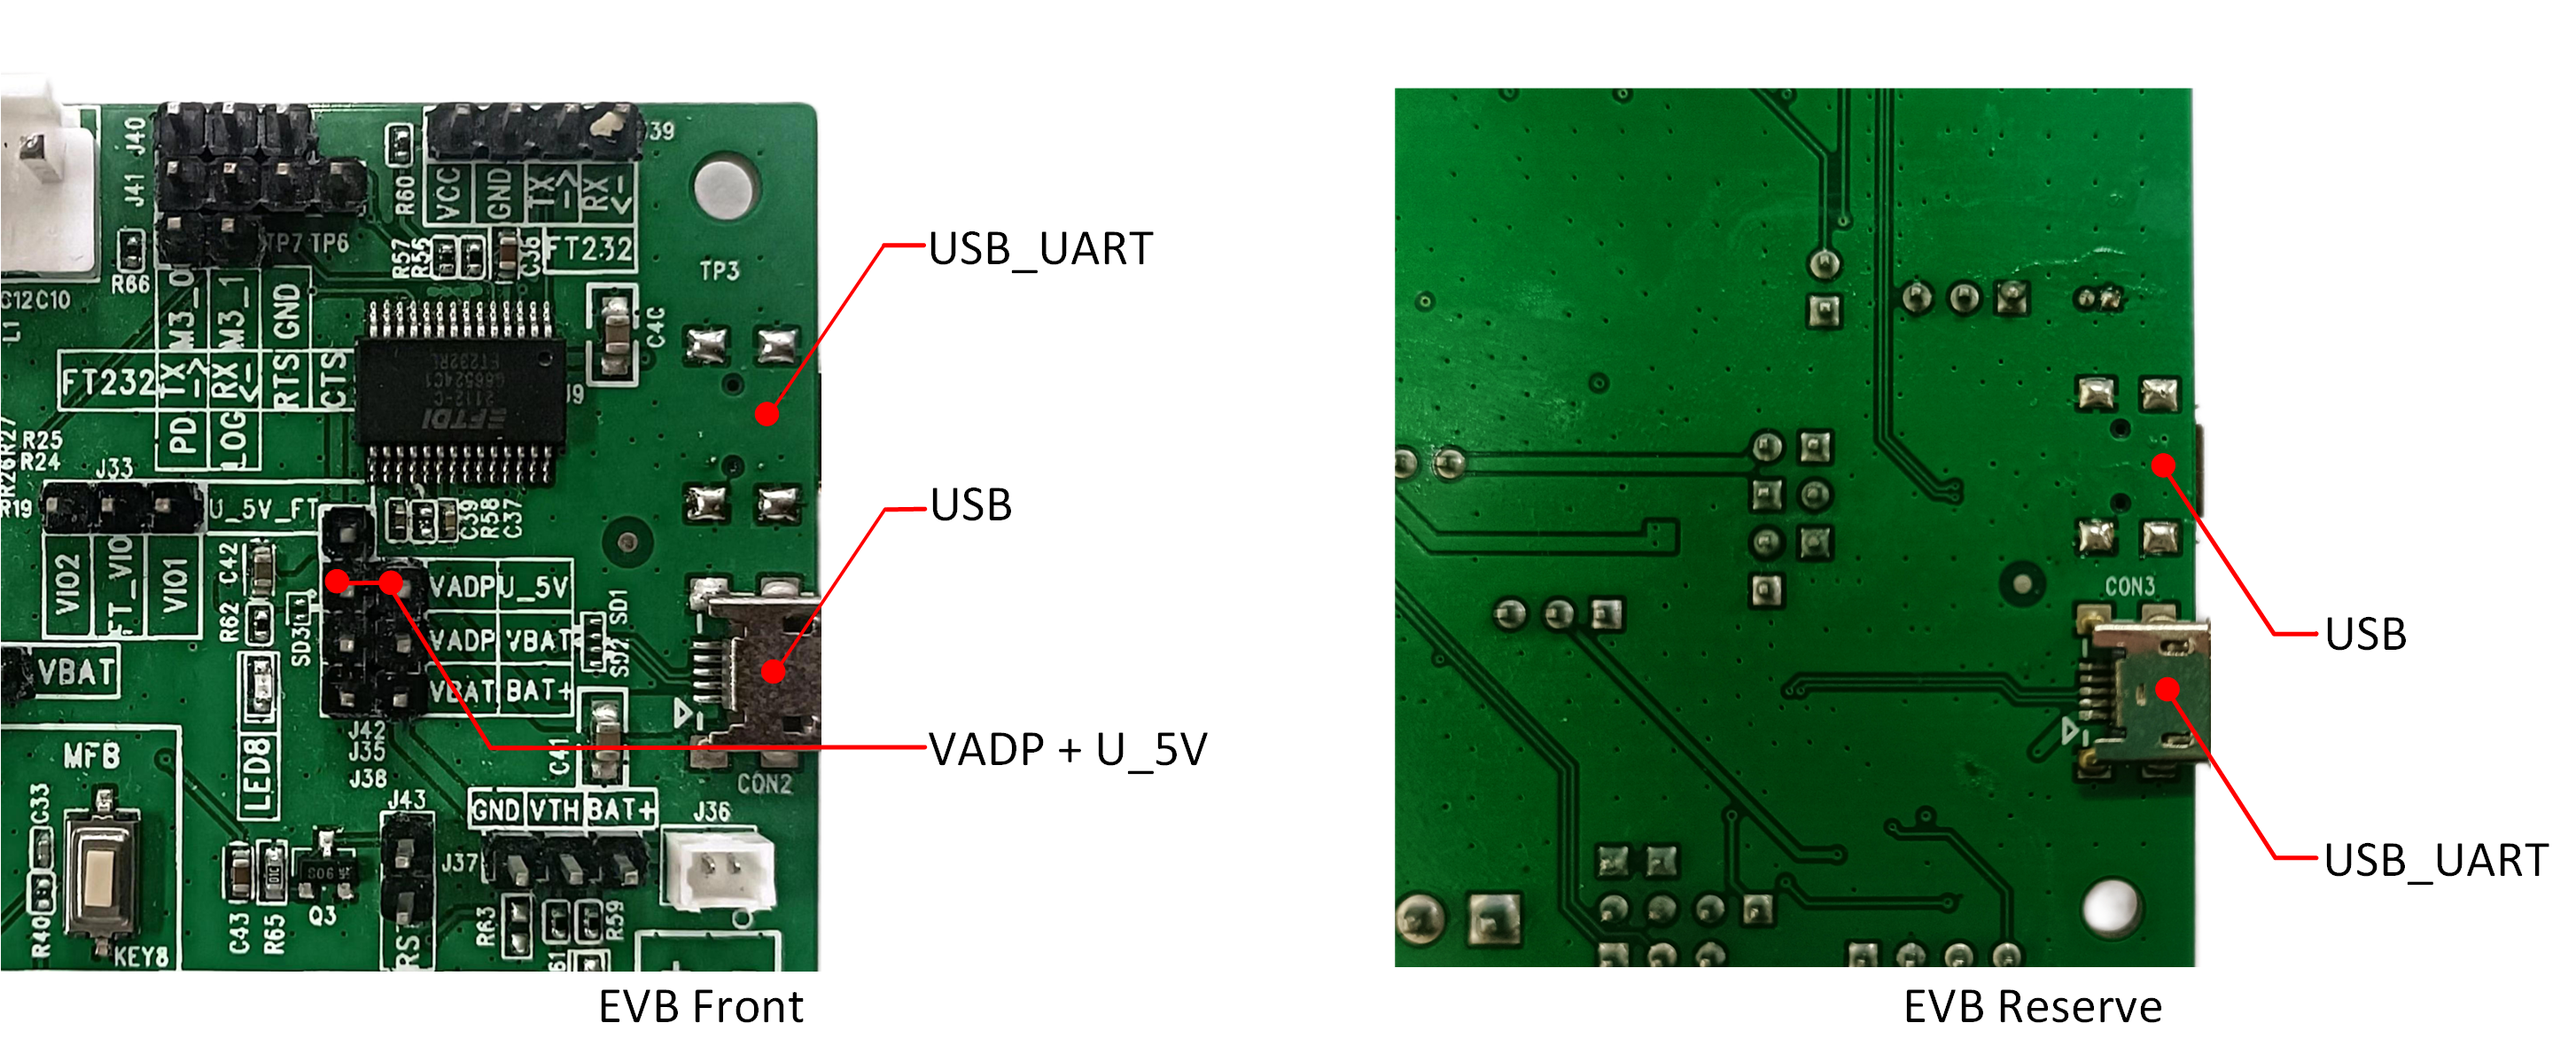
USB Connect
Test USB Keyboard Device
In PC, we can find the HID Keyboard Device.
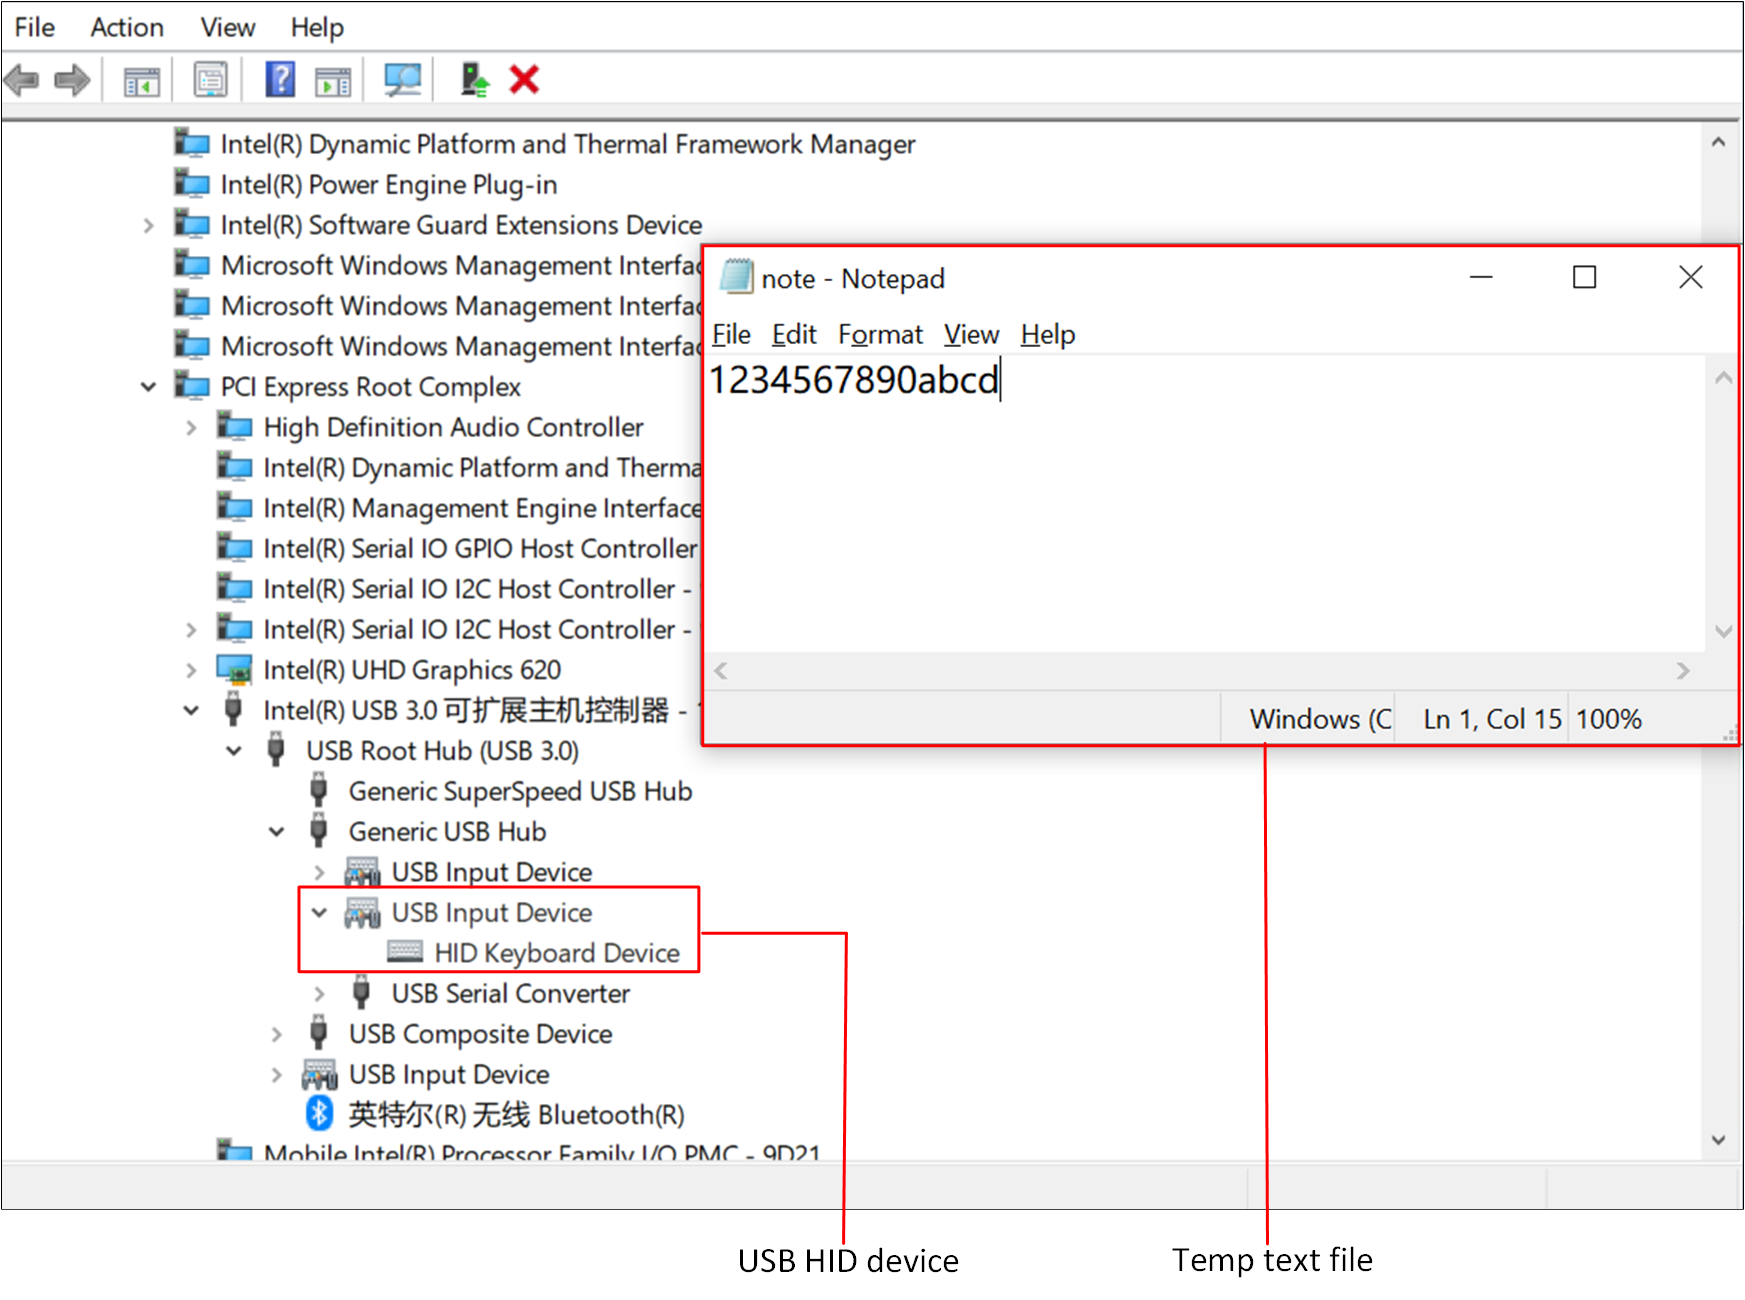
Keyboard Example
According to the demo code, Key1 connects with pin1_0 on the EVB. When Key1 is pressed, the information of numeric and alphabetic keys will be written into a text file, users can modify and extend this example code according to specific needs.
Test USB Mouse Device
In PC, we can find the HID-compliant mouse. According to the demo code, Key1 connects with pin1_0 on the EVB. When Key1 is pressed, the pointer will move up/down/left/right, users can modify and extend this example code according to specific needs.
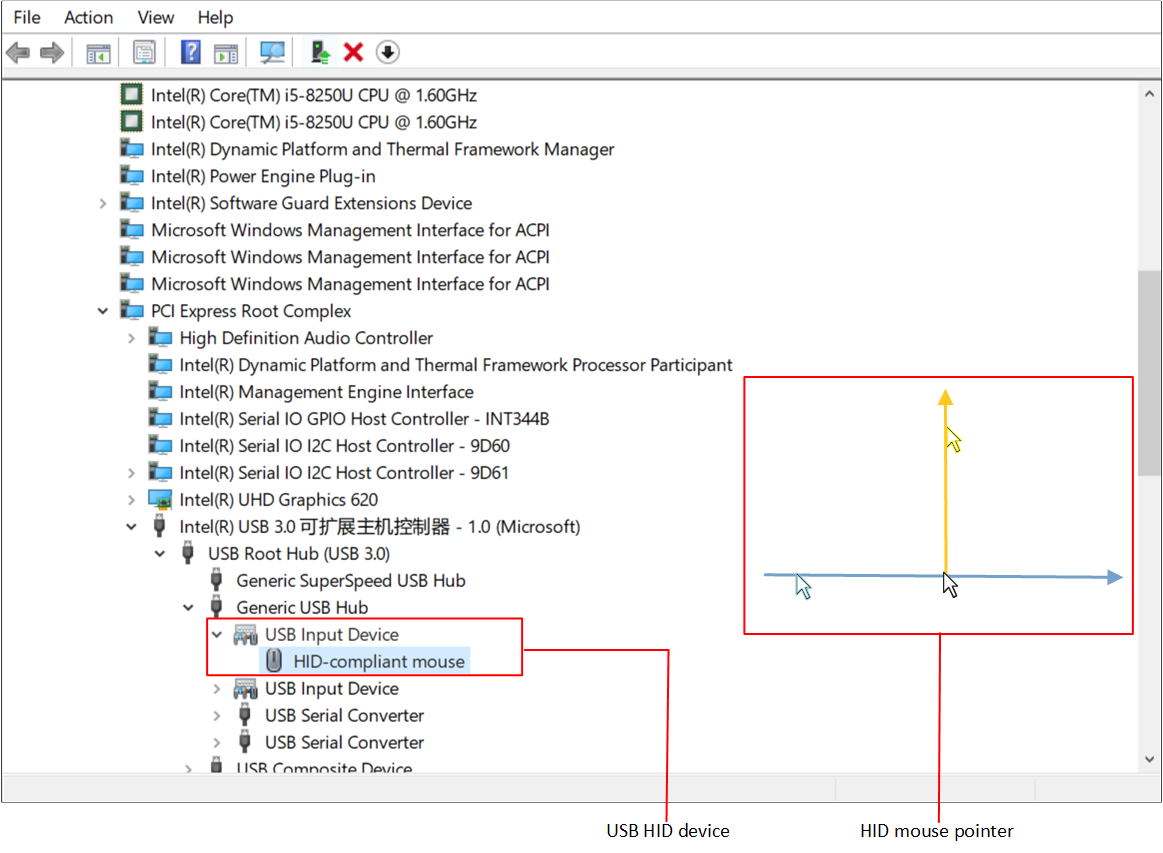
Mouse Pointer Example
Code Overview
The USB HID application overview will be introduced according to the following parts:
The USB HID sample project overview will be introduced in the chapter Source Code Directory.
The USB HID sample project source code overview will be introduced in the chapter Source Code Overview.
Source Code Directory
This section describes the project directory and project structure. The reference files directory is as follows:
Project directory:
\sdk\board\evb\usb_demo.Source code directory:
\sdk\src\sample\usb_demo.
Source files in the sample project are currently categorized into several groups as below.
└── Project: rtl87x3x_usb_hid
   ├── include                              ROM UUID header files. Users do not need to modify it
   └── lib                                  includes all binary symbol files that user application is built on
       ├── startup_rtl.c
       └── system_rtl.c
   ├── cmsis                                The cmsis source code. Users do not need to modify it
   └── usb                                  The USB profiles source code
       ├── usb_hid.c                        usb hid descriptor and some API
       └── usb_dev.c                        usb device descriptor
   └── usb_demo                             The application source code
       ├── app_main.c
       ├── app_io_msg.c
       ├── app_ipc.c
       ├── app_usb.c
       └── app_usb_hid.c
   └── key                                  The key function source code
Source Code Overview
The following sequence diagram shows how to use the HID class, and more details will be discussed in the later chapter.
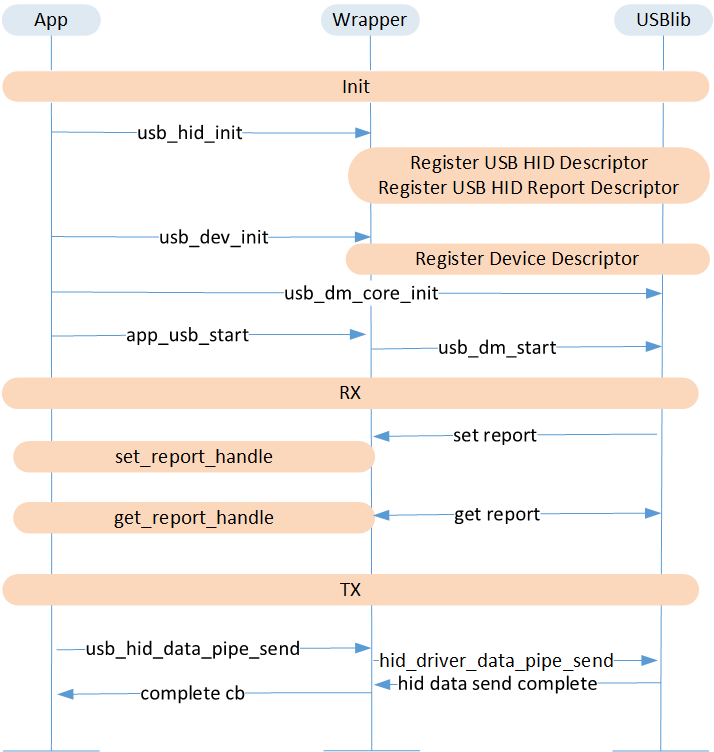
USB HID Flow
Initialization
Main function is invoked when the application is powered on or the chip is reset, and it performs the following initialization functions.
int main(void)
{
    .....
    os_msg_queue_create(&audio_io_queue_handle, "ioQ", MAX_NUMBER_OF_IO_MESSAGE, sizeof(T_IO_MSG));
    os_msg_queue_create(&audio_evt_queue_handle, "evtQ", MAX_NUMBER_OF_RX_EVENT, sizeof(unsigned char));

    app_init_timer(audio_evt_queue_handle, MAX_NUMBER_OF_APP_TIMER_MODULE);

    app_cfg_init();
    board_init();
    framework_init();
#if GPIO_KEY_EN
    key_init();
#endif
    app_usb_init();

    os_task_create(&app_task_handle, "app_task", app_task, NULL, 1024 * 3, 1);

    os_sched_start();

    return 0;
}
Please refer to app_main.c for initialization function declaration.
USB Device Configuration Descriptor
A device descriptor describes general information about a USB device. It includes information that applies globally to the device and all of the device's configurations. A USB device has only one device descriptor.
The device descriptor of a high-speed capable device has a version number of 2.0 (0200H). The bcdUSB field contains a BCD version number. The value of the bcdUSB field is 0xJJMN for version JJ.M.N (JJ: major version number, M: minor version number, N: sub-minor version number), e.g., version 2.1.3 is represented with the value 0x0213 and version 2.0 is represented with a value of 0x0200.
Field |
Description |
|---|---|
bcdUSB |
USB Specification Release Number in Binary-Coded Decimal (2.10 is 210H). |
bDeviceClass |
Class code (assigned by the USB-IF). |
bDeviceSubClass |
Subclass code (assigned by the USB-IF). |
bDeviceProtocol |
Protocol code (assigned by the USB-IF). |
bMaxPacketSize0 |
Maximum packet size for endpoint zero (only 8, 16, 32, or 64 are valid). |
idVendor |
Vendor ID (assigned by the USB-IF). |
idProduct |
Product ID (assigned by the manufacturer). |
bcdDevice |
Device release number in binary-coded decimal. |
iManufacturer |
Index of string descriptor describing manufacturer. |
iProduct |
Index of string descriptor describing product. |
iSerialNumber |
Index of string descriptor describing the device's serial number. |
bNumConfigurations |
Number of possible configurations. |
USB device application can configure the descriptor.
typedef enum
{
    STRING_ID_UNDEFINED,
    STRING_ID_MANUFACTURER,
    STRING_ID_PRODUCT,
    STRING_ID_SERIALNUM,
} T_STRING_ID;

static const T_USB_DEVICE_DESC usb_dev_desc =
{
    ......
    .bMaxPacketSize0        = 0x40,
    .idVendor               = 0x0bda,
    .idProduct              = 0x8773,
    .bcdDevice              = 0x0200,
    .iManufacturer          = STRING_ID_MANUFACTURER,
    .iProduct               = STRING_ID_PRODUCT,
    .iSerialNumber          = STRING_ID_SERIALNUM,
    .bNumConfigurations     = 1,
}

static T_STRING dev_strings[] =
{
    [0] =
    {
        .id     = STRING_ID_MANUFACTURER,
        .s = "RealTek",
    },
    [1] =
    {
        .id     = STRING_ID_PRODUCT,
        .s = "USB Audio Device",
    },
    [2] =
    {
        .id     = STRING_ID_SERIALNUM,
        .s = "0123456789A",
    },
}

static T_USB_CONFIG_DESC usb_cfg_desc =
{
    ......
    .bmAttributes = 0x80,
    .bMaxPower = 0x32
};

void usb_dev_init(void)
{
    usb_dev_driver_dev_desc_register((void *)&usb_dev_desc);
    usb_dev_driver_cfg_desc_register((void *)&usb_cfg_desc);
    usb_dev_driver_string_desc_register((void *)dev_stringtabs);
}
USB HID Configuration Descriptor List
This application exposes the following features:
-
USB HID Interface Descriptor
Need to Configure the HID Class Specification.
-
Endpoint Descriptor
Configure Endpoint Packet Size.
USB HID Configuration Descriptor
In analogy to the device descriptor, an HID configuration descriptor is applicable only in the case of HID-only devices.
static const char report_descs[] =
{
    HID_REPORT_DESCS
};

static T_HID_CS_IF_DESC hid_cs_if_desc =
{
    .bLength            = sizeof(T_HID_CS_IF_DESC),
    .bDescriptorType    = DESC_TYPE_HID,
    .bcdHID             = 0x0110,
    .bCountryCode       = 0,
    .bNumDescriptors    = 1,
    .desc[0]            =
    {
        .bDescriptorType = DESC_TYPE_REPORT,
        .wDescriptorLength = sizeof(report_descs),
    },
};

static T_USB_EP_DESC int_ep_desc =
{
    ......
    .wMaxPacketSize    = 0x40,
    .bInterval         = 1,
};

void *usb_hid_data_pipe_open(uint8_t ep_addr)
{
    T_HID_DB *hid = NULL;
    void *driver = hid_driver_data_pipe_open(ep_addr, 0);

    ......

    return hid;
}

bool usb_hid_data_pipe_send(void *handle, void *buf, uint32_t len, void(*cb)())
{
    ......
    return true;
}

void usb_hid_init(void)
{
    hid_driver_if_desc_register((void *)hid_if_descs);
    hid_driver_report_desc_register(&hid_std_if_desc, (void *)report_descs, sizeof(report_descs));
}
USB Control
In the APP layer code, register relevant functions and initialize some parameters to use the USB functionality.
void app_usb_init(void)
{
    memset(&app_usb_db, 0, sizeof(T_APP_USB_DB));
#if F_APP_USB_HID_SUPPORT
    usb_hid_init();
#endif
    usb_dev_init();
    T_USB_CORE_CONFIG config = {.speed = USB_SPEED_FULL, .class_set = {.hid_enable = 0, .uac_enable = 0}};
#if F_APP_USB_HID_SUPPORT
    config.class_set.hid_enable = 1;
#endif
    usb_dm_core_init(config);
    app_usb_start();
}
When this API is executed, USB will start up and all of its features will be successfully listed.
static void app_usb_start(void)
{
    uint32_t actual_mhz = 0;
    sys_hall_auto_sleep_in_idle(false);
    app_usb_db.store.pre_cpu_clk = pm_cpu_freq_get();
    pm_cpu_freq_req(&app_usb_freq_handle, pm_cpu_max_freq_get(), &actual_mhz);
    pm_dvfs_set_supreme();
#if (TARGET_RTL8773DO == 1 || TARGET_RTL8773DFL == 1)
    pmu_vcore3_pon_domain_enable(PMU_USB);
#endif
    usb_dm_start(false);
    app_ipc_publish(USB_IPC_TOPIC, USB_IPC_EVT_PLUG, NULL);
}
Troubleshooting
Can RTL87x3E and RTL87x3D Enter DLPS in Suspend State?
RTL87x3D can enter DLPS.
RTL87x3E cannot enter DLPS, but it can enter LPS mode in the suspend state.
See Also
Please refer to the relevant API Reference: