Quick Start
This chapter introduces how to install the HoneyGUI Visual Designer plugin and create your first GUI application.
Installation Requirements
Software Environment
VSCode: Version 1.60.0 or higher
Python: 3.9.7 or higher
SCons: 4.4.0 (install via
pip install scons==4.4.0)kconfiglib: Install via
pip install kconfiglib
Windows Platform:
MinGW-w64 (recommended version 8.1.0), installed at
C:\mingw64CMake 3.31.2+ (optional, for CMake build)
Linux/WSL Platform:
GCC toolchain
SDL2 development libraries:
sudo apt-get install libsdl2-dev
Installing the Plugin
Method 1: Install from VSCode Marketplace
Open VSCode
Click the Extensions icon in the activity bar (or press
Ctrl+Shift+X)Type
HoneyGUI Visual Designerin the search boxClick the Install button
Method 2: Install from VSIX File
Download the plugin's
.vsixfileIn VSCode, open the Extensions panel
Click the ... menu in the top right corner
Select Install from VSIX...
Choose the downloaded VSIX file
Environment Check
After installation, the plugin will automatically check the development environment:
Open VSCode Command Palette (or press
Ctrl+Shift+P)Type and execute
HoneyGUI: Check EnvironmentView the terminal output to confirm all dependencies are installed
Note
If the environment check fails, install missing dependencies according to the error messages.
Creating Your First Project
Using Project Templates
Click the HoneyGUI icon in the VSCode activity bar
Click the New Project button in the sidebar
-
Select a project template:
Blank Project: Design interface from scratch
Watch Project: Smartwatch interface template (410x502)
Dashboard Project: Dashboard interface template (800x480)
Enter the project name
Choose the project save location
The plugin will automatically create the project structure and initialize it
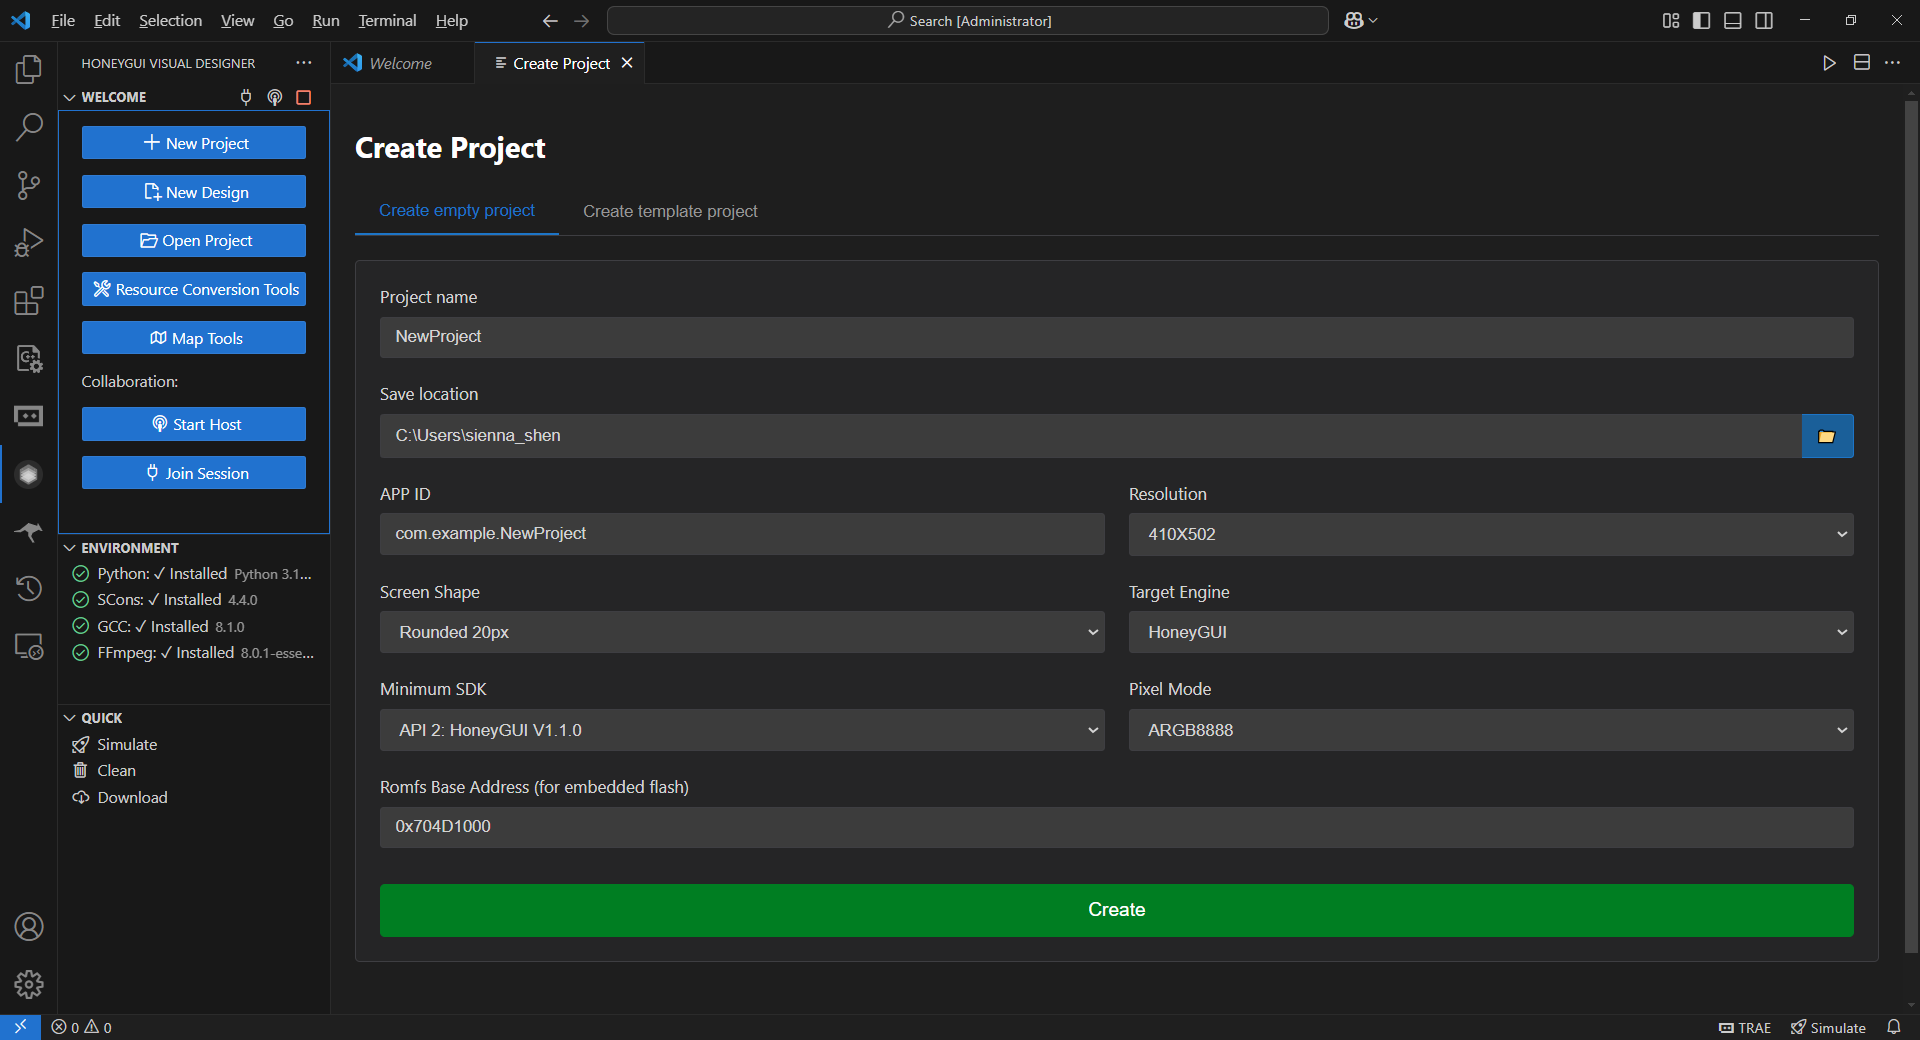
Create New Project
Project Structure
The created project contains the following structure:
my-project/
├── project.json          # Project configuration file
├── ui/                   # HML interface files directory
│   └── main.hml          # Main interface
├── src/                  # Generated C code
│   ├── ui/               # UI structure code (auto-generated)
│   ├── callbacks/        # Callback function framework (generated once)
│   └── user/             # User code (manually written)
├── assets/               # Resource files directory
│   ├── images/           # Image resources
│   ├── fonts/            # Font resources
│   └── videos/           # Video resources
└── SConstruct            # SCons build script
Designing Interface
Opening the Designer
Double-click an
.hmlfile in the VSCode file explorerThe designer will open in the editor area, displaying the visual design interface
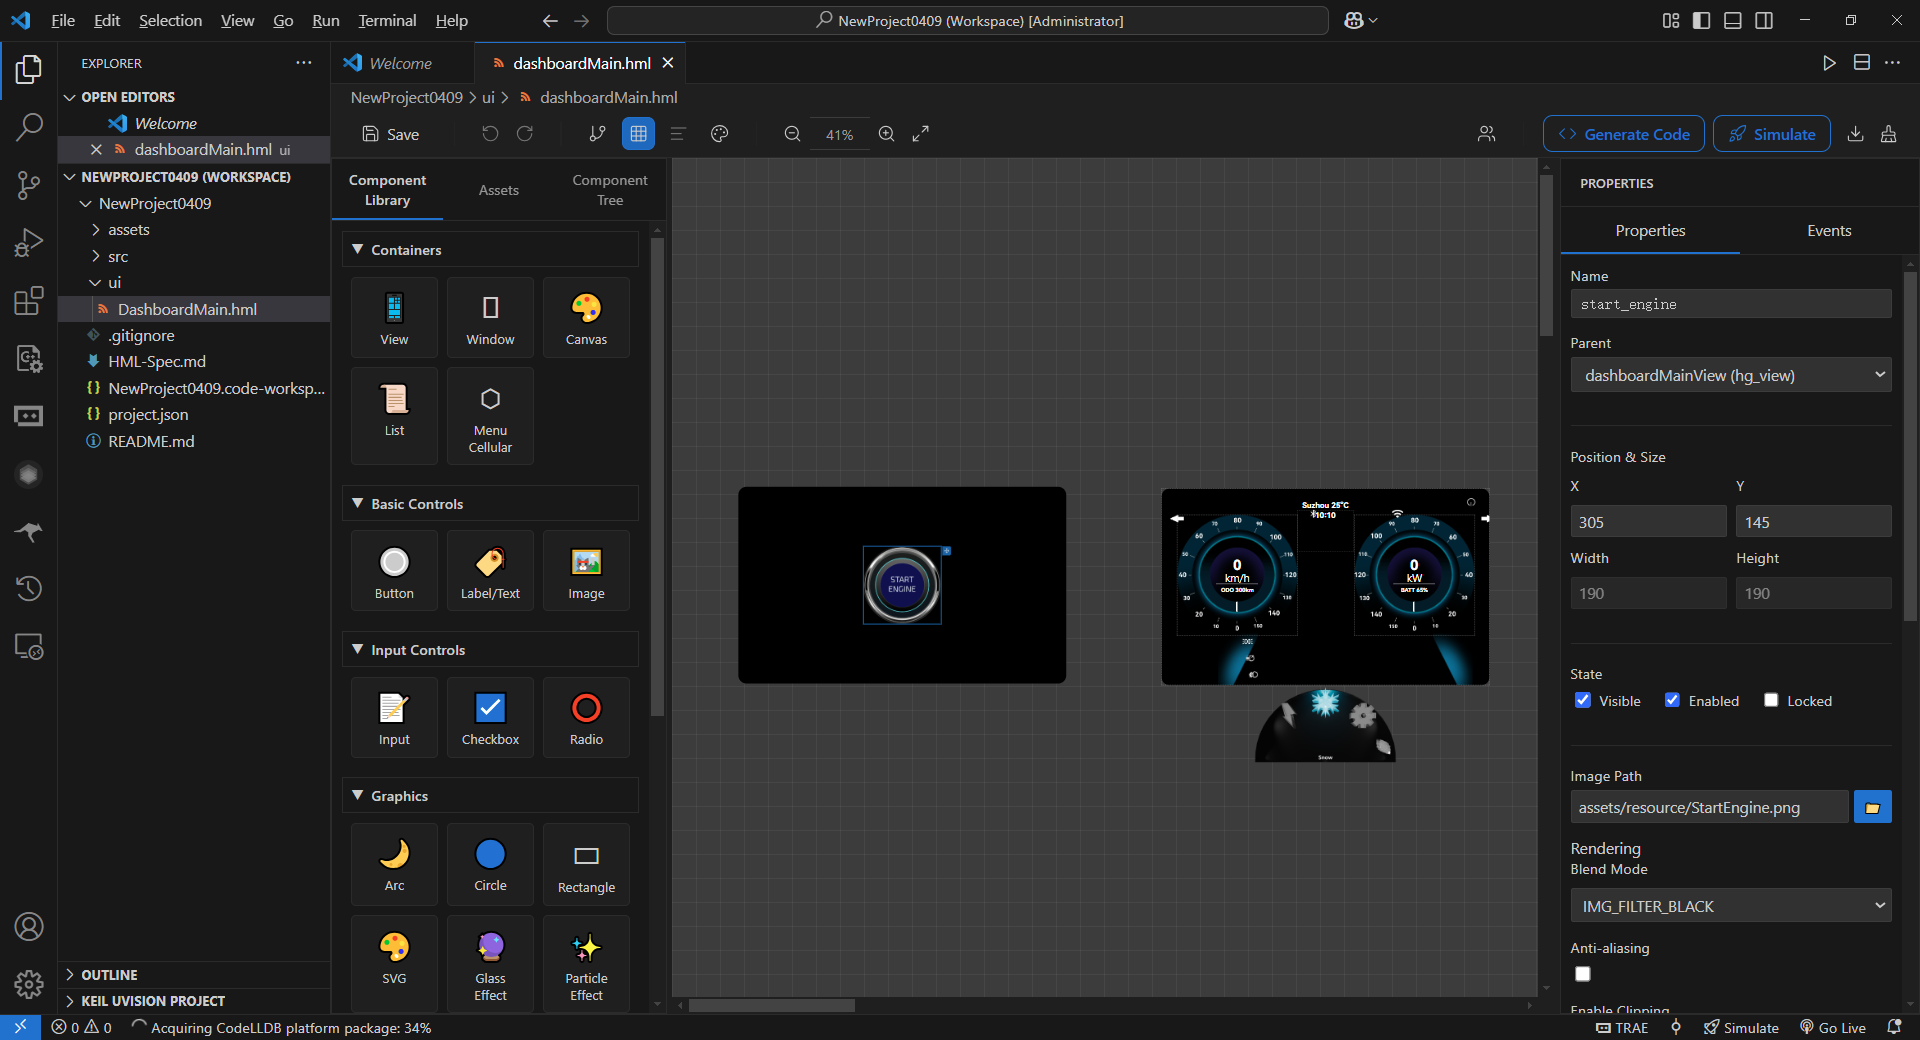
Visual Designer Interface
Designer Interface Overview
Toolbar: Provides common operations like save, undo, redo
Component Library (left): Contains all available HoneyGUI components
Canvas (center): Design area showing the actual interface
Component Tree (top right): Shows the component hierarchy of the current interface
Property Panel (bottom right): Edit properties of the selected component
Adding Components
Select a component from the left component library (e.g.,
hg_button)Drag it to the canvas center
Release the mouse, and the component will be added to the interface
-
Modify component properties in the right property panel:
Position and size
Text content
Colors and styles
Event bindings
Basic Operations
Select component: Click on a component in the canvas
Move component: Drag the selected component
Resize: Drag the control points on the component edges
Delete component: Press
Deletekey after selectionCopy/Paste:
Ctrl+C/Ctrl+VUndo/Redo:
Ctrl+Z/Ctrl+Y
Generating Code
Automatic Code Generation
After completing the design, the plugin will automatically generate C code:
-
Click the Generate Code button in the toolbar, or use the command palette:
Ctrl+Shift+P → HoneyGUI: Generate Code
The plugin will scan all HML files in the
ui/directory-
Automatically generate the following files:
src/ui/*.c- UI structure code (regenerated each time)src/callbacks/*.c- Callback function framework (generated only once)src/user/*.c- User code (manually written, never overwritten)
Code Protection Zones
Generated callback code contains protection zone markers where users can add custom logic:
/* @protected start custom_functions */
// Add your code here
void on_button_click(void *obj, gui_event_t *e) {
    printf("Button clicked!\n");
}
/* @protected end custom_functions */
Warning
Code outside protection zones will be overwritten during regeneration. Always write custom code inside protection zones.
Build and Simulation
Building the Project
Click the Simulate button in the toolbar
Or use the command palette:
HoneyGUI: Build and Simulate-
The plugin will automatically:
Convert resource files (images, fonts, etc.)
Compile C code (using SCons)
Launch the simulator

Build and Simulation
Running the Simulator
After successful compilation, the simulator window will pop up automatically, displaying the designed interface.
Mouse operations: Simulate touchscreen
Keyboard operations: Support some shortcuts
Real-time debugging: Debug via GDB or printf
Common Issues
Build Failure:
Check if environment variables are configured correctly
Verify MinGW/GCC path is correct
Review error messages in the terminal output
Simulator Won't Start:
Check if SDL2 library is installed
On Linux:
sudo apt-get install libsdl2-devOn Windows: Ensure MinGW includes SDL2 library
Next Steps
Learn Designer Usage for more design techniques
Understand HML File Format for advanced customization
Master Event System to implement interactive features
Explore Resource Management to optimize resource usage