86box Application
This example demostrates how to develop a RealUI 86BOX APP, from which you can learn and understand the basic methods and processes of developing a ui application.
Source File
APP package
gui_engine\example\screen_480_480\root\app\boxUI Design project
RVisualDesigner-v1.0.5.0\Demo\480x480\box\box480x480.rtkprj
UI design
RVisualDesigner
RealUI 86box utilizes
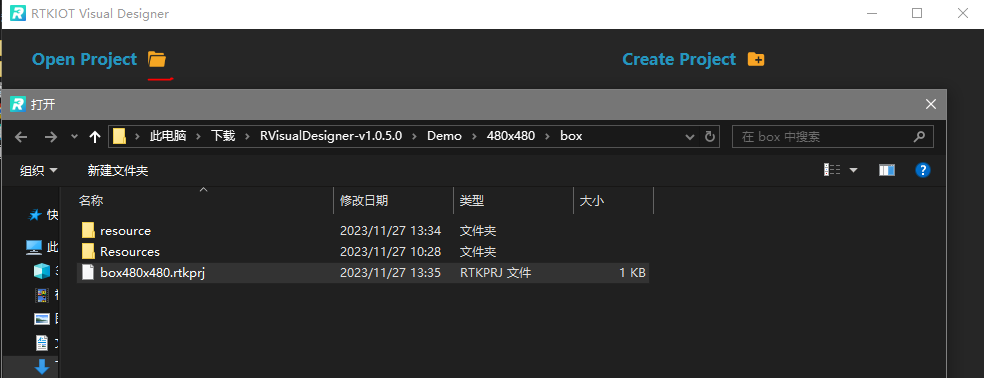
RVisualDesignerto complete UI design. For the first-time usage ofRVisualDesigner, please refer toRVisualDesigner-v1.0.5.0\RTKIOT Visual Designer User Guide EN.pdfto obtain a detailed development guide.Find and open the example UI design project in the specified path.
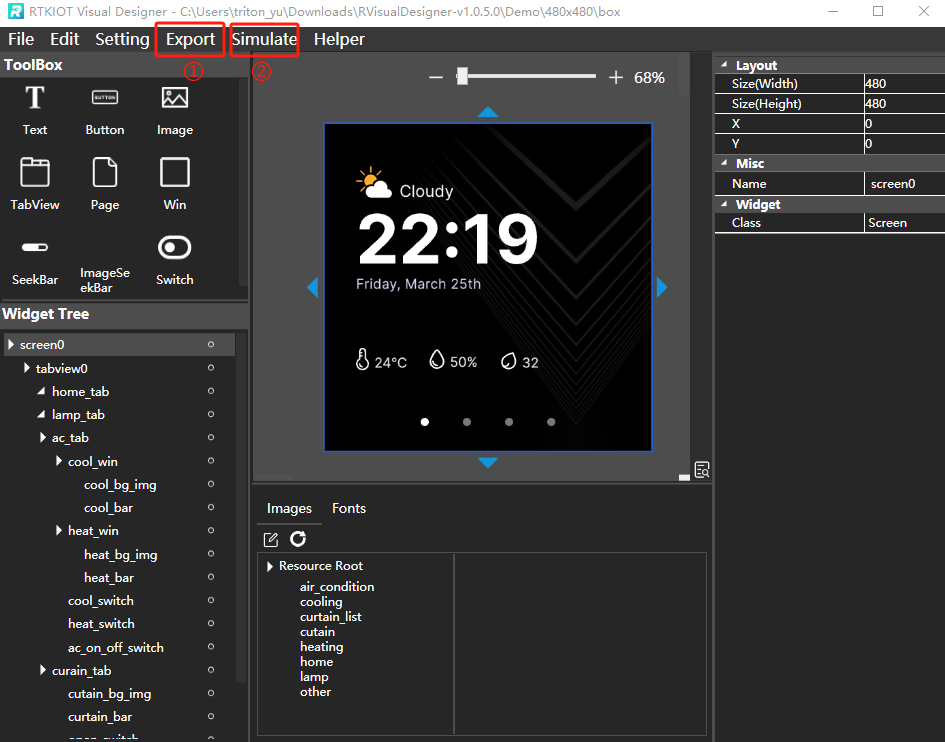
Click on
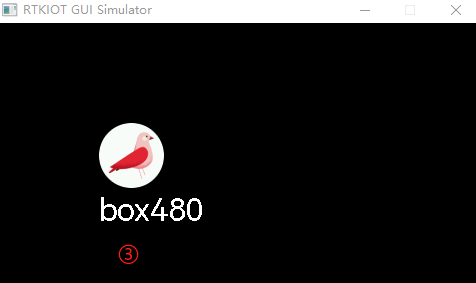
Exportand thenSimulatein succession to complete the export and launch the simulation. Once the simulator window is launched, the 86box APP icon will be displayed. Clicking on it will take you to the corresponding APP.
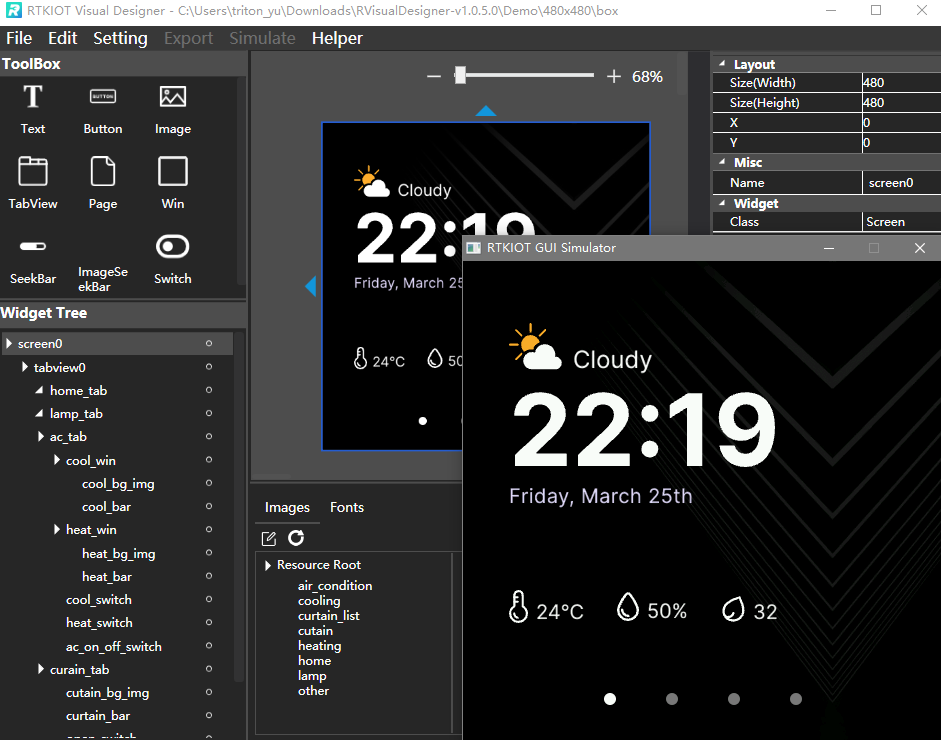
When entering the APP, you will see the same UI content as in the
RVisualDesignerdesign project in the simulator window. Therefore, this design mode has the feature of “What You See Is What You Get” (WYSIWYG). Developers can drag widgets from the ToolBox to the canvas to create widgets for the current page. After adding image resources to the project, the widgets can be configured and linked to custom images. The hierarchy relationship between widgets will be displayed through the Widget tree.
This tool requires adding pictures in advance, and then dragging the widgets in the
ToolBoxto the middle screen to lay out the same UI as the currentWidget tree.
Javascript
Non-default effects and logic for controls currently need to be implemented by developers using JavaScript in the current version. For example, control interactions include switch widgets switching images on click, tab widgets sliding , etc. Please refer to
JavaScript syntaxto learn more about the JavaScript-based UI development approach.
Gestures
In the JS file gui_engine\example\screen_480_480\root\app\box\box.js, the control and interaction logic of the UI is implemented.
Light control switch

The callback functions for opening and closing the switch control named “kitchen_switch” are registered sequentially. When the switch control “kitchen_switch” is opened, its callback function
led1OnFuncwill be triggered and called.The control of the lights in this example is abstracted as a
Gpioobject. Each light corresponds to aGpioobject, and its value is assigned using thewriteSyncfunction, which is defined in the underlying layer to accommodate different smart home communication control protocols and control methods.
// define an Gpio object
var LED1 = new Gpio(0, 'out');
function led1OnFunc(params) {
    if (sleep_flag) {
        LED1.writeSync(0)
    }
}

// register callback function
sw.getElementById('living_switch')
sw.switch_on(led1OnFunc)
sw.switch_off(led1OffFunc)
Tab jumping switch
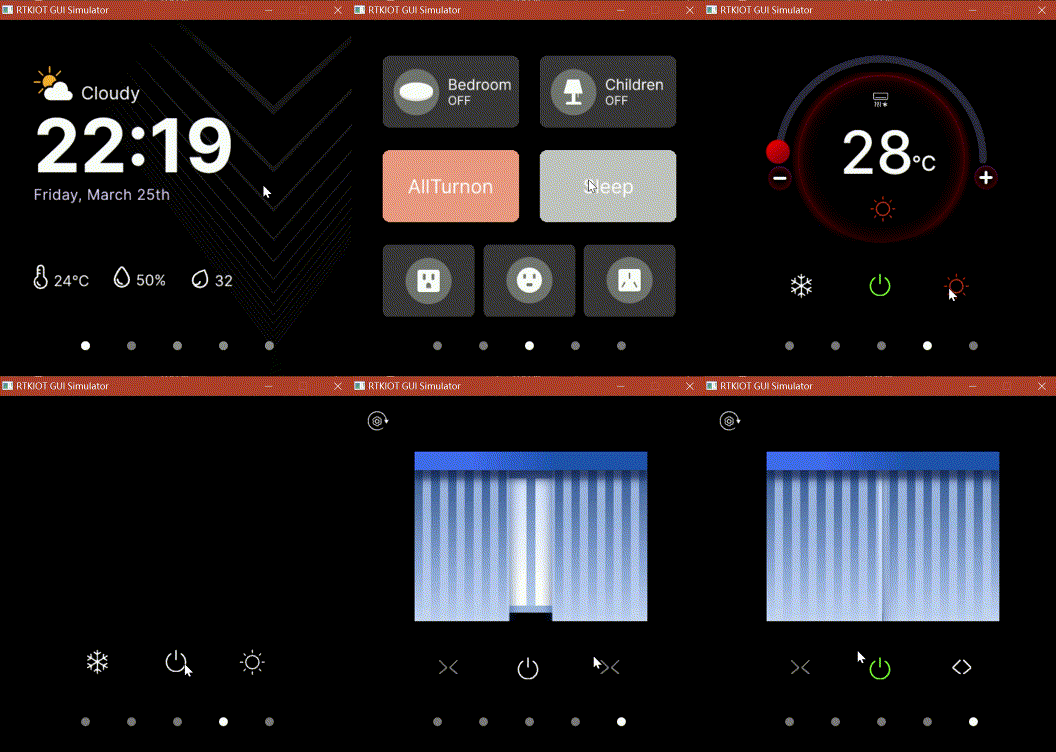
Register a tab slide callback for the tabview widget. When the tab is changed by sliding, update the current tab index and synchronize the UI display state.
Register a jump control callback function for each switch that controls the navigation. When called back, pass the index value as a parameter to indicate the tab to be navigated to.
In the callback function, use the
jumpfunction to navigate and synchronize the UI display state.
tab.getElementById('tabview0')
var tabJump = {
    cur_tab_x: 0,
    nxt_tab_x: 0,
	cur_tab_y: 0,
    nxt_tab_y: 0
}
function sw_jump_tab(params) {
	// console.log('jump', params)
	tabJump.nxt_tab_x = params

	if(tabJump.nxt_tab_x != tabJump.cur_tab_x)
	{
		sw_jump_turnoff();
		tab.jump(params);
		tabJump.cur_tab_x = tabJump.nxt_tab_x
	}
}

function sw_jump_keep_on(params) {
	// console.log('sw_jump_keep_on ', params)
	Id_prefix = 'sw_tab';
	if(params == tabJump.nxt_tab_x)
	{
		sw.getElementById(sw_getId(params));
		sw.turnOn();
	}
}

function tab_slide(params) {
	// console.log('tab_slide')
	var cur_tab = tab.getCurTab()

	tabJump.nxt_tab_x = cur_tab.x;
	sw_turnOn(tabJump.nxt_tab_x);
	sw_turnOff(tabJump.cur_tab_x);
	tabJump.cur_tab_x = cur_tab.x;
}

// tab change
tab.onChange(tab_slide)

// jump tab0
sw.getElementById('sw_tab0')
sw.onOn(sw_jump_tab, 0)
sw.onOff(sw_jump_keep_on, 0)